FENCE CONSTRUCTING/ ADDING / ANTIMATING USING 3DS MAX
A fence was modeled to allow for an animated separation between the road and levee infrastructures. Additional video and elements were compiled in After Effects following the constructing of the fence. The final video is influenced by the works of Pan Chan-wook and Michel Gondry. My video explores the idea of a continuous, repetitive object in movement (a fence) and the change in human perspective if this constant is deconstructed while the speed of other layers quickens. Below is the 3DS Max process to create and explode the constant, the fence.
CONSTRUCTION:
To construct the fence use the cylinder shape tool [“Create”, “Geometry”, click “Cylinder”]. To create accurate shapes, manipulate the dimensions in the “parameters” menu. The cylinders were assembled together using the “move” and “rotate” tools. Alignment accuracy is easier to achieve while using 4 viewports.
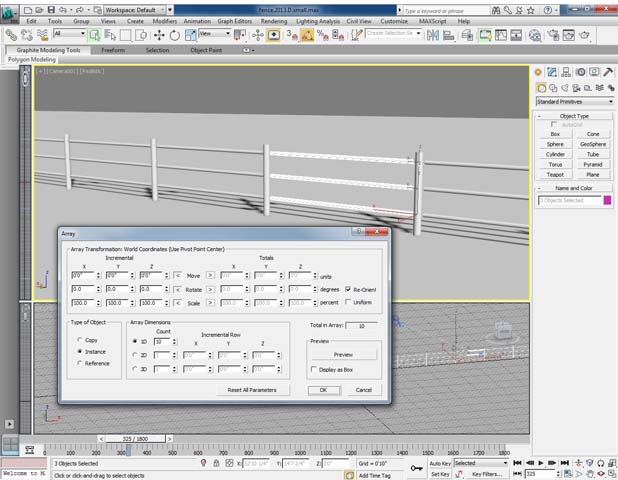
At first I began testing two types of fence systems: 5 posts (3 horizontal and 2 vertical posts) system and the triangulated support system. To test the systems, one segment of each fence type were constructed. To reflect movement in the systems it became apparent the 5 post system delivered the best moving image results (however one segment of the triangulated system appears in the first three seconds of the video). To repeat the 5-post fence use the “array” tool [tool bar, “tools” pull down menu, “array”]. The “array” feature provides a function for copying/offsetting objects in any quantity and along any axis. For this fence it was necessary to array the vertical items separately from the horizontal. Hence, the “array” option provides a way to construct an object to repeat 500 times (as in this video) or more. Gaps in the fence were created by selecting portions of the arrayed fence and deleting cylinders individually. Spacing in the fence was required in the digital model due to the intersection with levee roads in a separate video. The connection between the levee video and the fence animation are later combined/ aligned in After Effects.
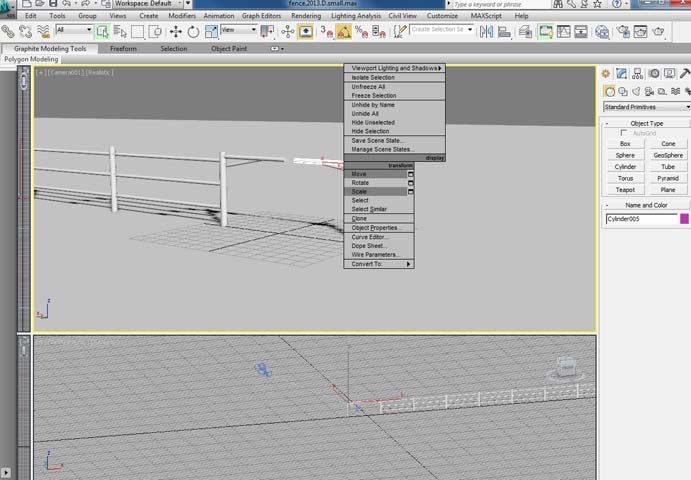
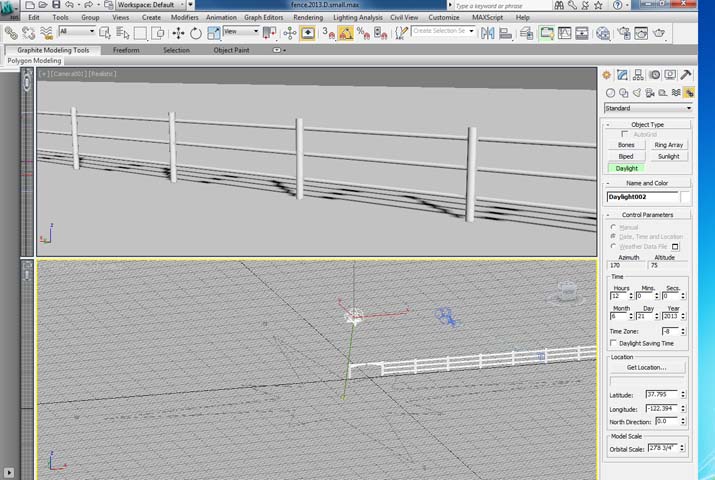
Create a plane for the fence to sit on [“create”, “geometry”, “plane”]. Instead of using the “parameters” menu, use the “scale” tool (located in the toolbar) or right click on the object, “scale”. The plane is necessary to establish the shadows cast from the fence and refract a daylight system. Begin the daylight system by clicking in the toolbar “create”, “lights”, and “daylight” system. Enter a location and time of day. Bring curser into the viewport, click once to show the compass, and use the curser to extrude the “sun” along the z axis. The combination of a daylight system and a ground plane allow for object shadows (on itself and on a ground plane).
ANIMATION:
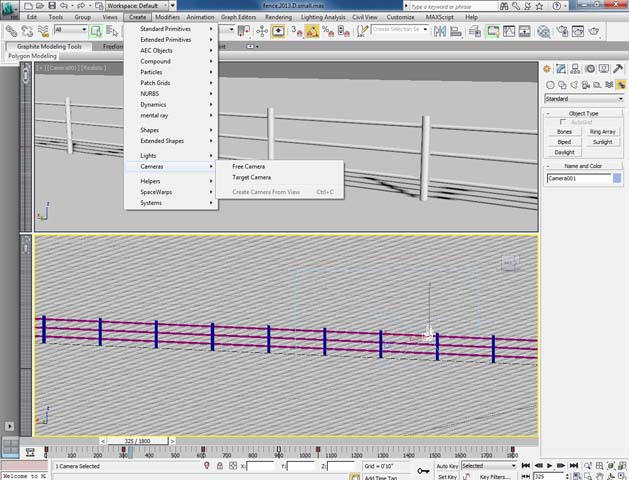
The preexisting After Effects videos dictate the camera angle on the fence. The view is as if a passenger is looking out the window of a moving car. Pan with the 3DS Max camera to establish a similar movement. Create a camera [“create”, “camera”, “target camera”]. The short cut for camera is “crtl C”. Depending on the type of camera movements being used “target camera” or “free camera”. In this case either camera can be used for panning. Set one of the viewports to “camera view” to observe the scene while animating in another viewport.
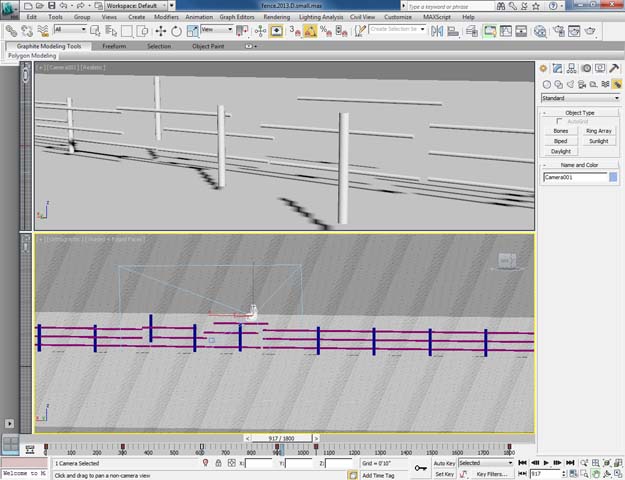
Time is segmented in 1800 frames, 30 frames per second (60 second video). First, animate (key) the camera movement, followed by any animation of the object/fence. Click the auto key option in the lower tool bar. This will frame the viewports in red. Move the frame bar away from zero to the number of frames to apply to the first movement. After setting the camera and key to the numbered frames necessary, move the camera with the move tool. To move both the camera and the target point (PAN) click the camera, hold CTRL and click the target point box. This will allow you to move both in sync. The red keys can be adjusted in the frames toolbar by sliding back/forth or for more difficult transitions, right click on the key frame for more options. Repeat animating time sections until the end of the fence/object.
Between frames 980 and 1150, the fence is animated. The purpose is to split the functional capability of a fence and reassemble it within a few seconds. Each cylinder is animated separately by setting the first key frame and the last frame. I found it easier to set the last key frame before moving the pieces in an abnormal way. This allows for the QUICK reassembly of the pieces without the hassles of realignment settings. Simply, before the fence explodes in a multitude of directions, give it a start and an end point.
Once rendered, and brought into After Effects, it is possible to shorten/lengthen time to correspond to other elements and videos. In After Effects click on the layer, select “layer” in the toolbar, “time”, and “enable time remapping”. Time remapping will appear under the layer that was selected. Highlight “time remapping” under the layer, select “animation” from the toolbar, “add expression” and type in the command bar loop_out(“cycle”,0). This will allow for changing the number of frames between set key frames (i.e. 60 frames in one second instead of two).
EXPORTING:
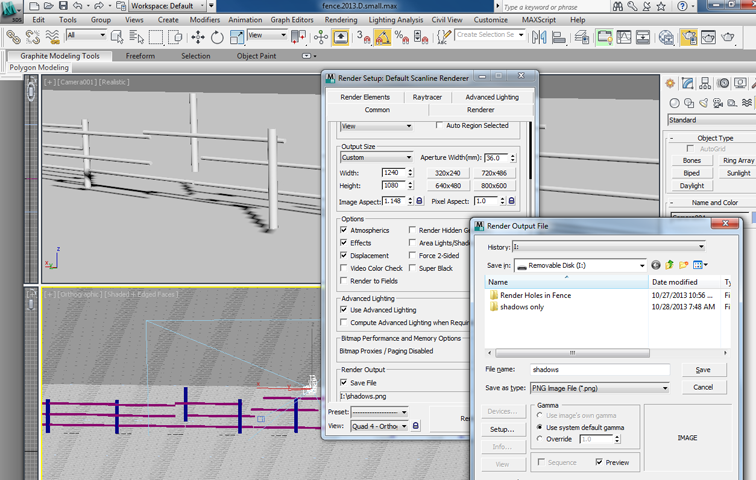
The fence animation requires two separate render processes, the fence and its shadows. To begin the render process, click on the viewport displaying the camera view. 3DS Max will render any viewport that is selected. To only render the fence there are two options, (1) highlight the plane, right click, “object properties”, and deselect “visible to camera” option (2) open materials window “M”, add a “matte/shadow reflection” to the plane. Both options will remove the object from the render. Do not do both! This will turn your rendered images black with no objects or shadows.
Select “rendering” and “rendering setup”. In the common settings select “active time segment” under time output; “view” area to render; output size (type in if need be); and to store “files” under render output heading. 3DS Max renders sequential, numbered frames. Make a folder to store them on the desktop. Select this folder in the “files” option of render settings. Choose to save the images as PNG. The PNG file allows for the addition of an alpha channel. Select the alpha channel will remove the background.
To render the shadows apply the material “matte/shadow reflection” to all of the fence and plane. Create a separate file for the shadow images. Go through the same render process listed above. To manipulate the shadow separately from the image, two renders are necessary. The render image in 3ds Max will most likely be black (due to the alpha channel being selected). Check the location folder to check the images are rendering shadows.