
Technique Documentation: Exploring Topography and Hydrology in Grasshopper
Concept:
Our composite project focuses on the development of the surrounding areas of Bayou Lafourche. This area changed in the ways of topography, ecology and hydrology. In the generative part, topography and hydrology changes are shown through Rhino model and grasshopper definition.
Techniques:
Topography:
1.Open the sampler grasshopper definition.

2.Double click on the DEM image. In the image sampler settings window, click ”…” to change the grayscale DEM image with the proper image, click OK.

3.Change the slider number to a proper one.

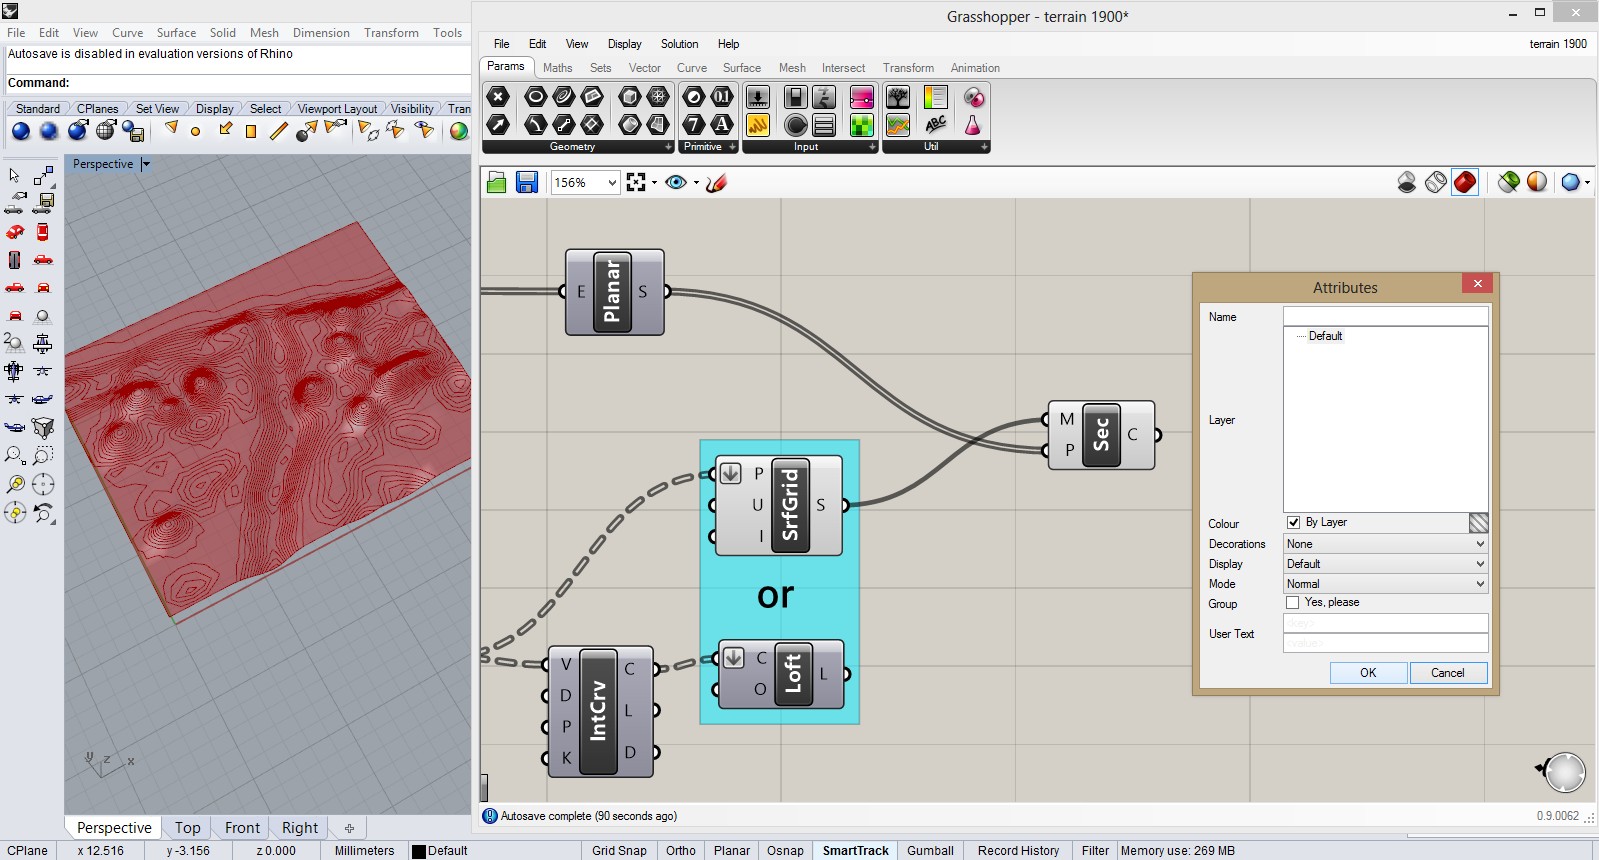
4.Right click on the “LOFT” button, and then click “bake” so that we can the “Attributes” window, press OK and then we bake the grid of the terrain.
5.Adjust the perspective in Rhino to a proper angle, pick the “Render Tools” on the toolbar, and click on the first blue ball so that we get rendering of the terrain, and then save it.

6.Delete the grid. Right click on the “SEC” in the grasshopper, and then click “bake” so that we can the “Attributes” window, press OK and then we bake the contours of the terrain.
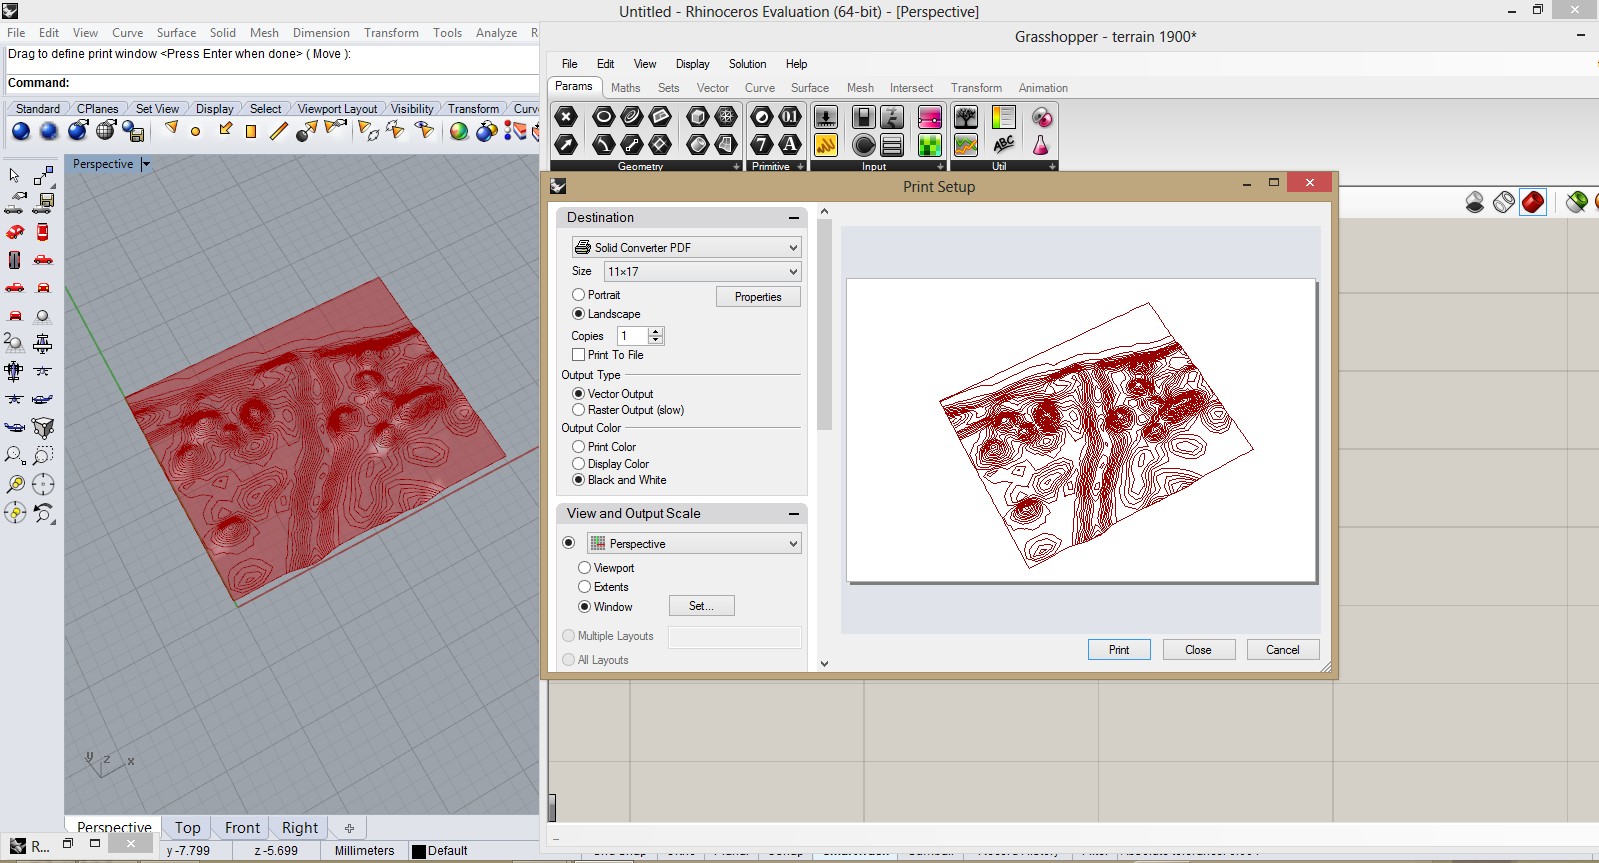
7.Go to the Rhino toolbar, choose “PRINT” under the “File”, in the “Print Setup” window, choose “solid converter PDF”, and size” 11/17”, set “window” in the “ View and Output Scale”, then print so that we get the pdf file of contours.
8.Put the contour file and the rendering together in the Photoshop so that we get the final topography image.
Hydrology:
1.Choose all the contours in Rhino which we baked before, then input “Group” in the Rhino command, press Enter.

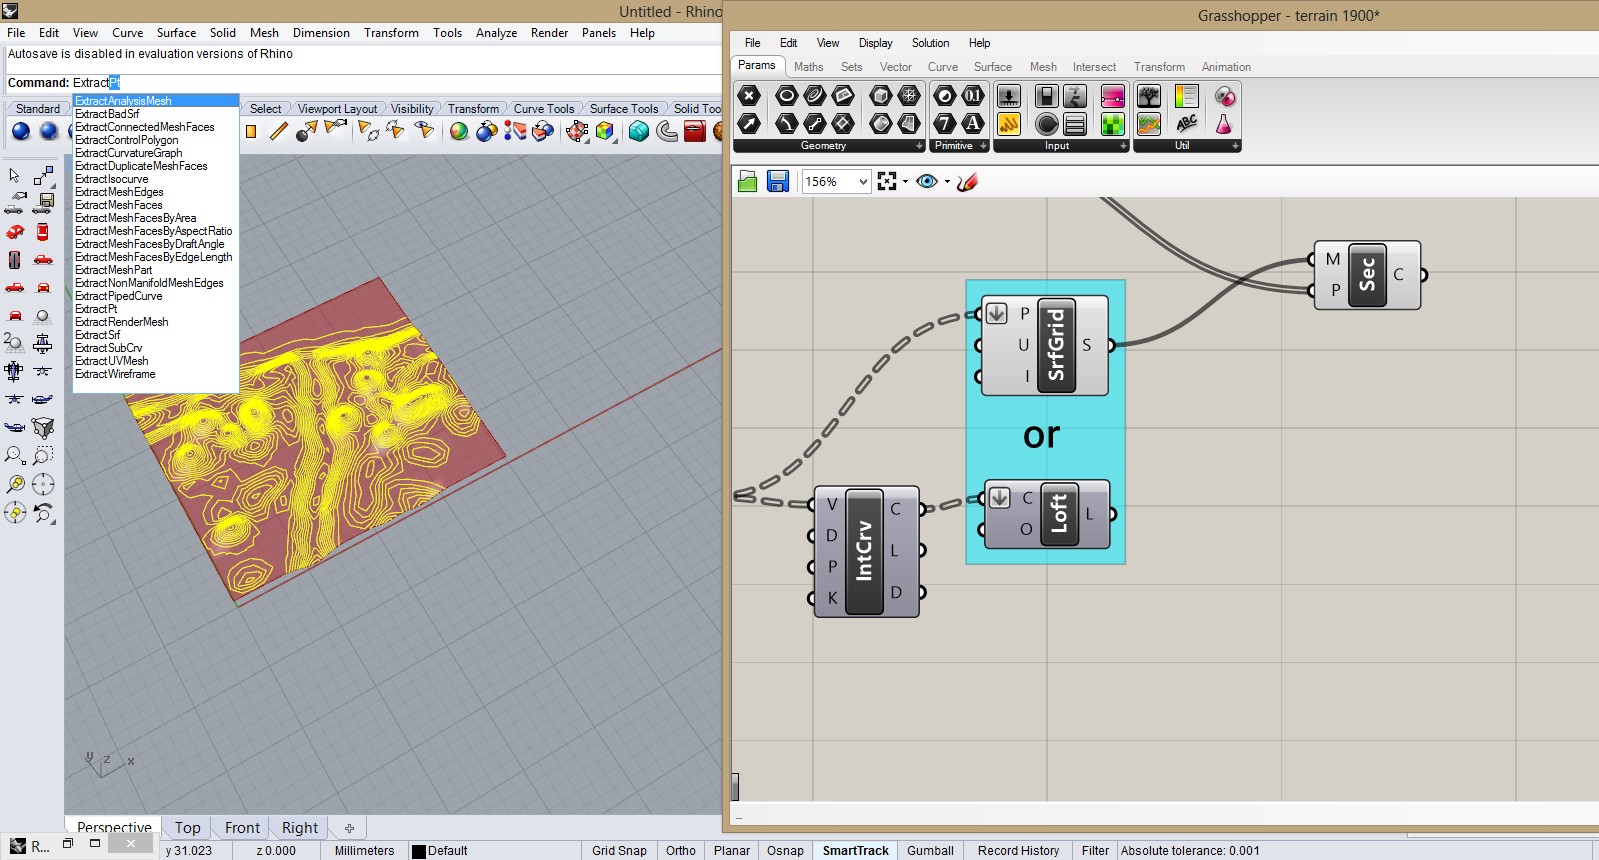
2.Input “extractPt” in the Rhino command, press Enter. Then we open the “water elevation grasshopper file”.
3.Double click on the grasshopper empty space, and enter “POINT” order, press Enter, so we get a “Pt” button, then line the right of “Pt” button to the “P” on the left of “Del” button.
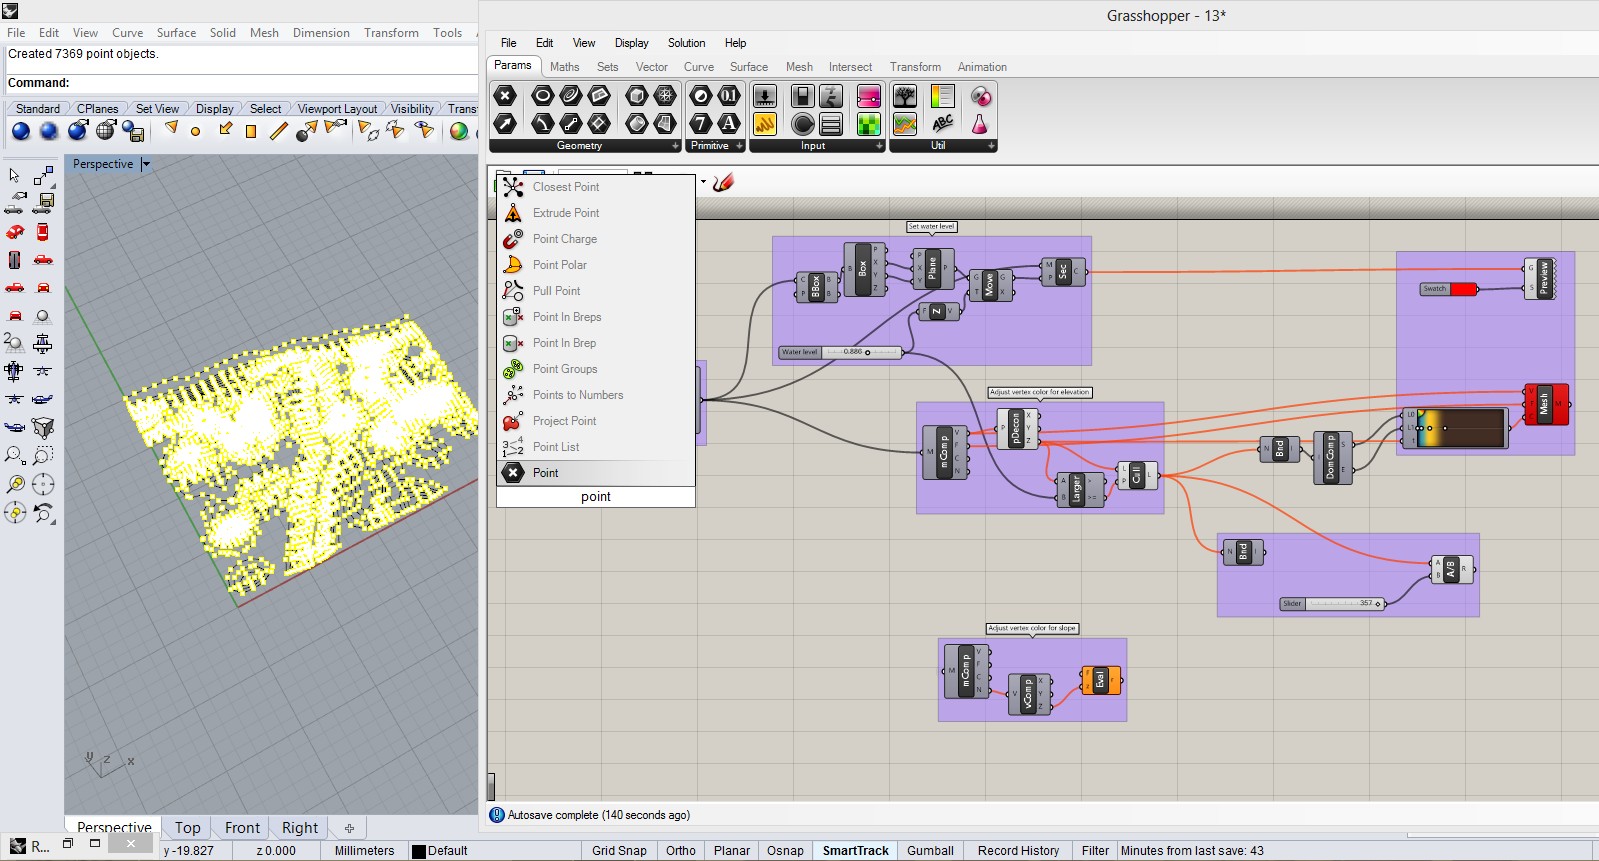

4.Right click on the “Pt” button, and choose “set multiple points”, then right click on the “Pt” button and choose “Preview”.
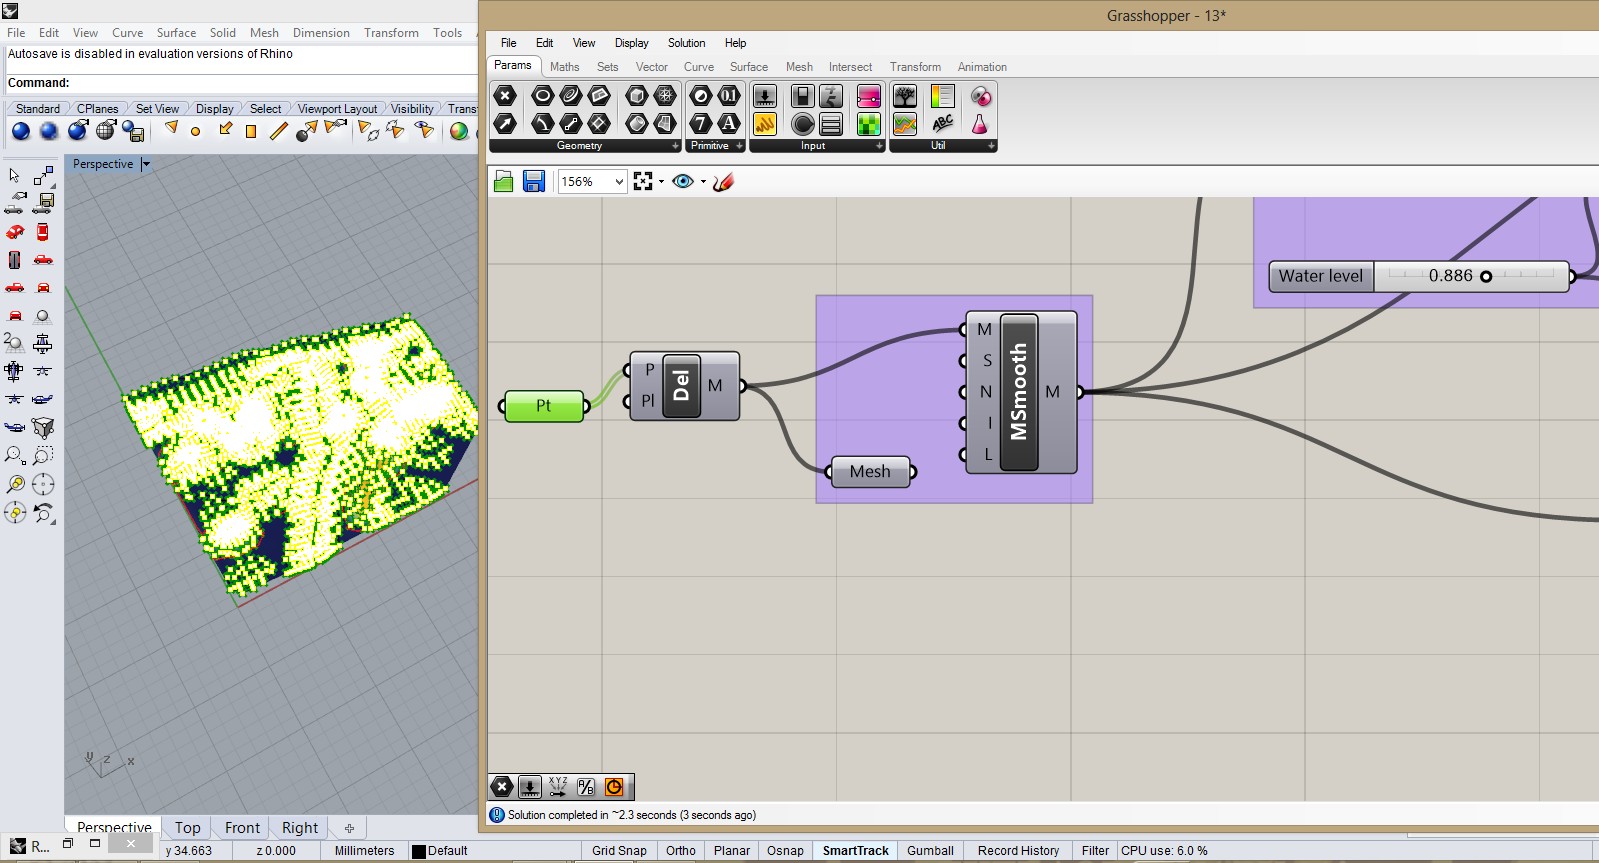
5.Go to the Rhino window, choose all the points and contours, press “CTRL” button on the keyboard as well as pick one contour, then input “hide” in the Rhino command so that we can hide all the points and keep only contours.
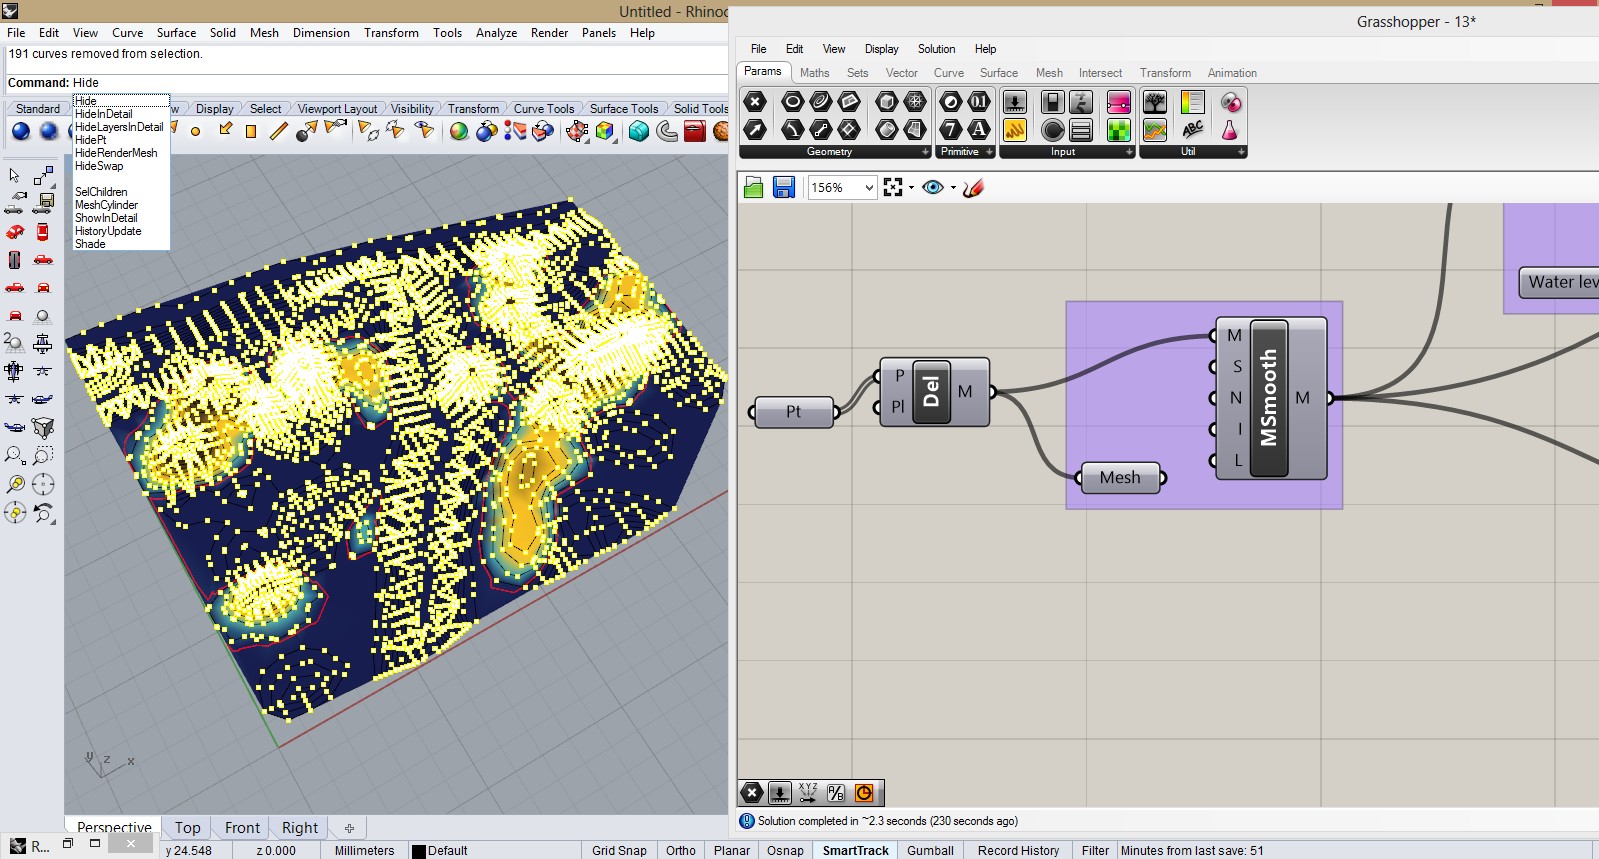
6.Last step is to change the slider to simulate different water elevation. And render the topography and export contours, and put two files together in Photoshop.
