
Technique Documentation- Explosion with Maya Fluids
Fluid Effects: A realistic fluid simulator based on simplified, incompressible Navier–Stokes equations for simulating non-elastic fluids. It is effective for smoke, fire, clouds and explosions, as well as many thick fluid effects such as water, magma or mud. added in Maya 4.5 (Wikipedia).
According to NASA, the Navier-Stokes equation describes how the velocity, pressure, temperature, and density of a moving fluid are related. The equation indicates velocity instead of position. Therefore, any object’s flow can be determined using the Navier-Stokes equations.
The application of this technique can also be useful in the study of river currents and bayou flows in the Louisiana landscape.
To produce an explosion using Maya Fluids:
*Open Autodesk Maya
*Set tool bars to Dynamics
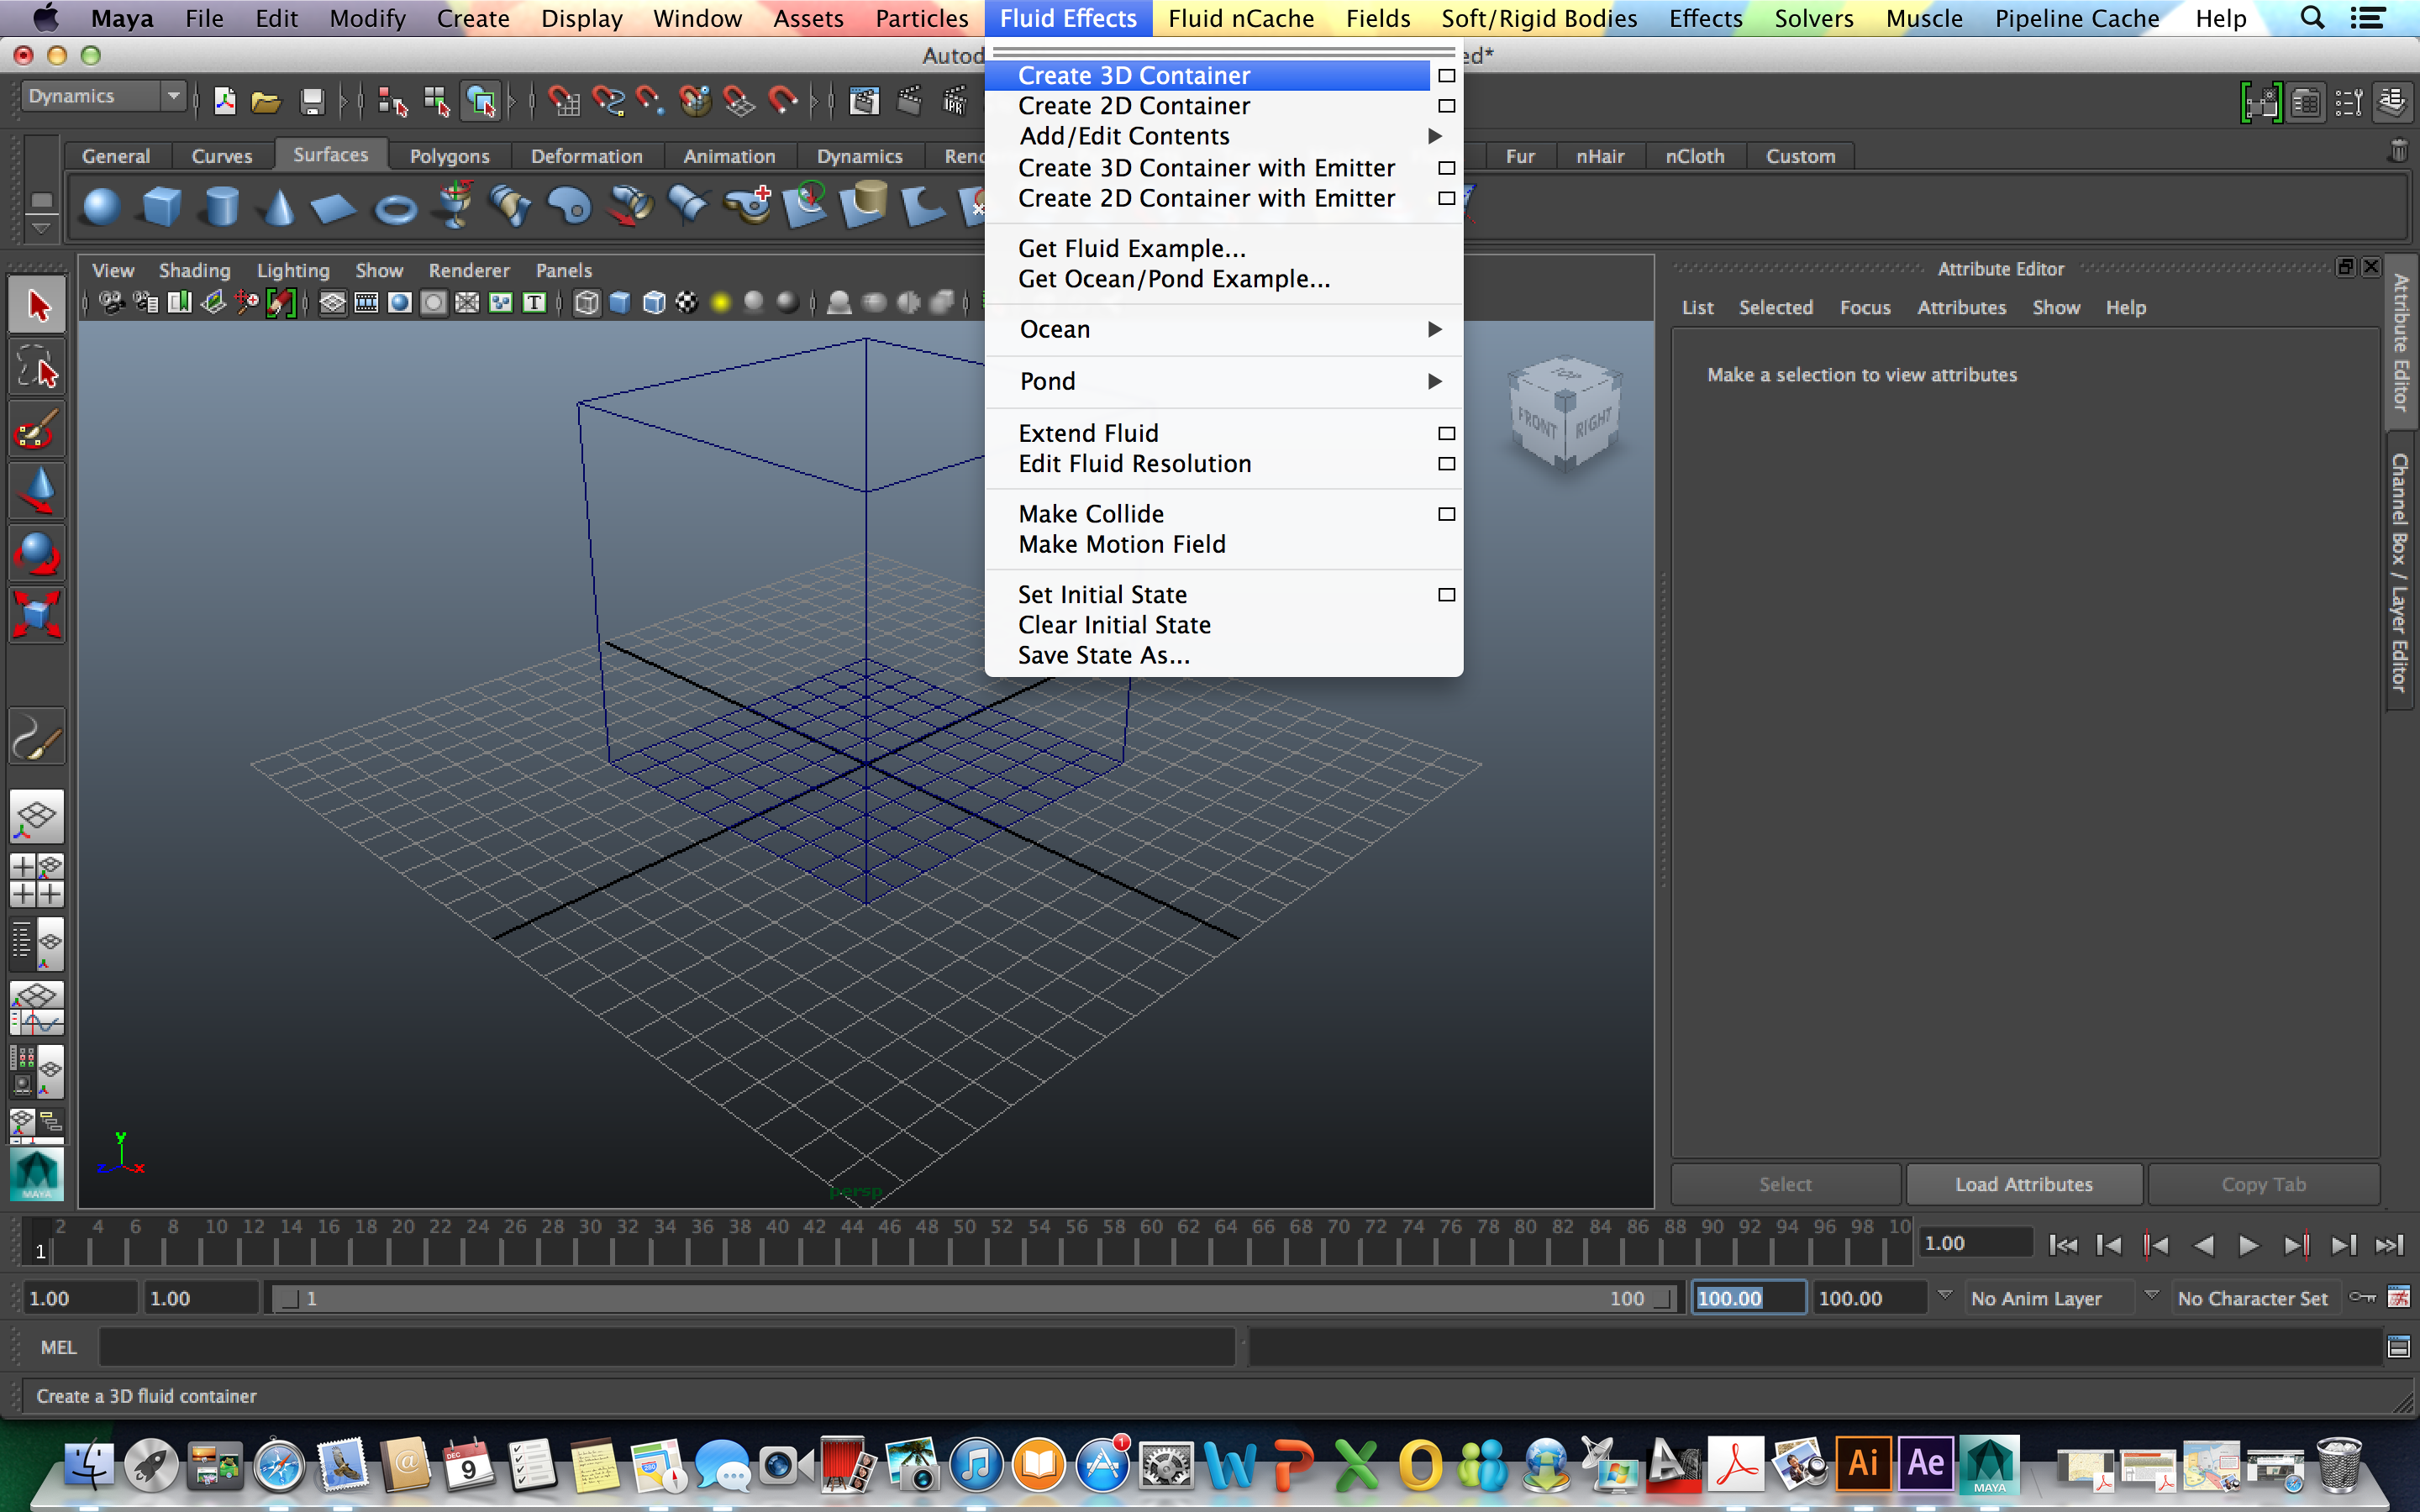
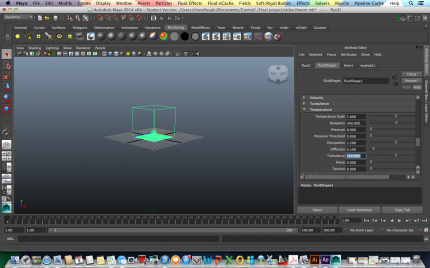
*Drop down menu Fluid Effect and select Create 3D Container
*Increase the time range

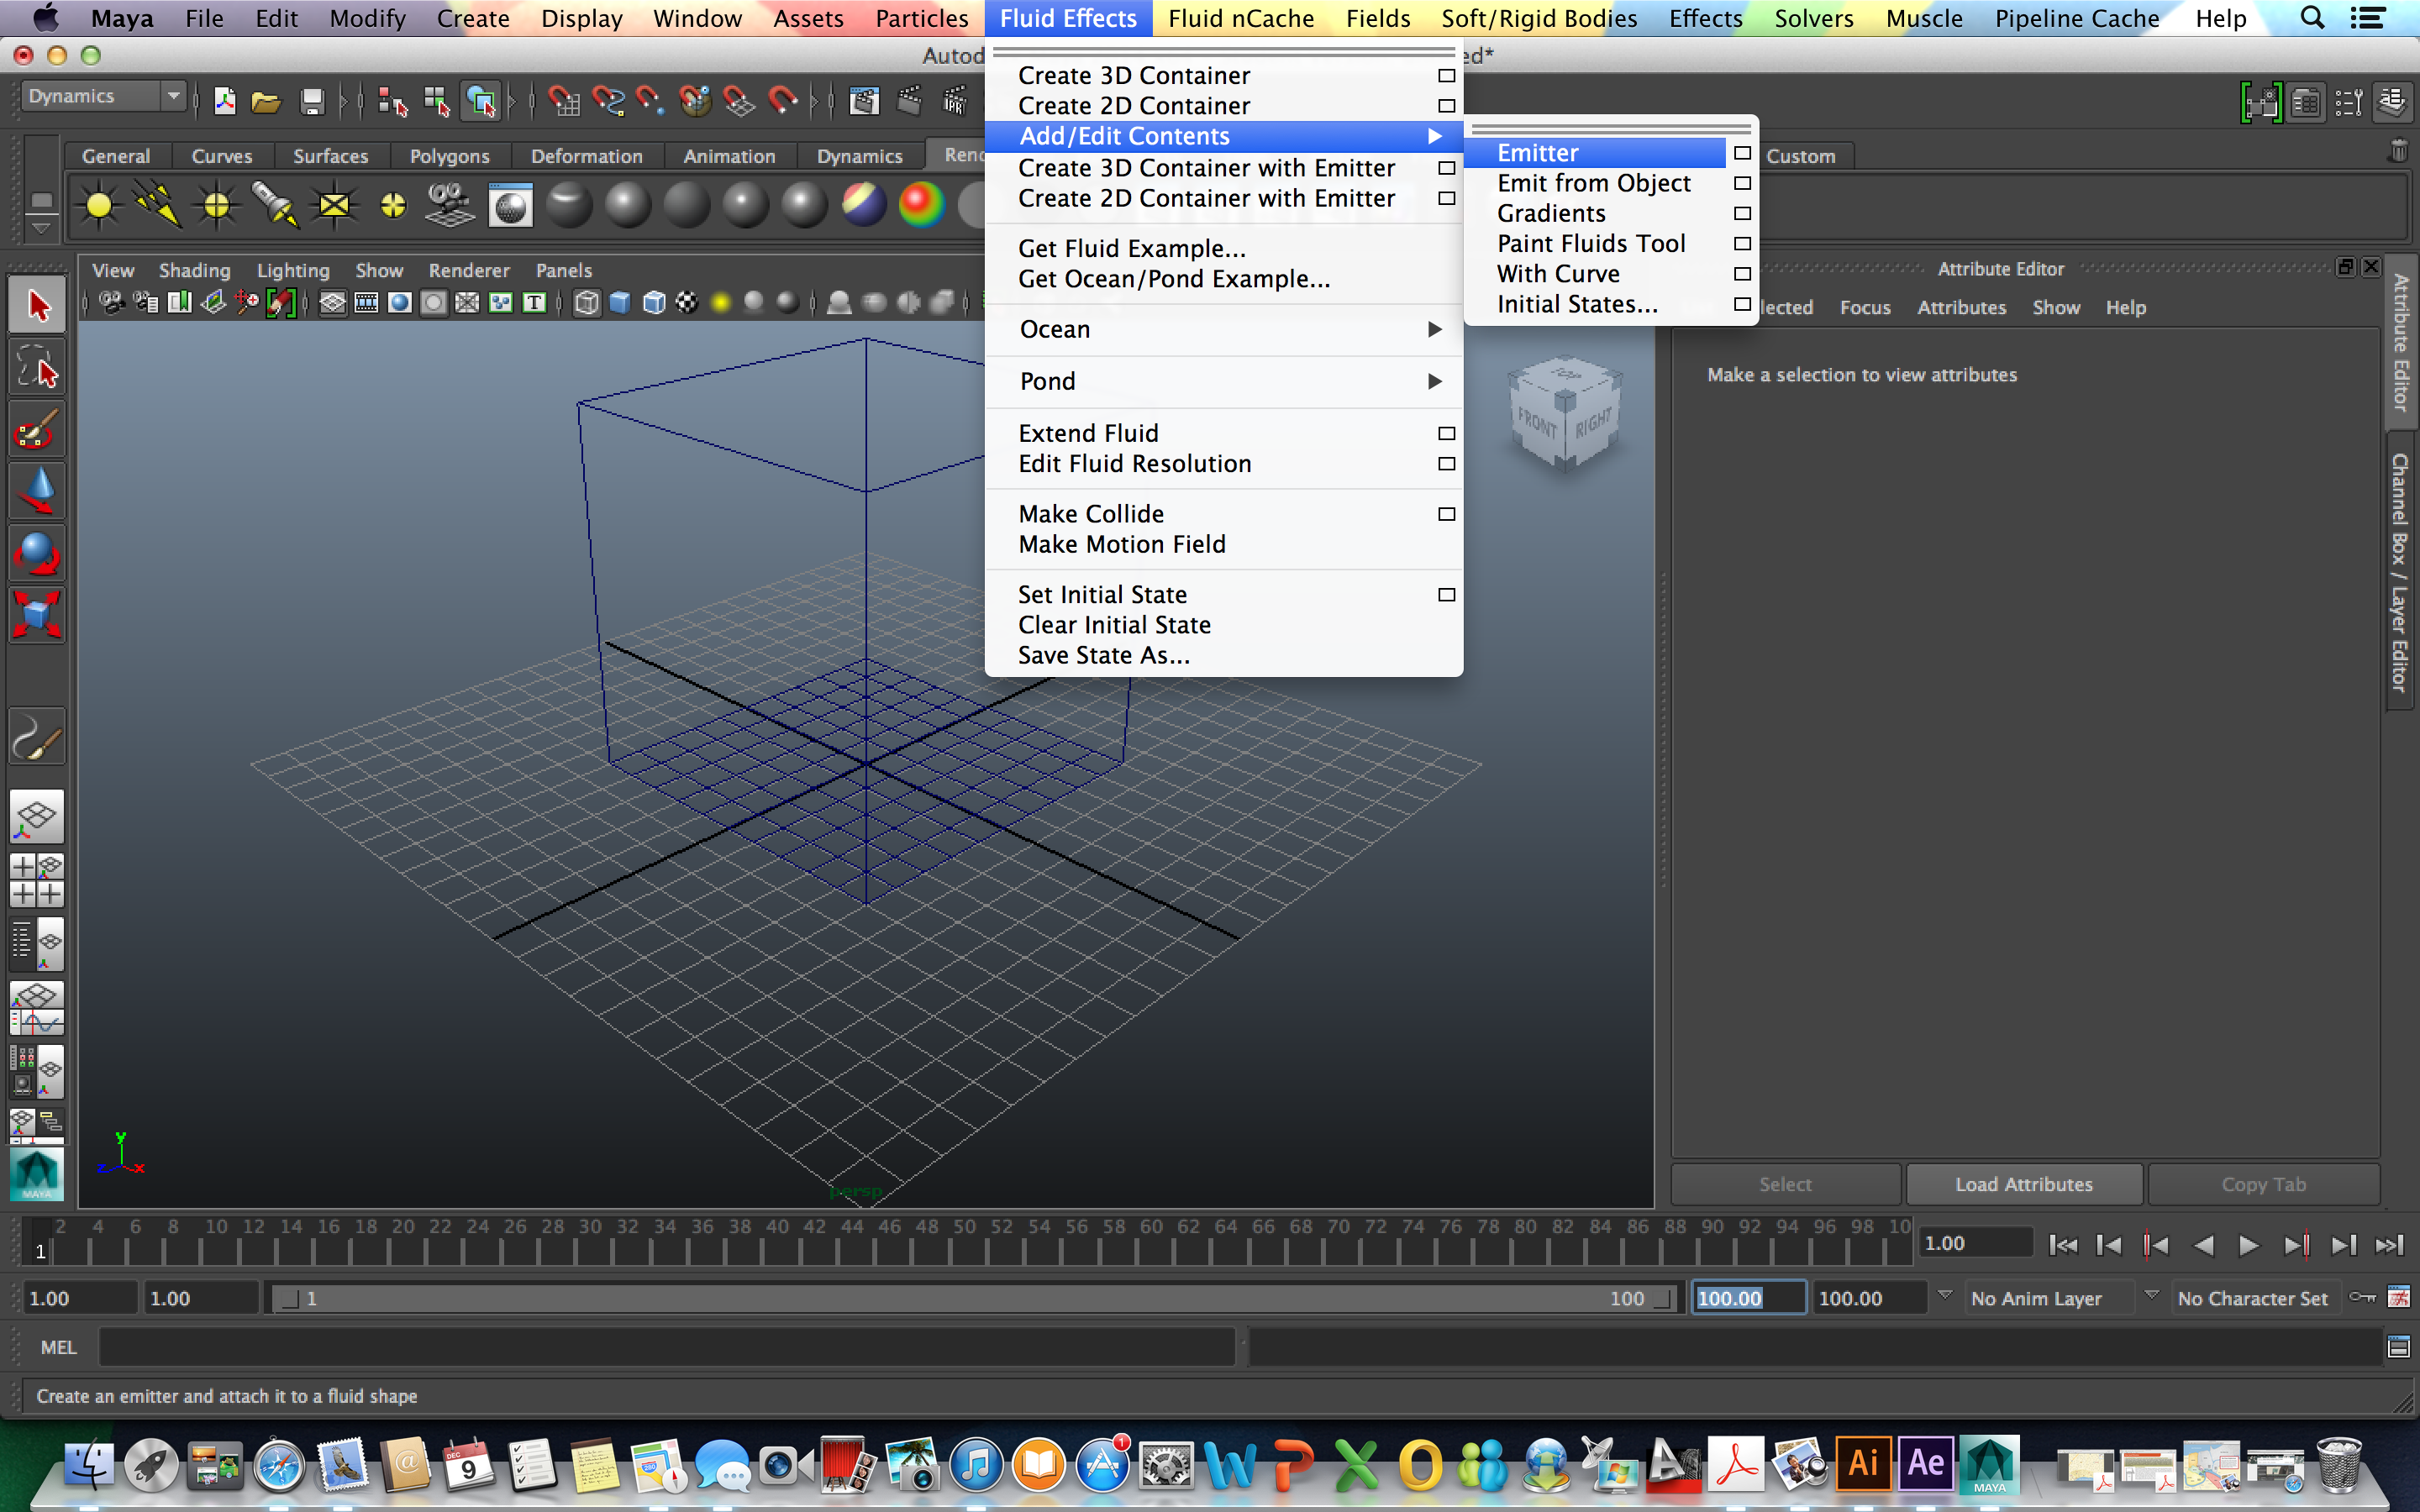
*Drop down menu Fluid Effects and select Add/Edit Contents then Emitter
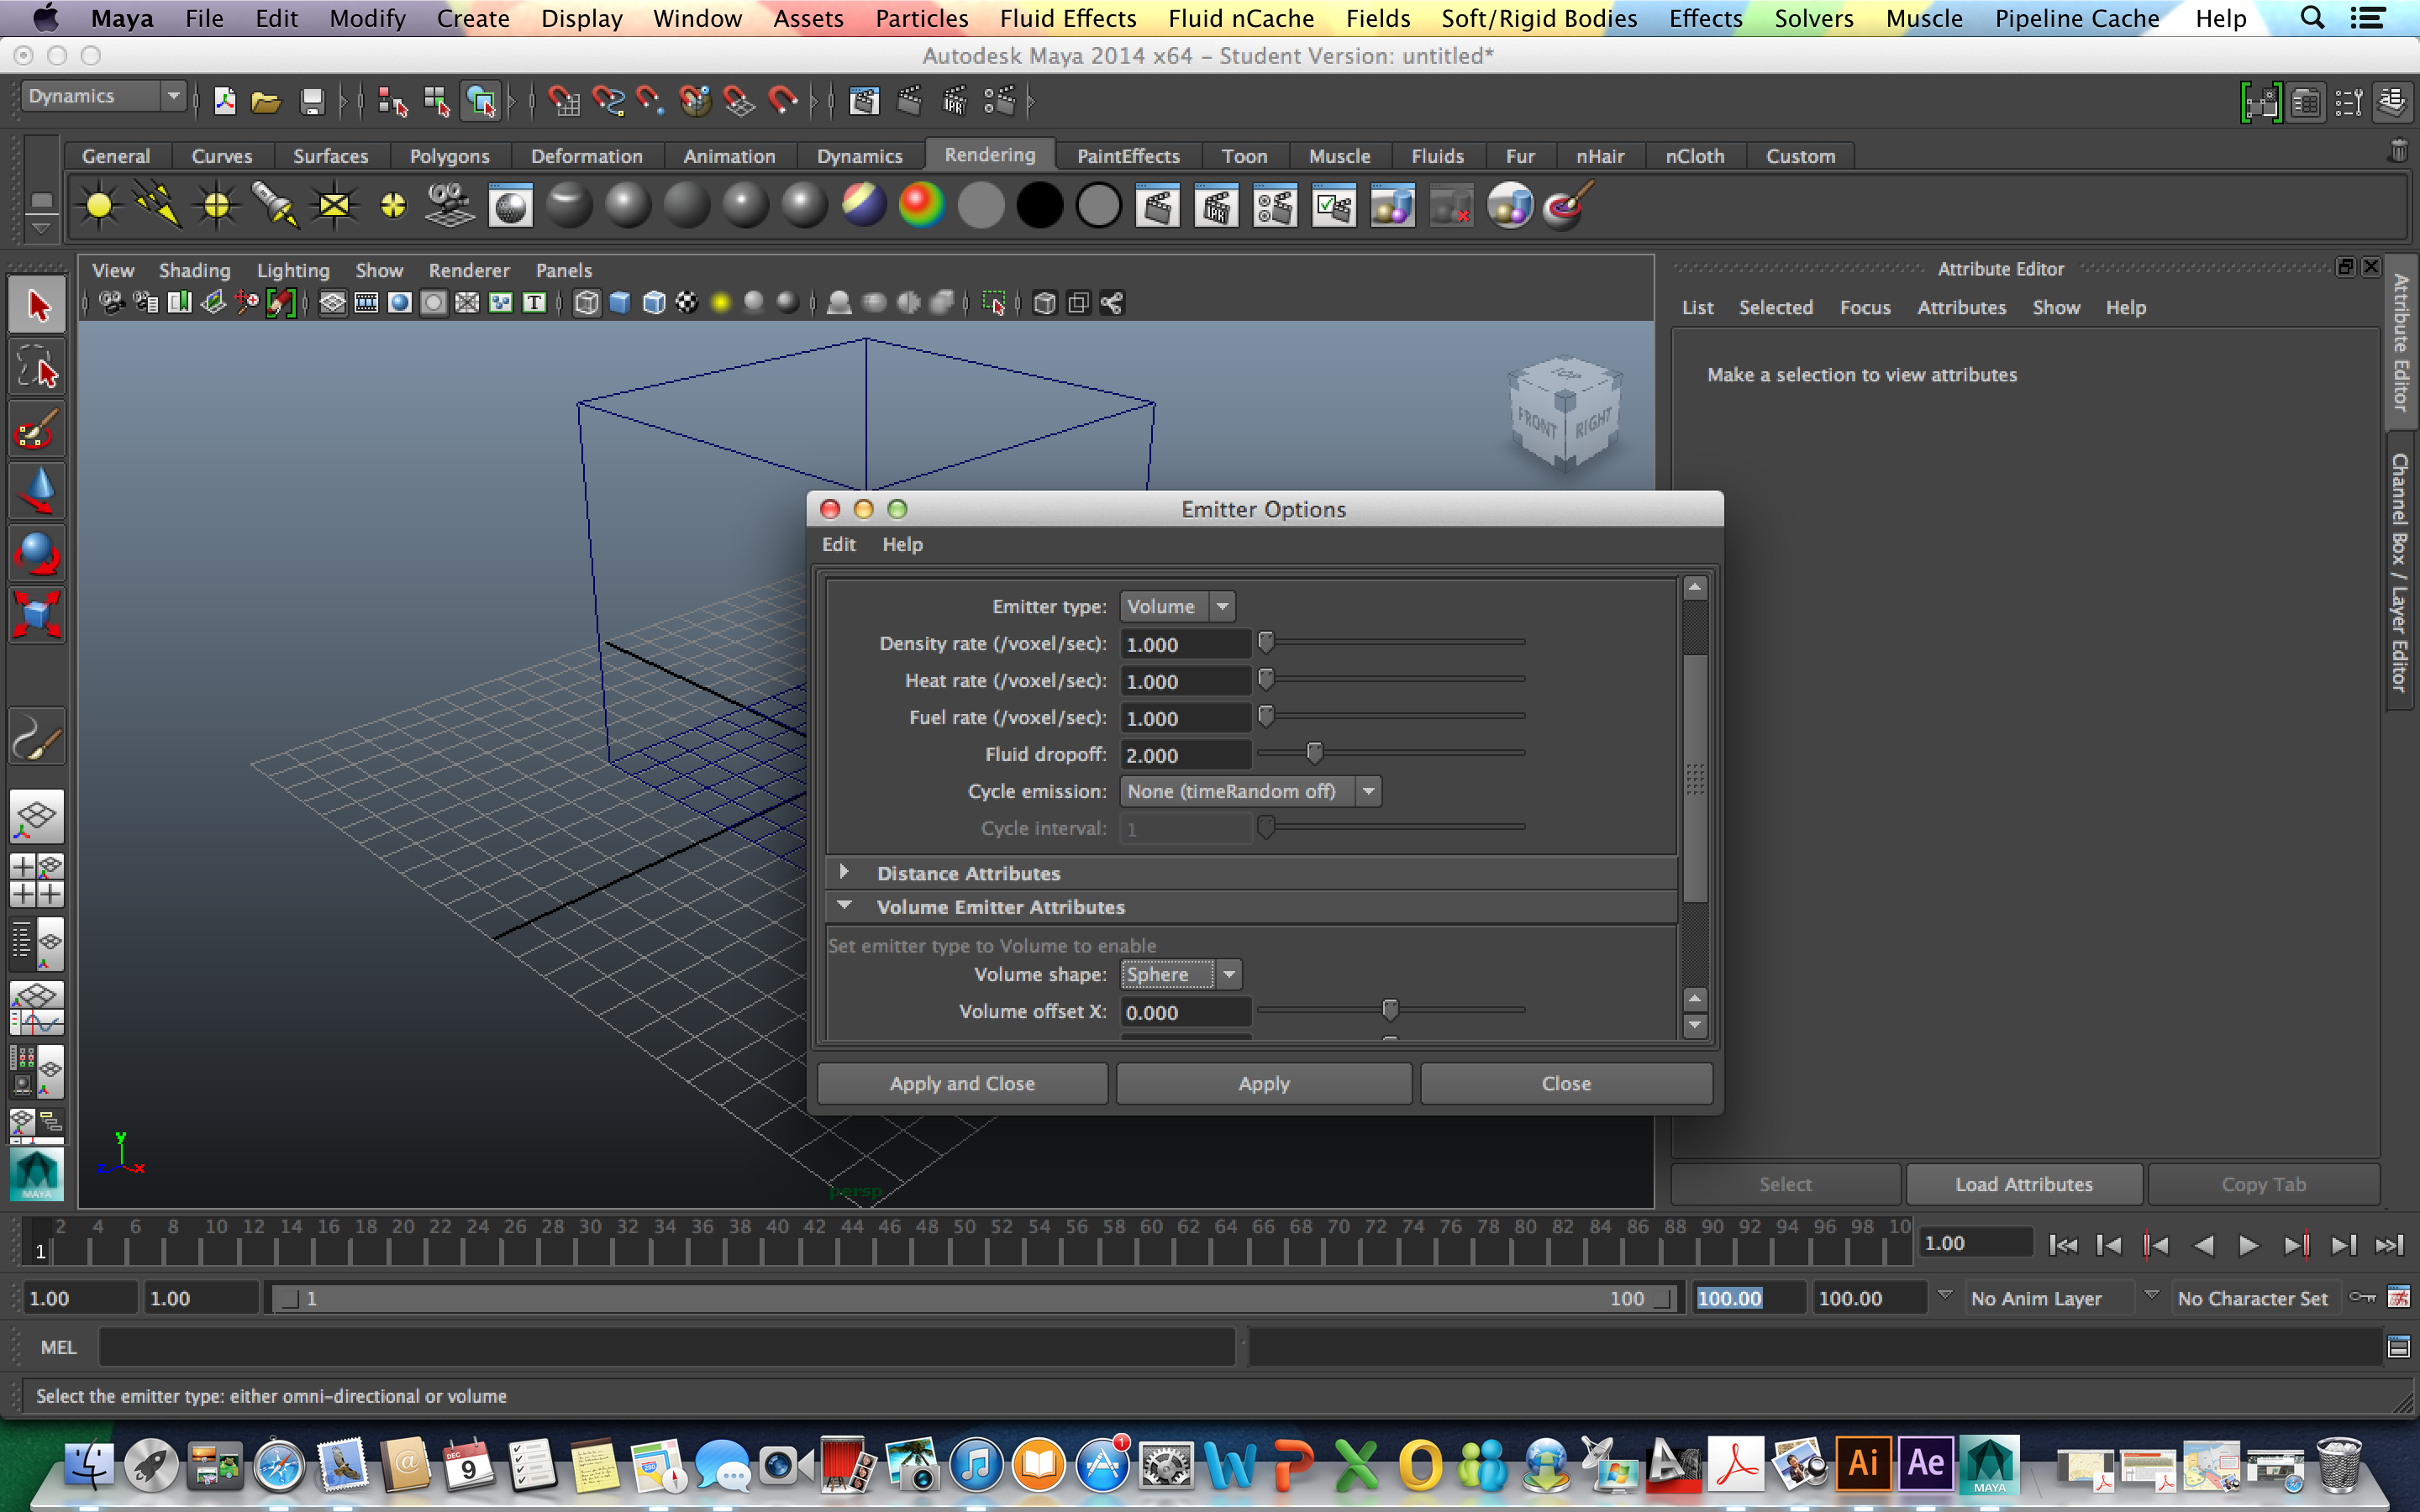
*Adjust Emitter Options to Emitter type: Volume and Volume Shape: Sphere
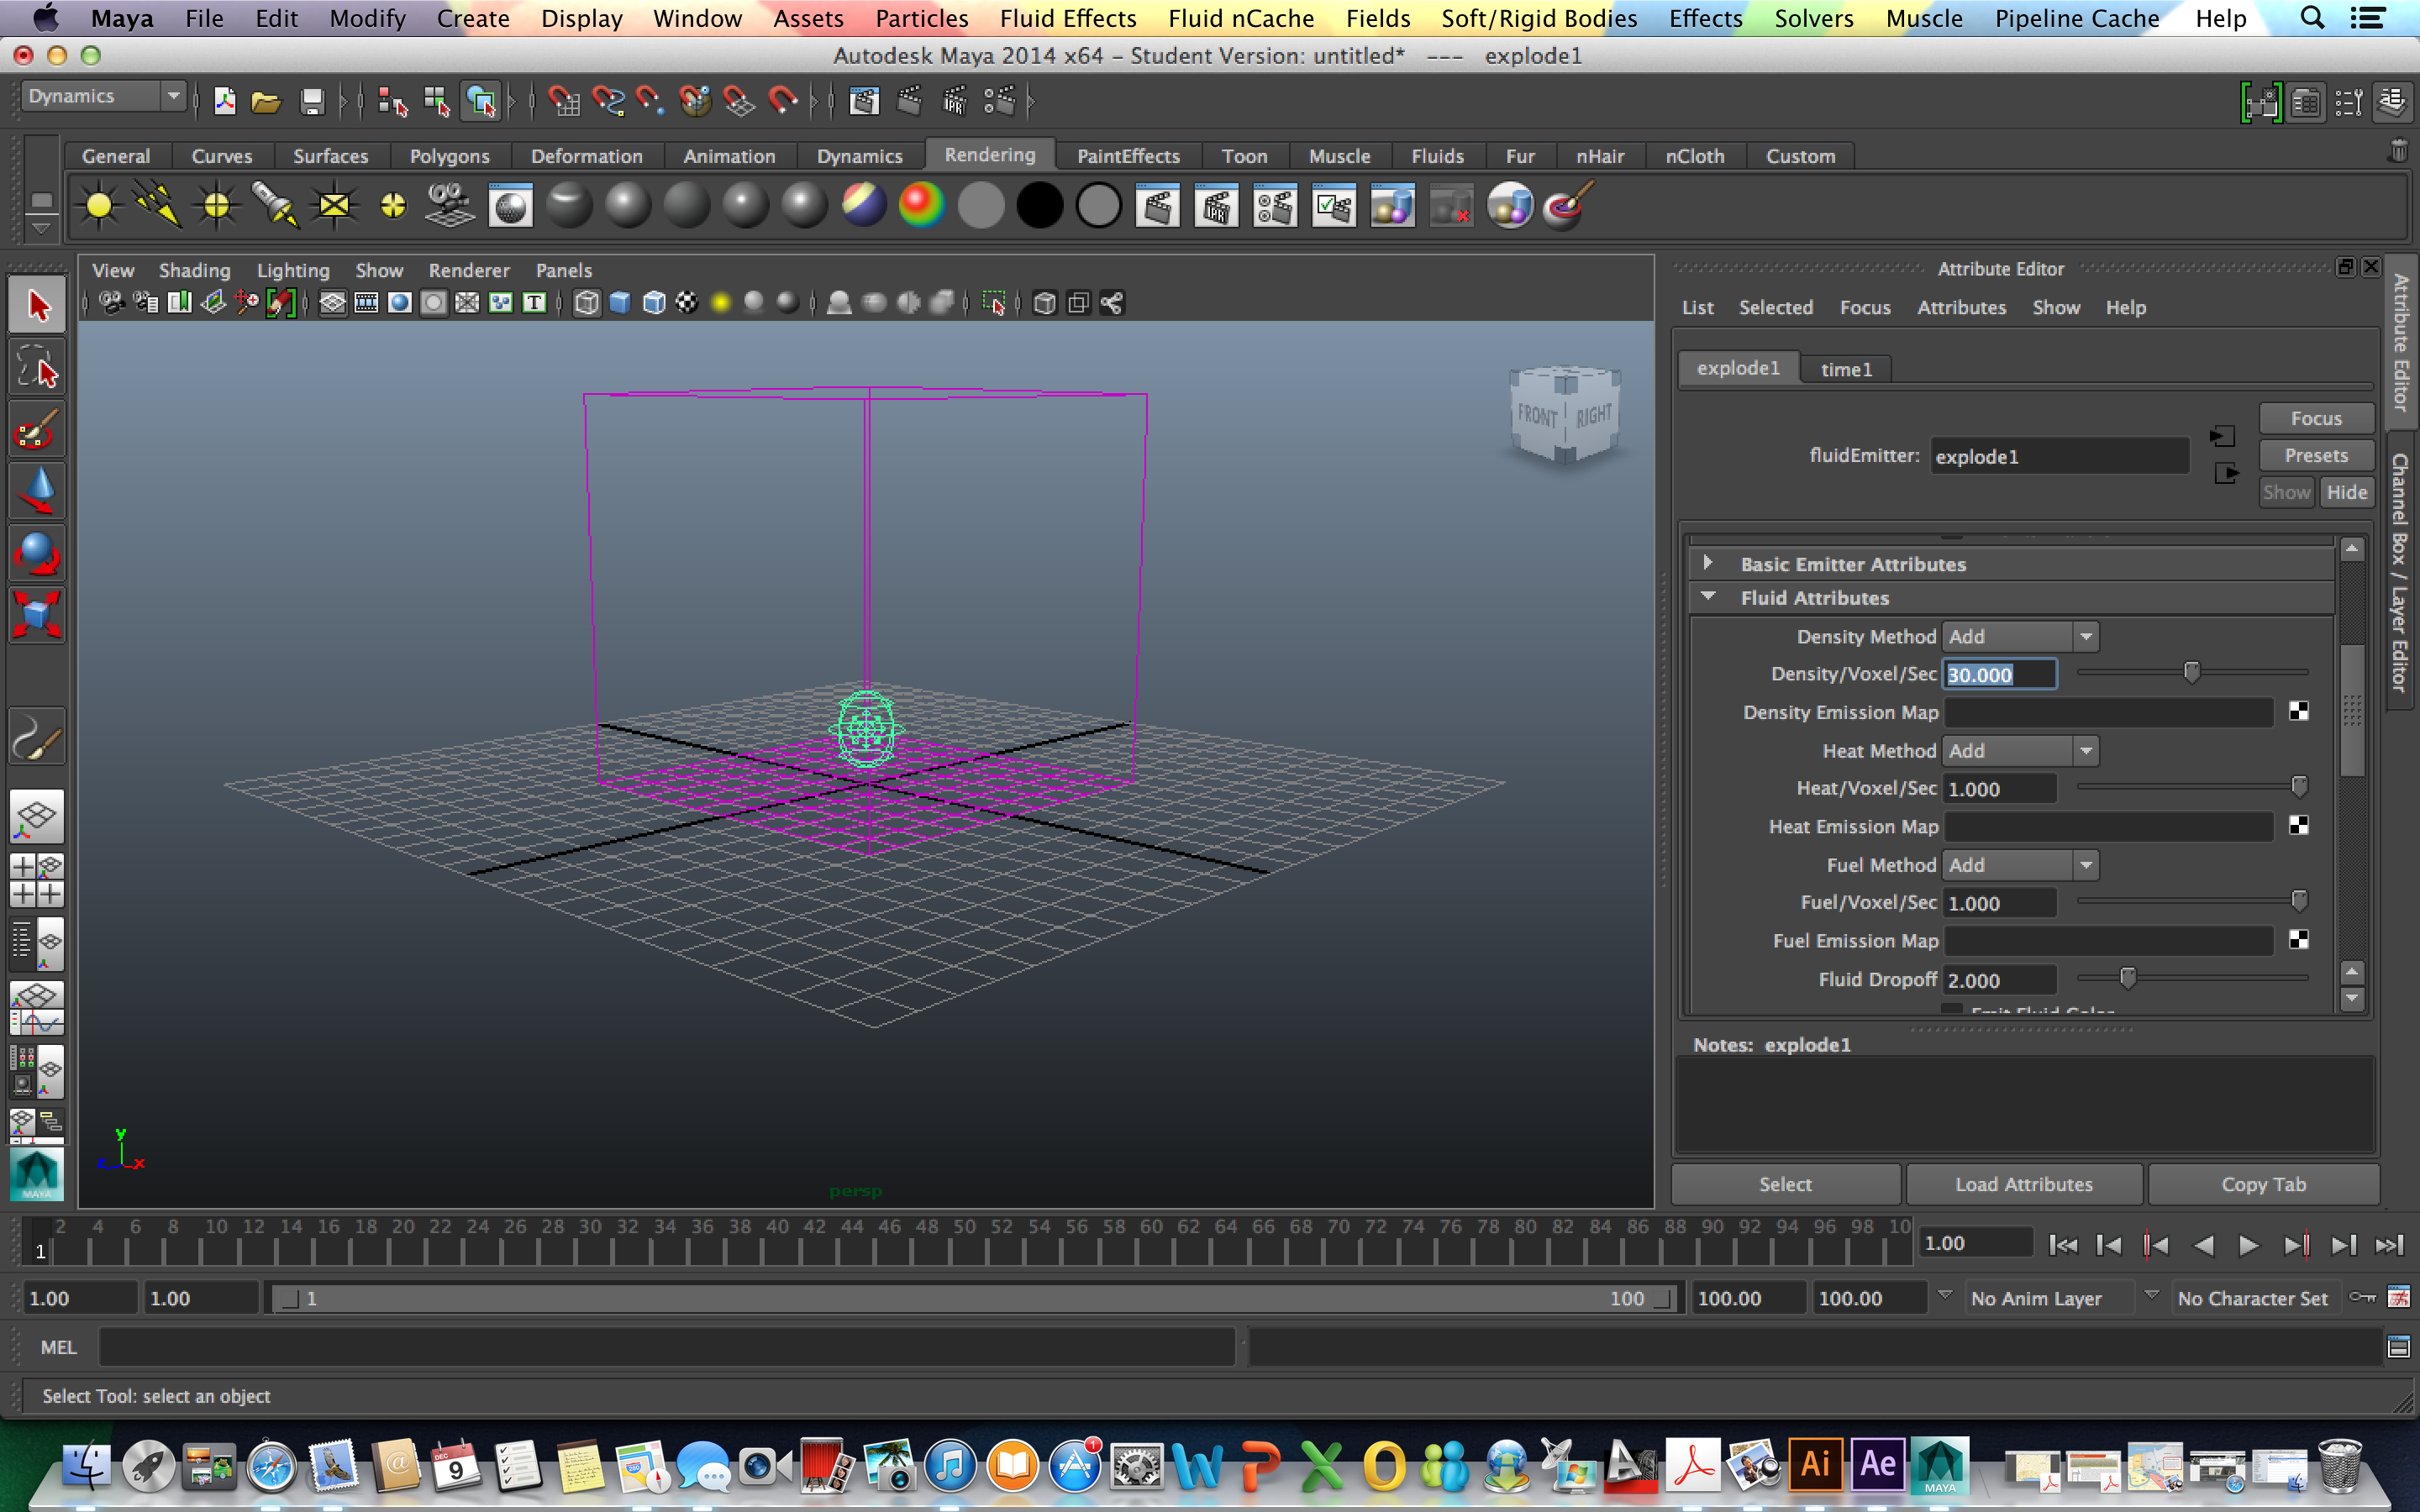
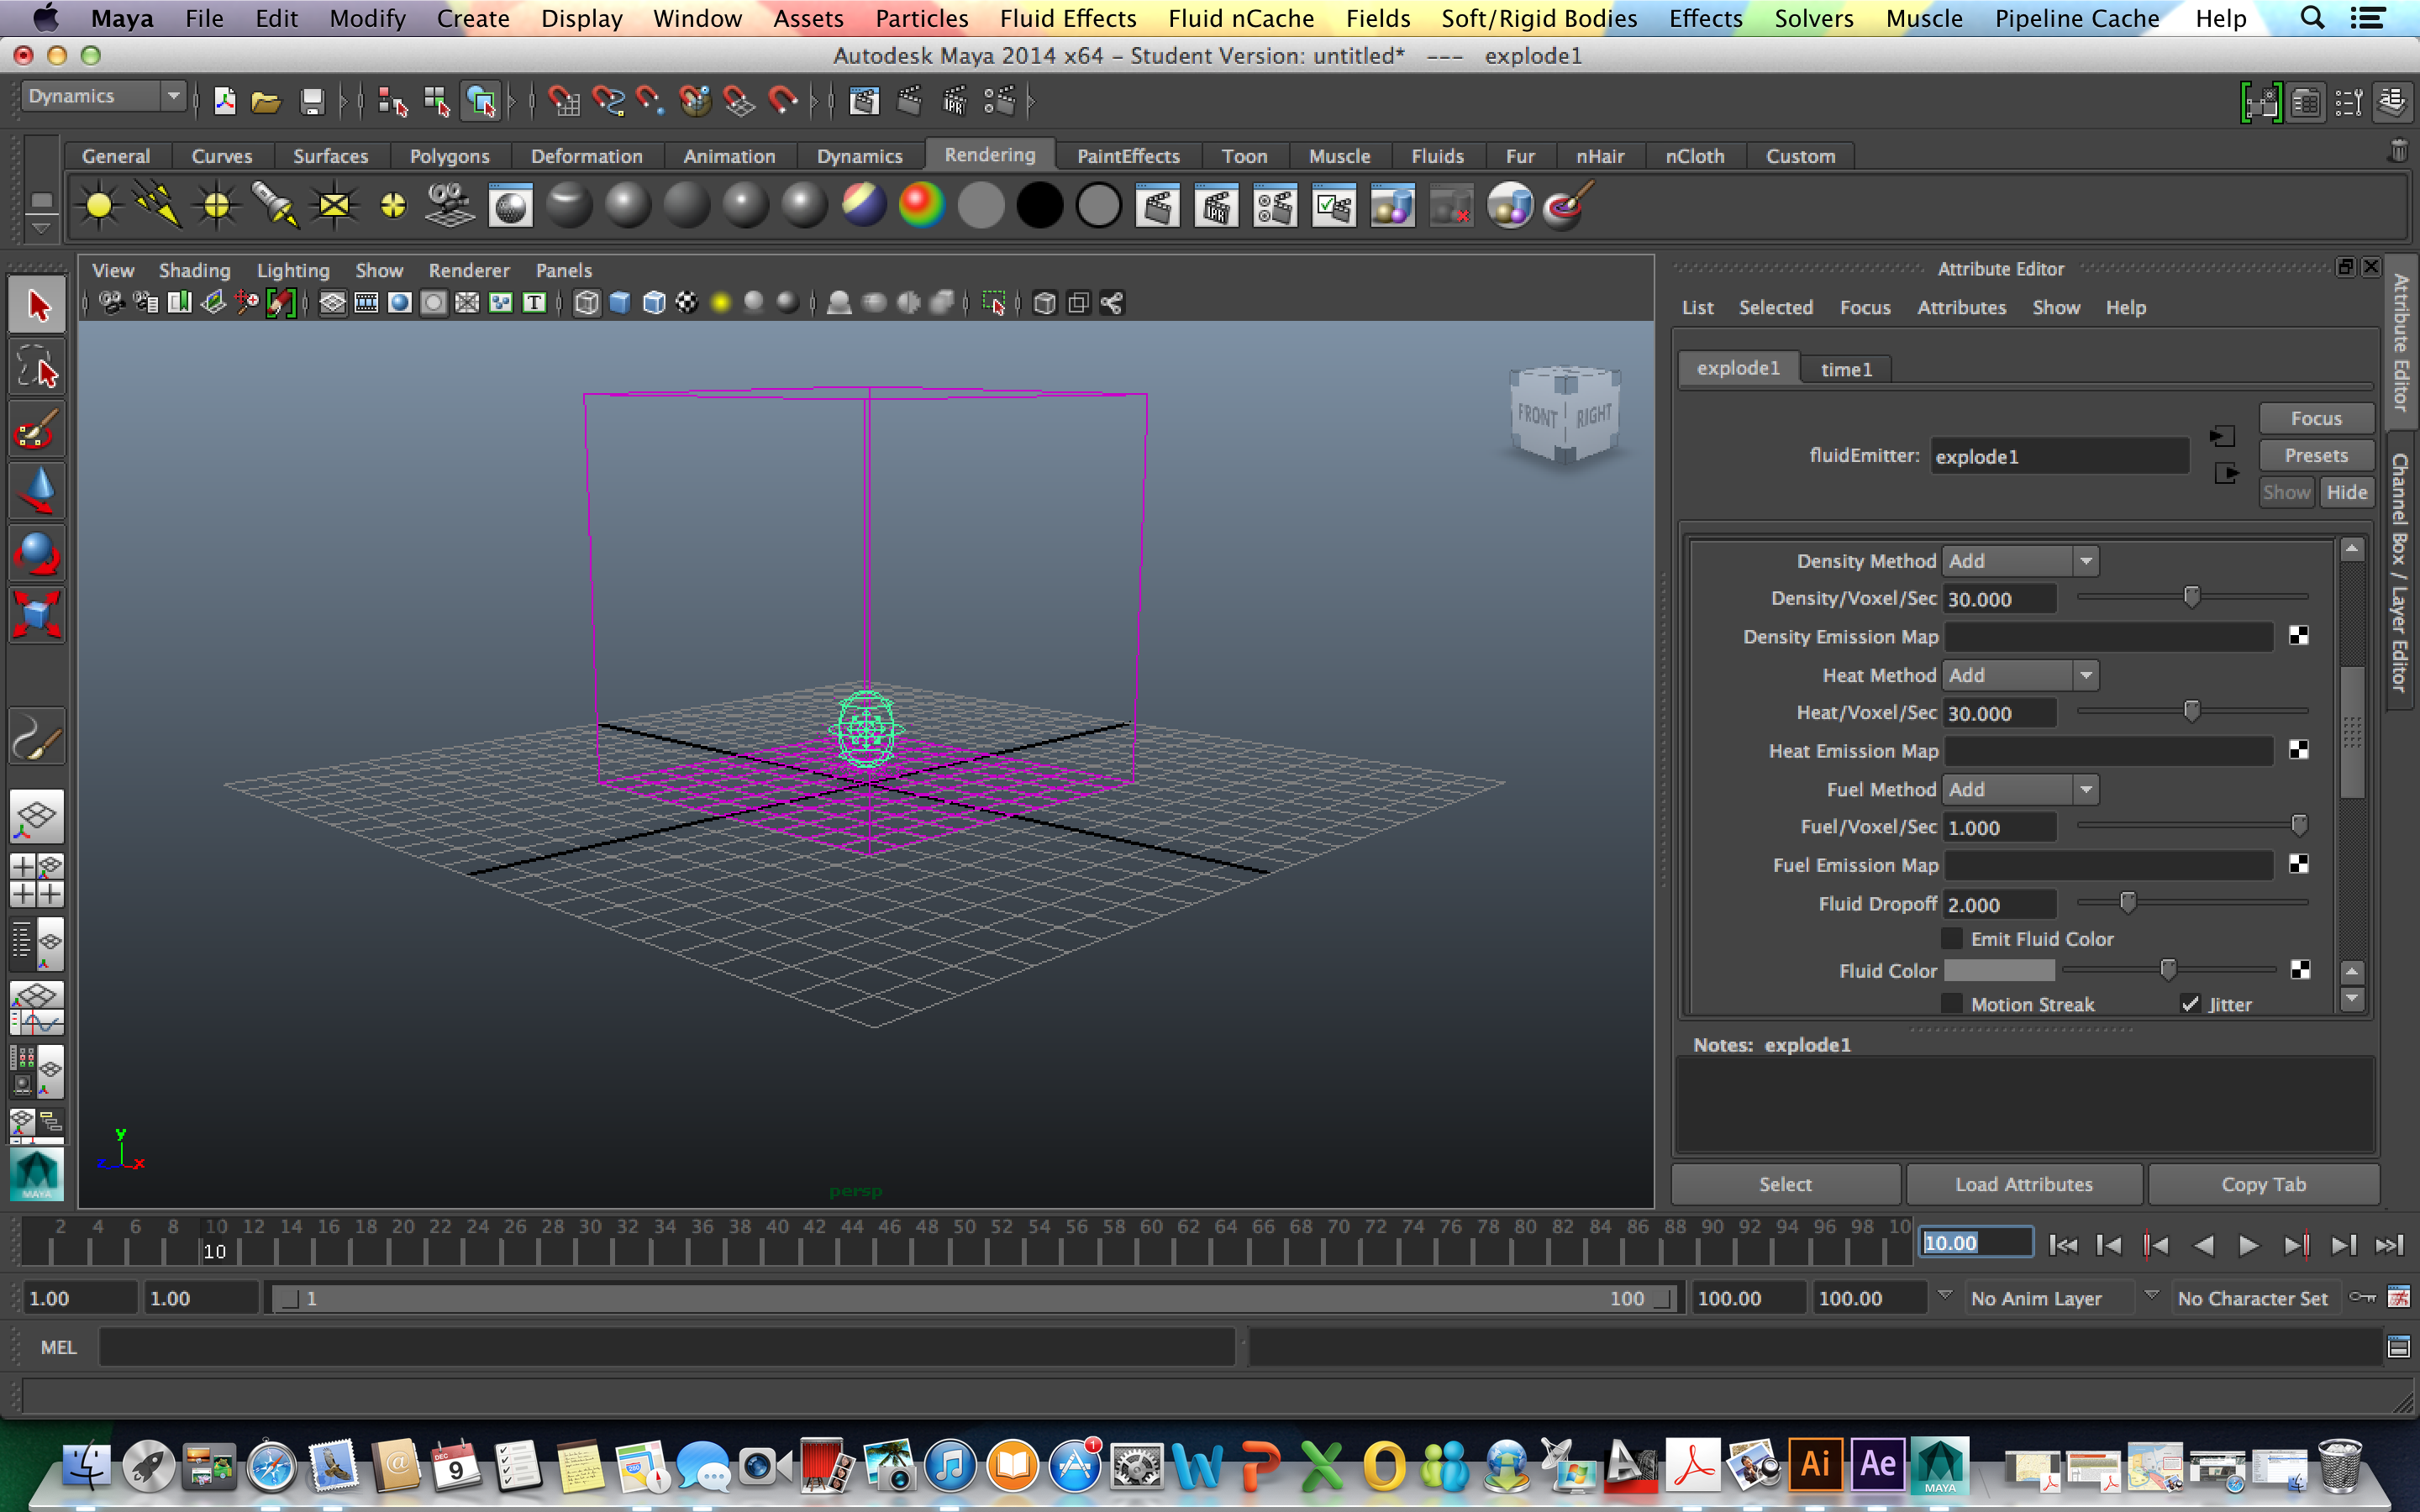
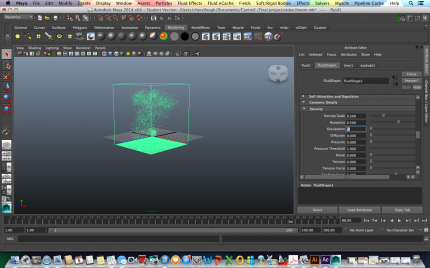
*Adjust the Density under Fluid Attributes, Set Key ; Heat: 30, Set Key
*Move time slider to frame 10 and Density: 0, Set Key ; Heat 0, Set Key
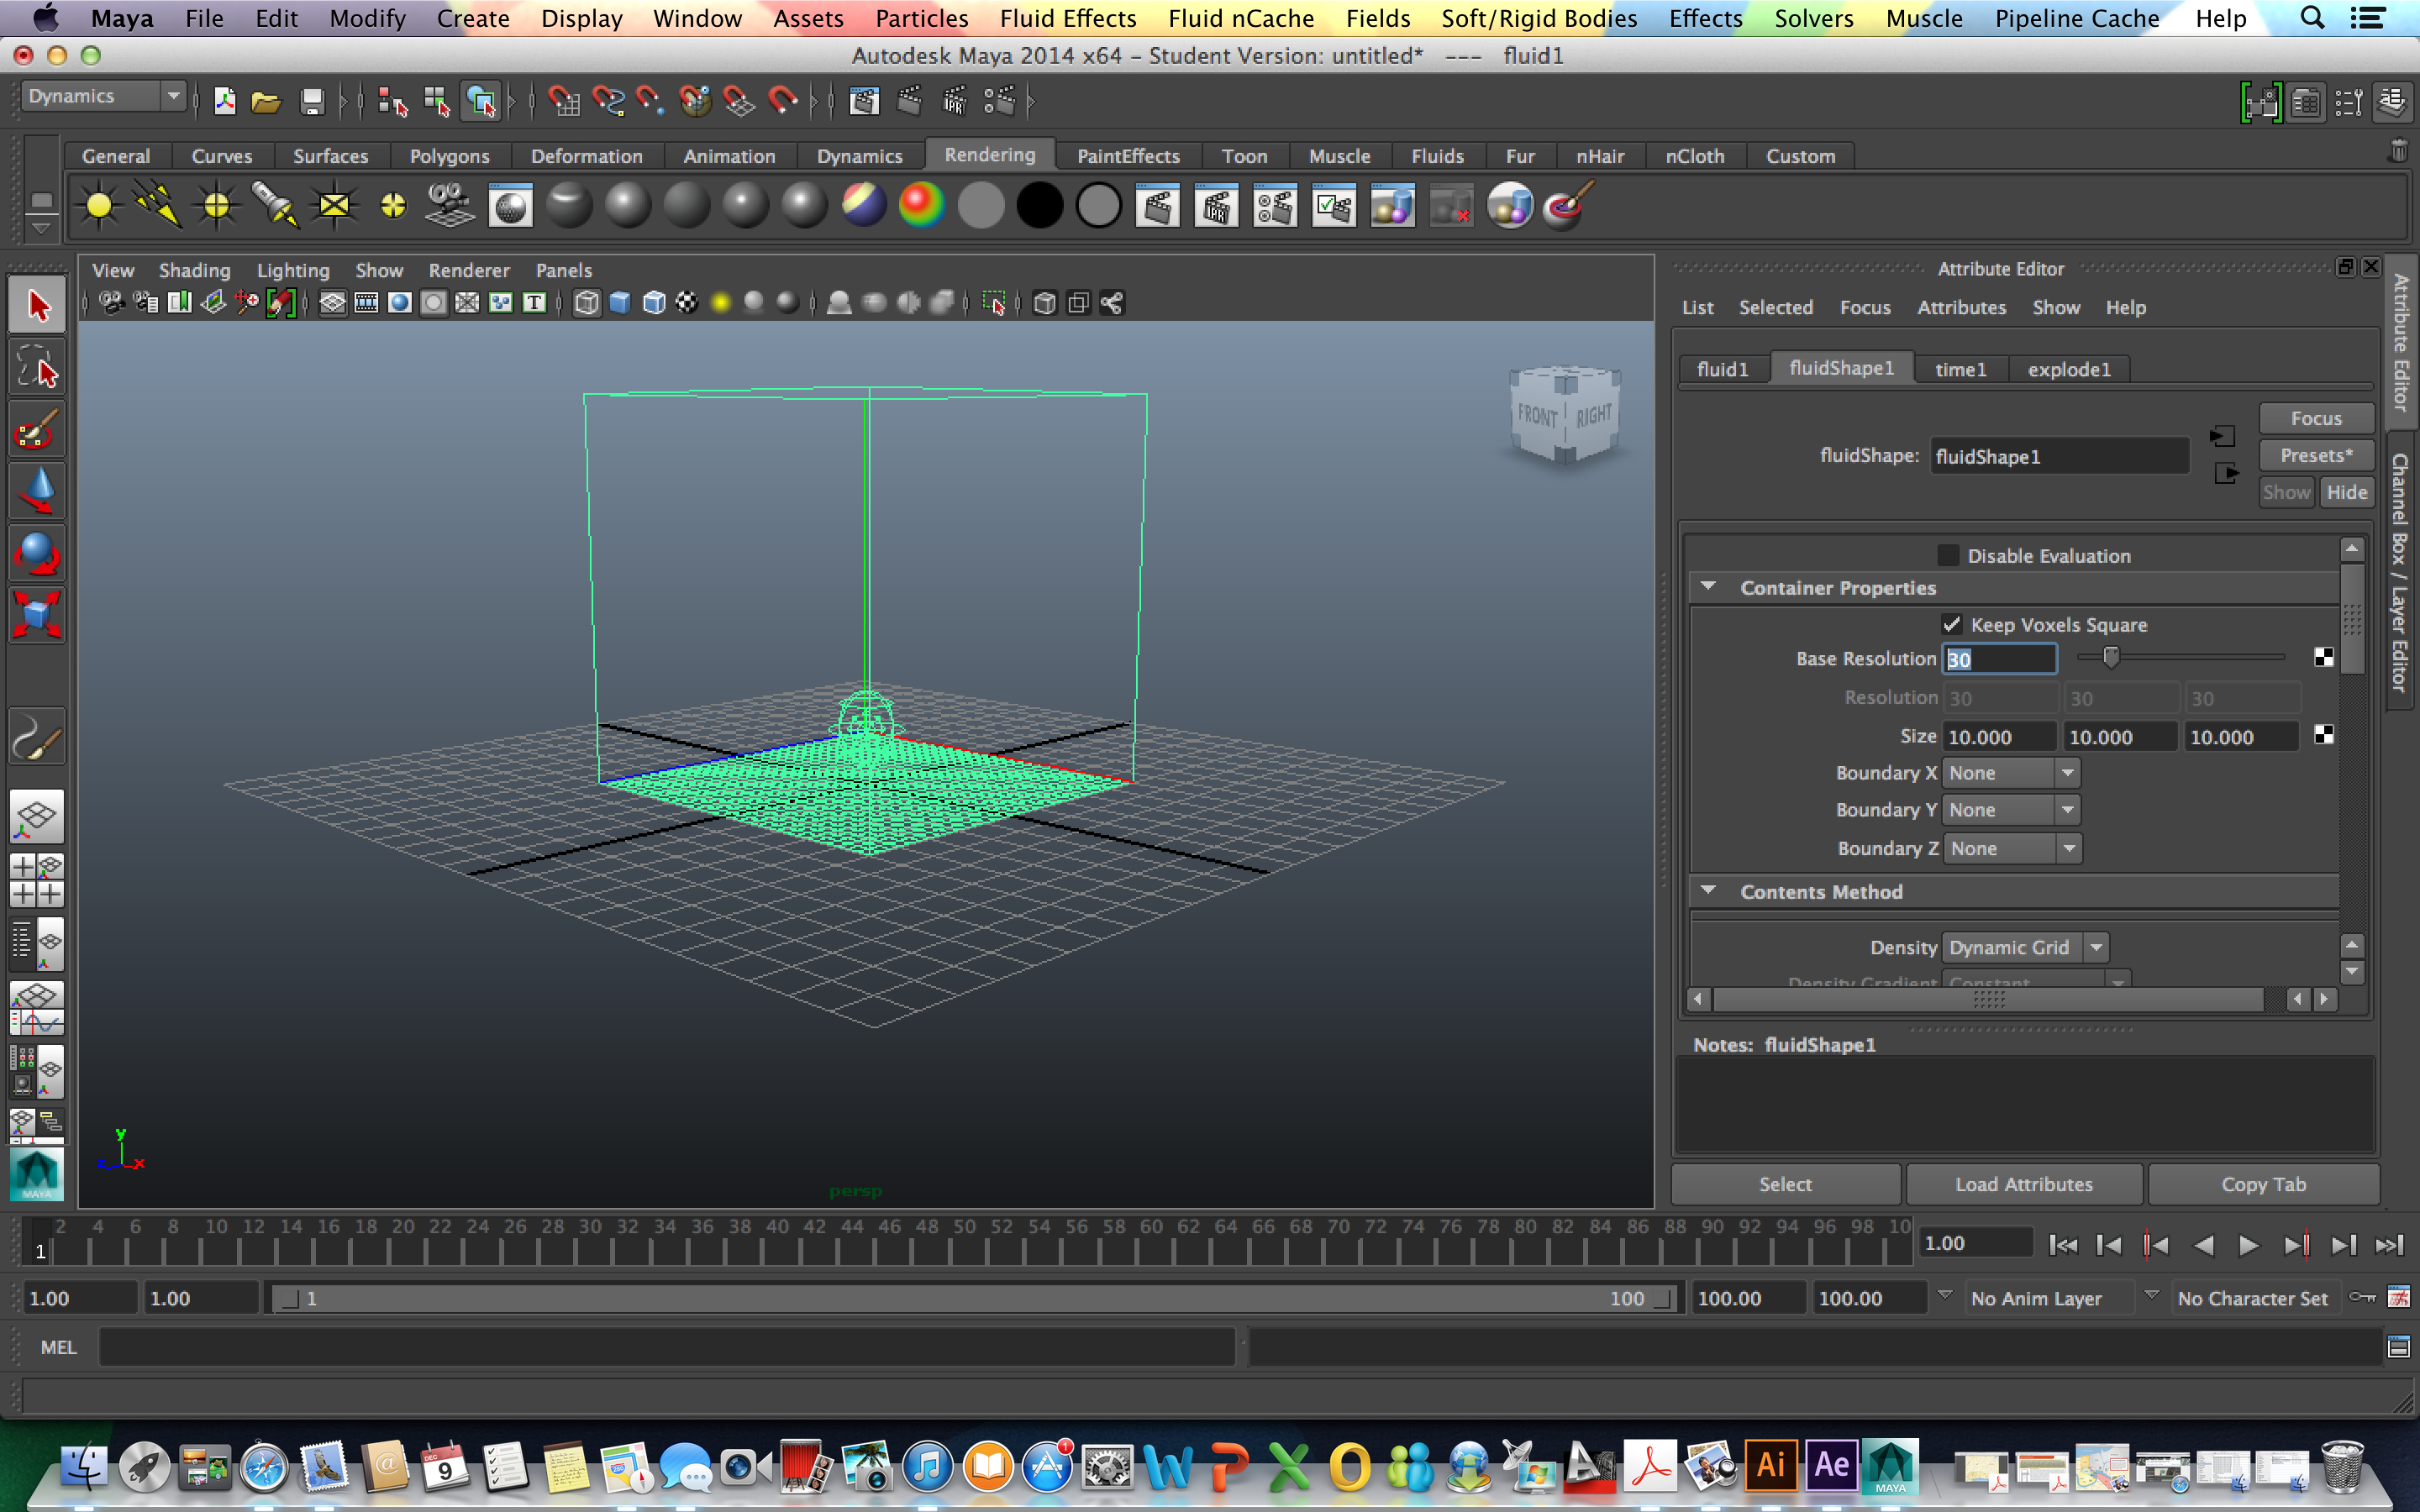
*Select the box and under Container Properties, increase the base resolution to 30 boundary XYZ to None
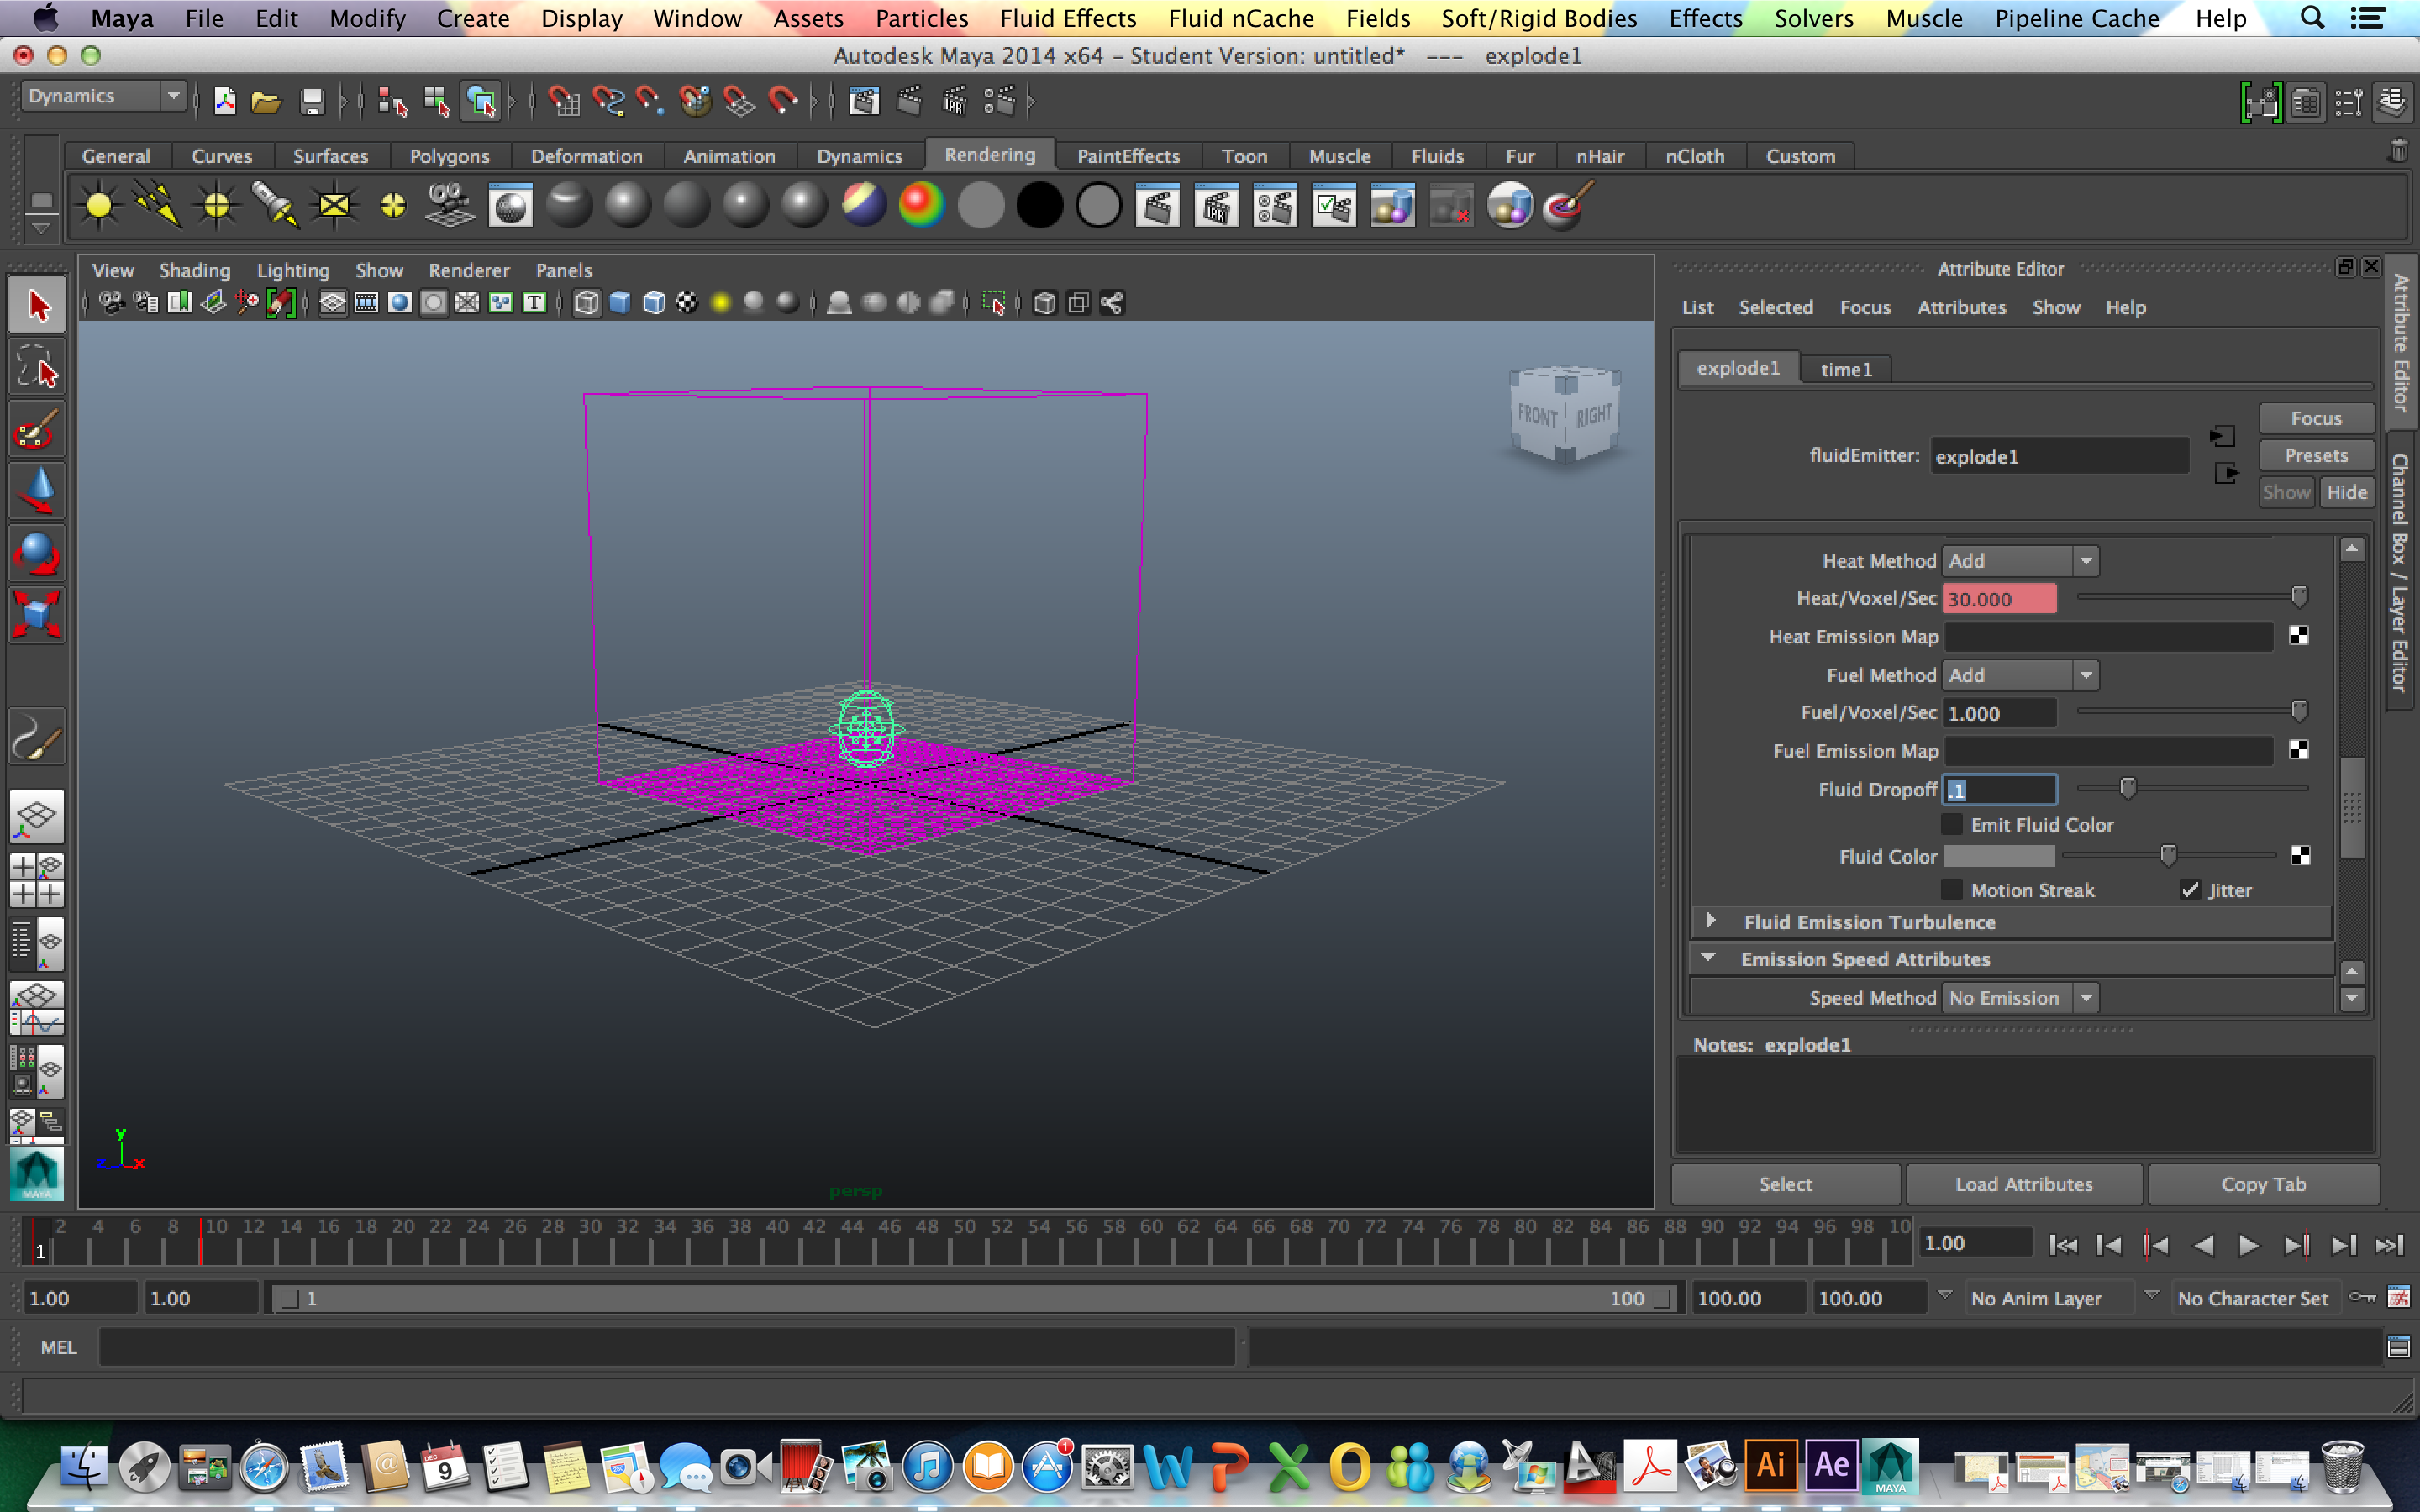
*Select Explode 1 and decrease Fluid Drop off to 0.1
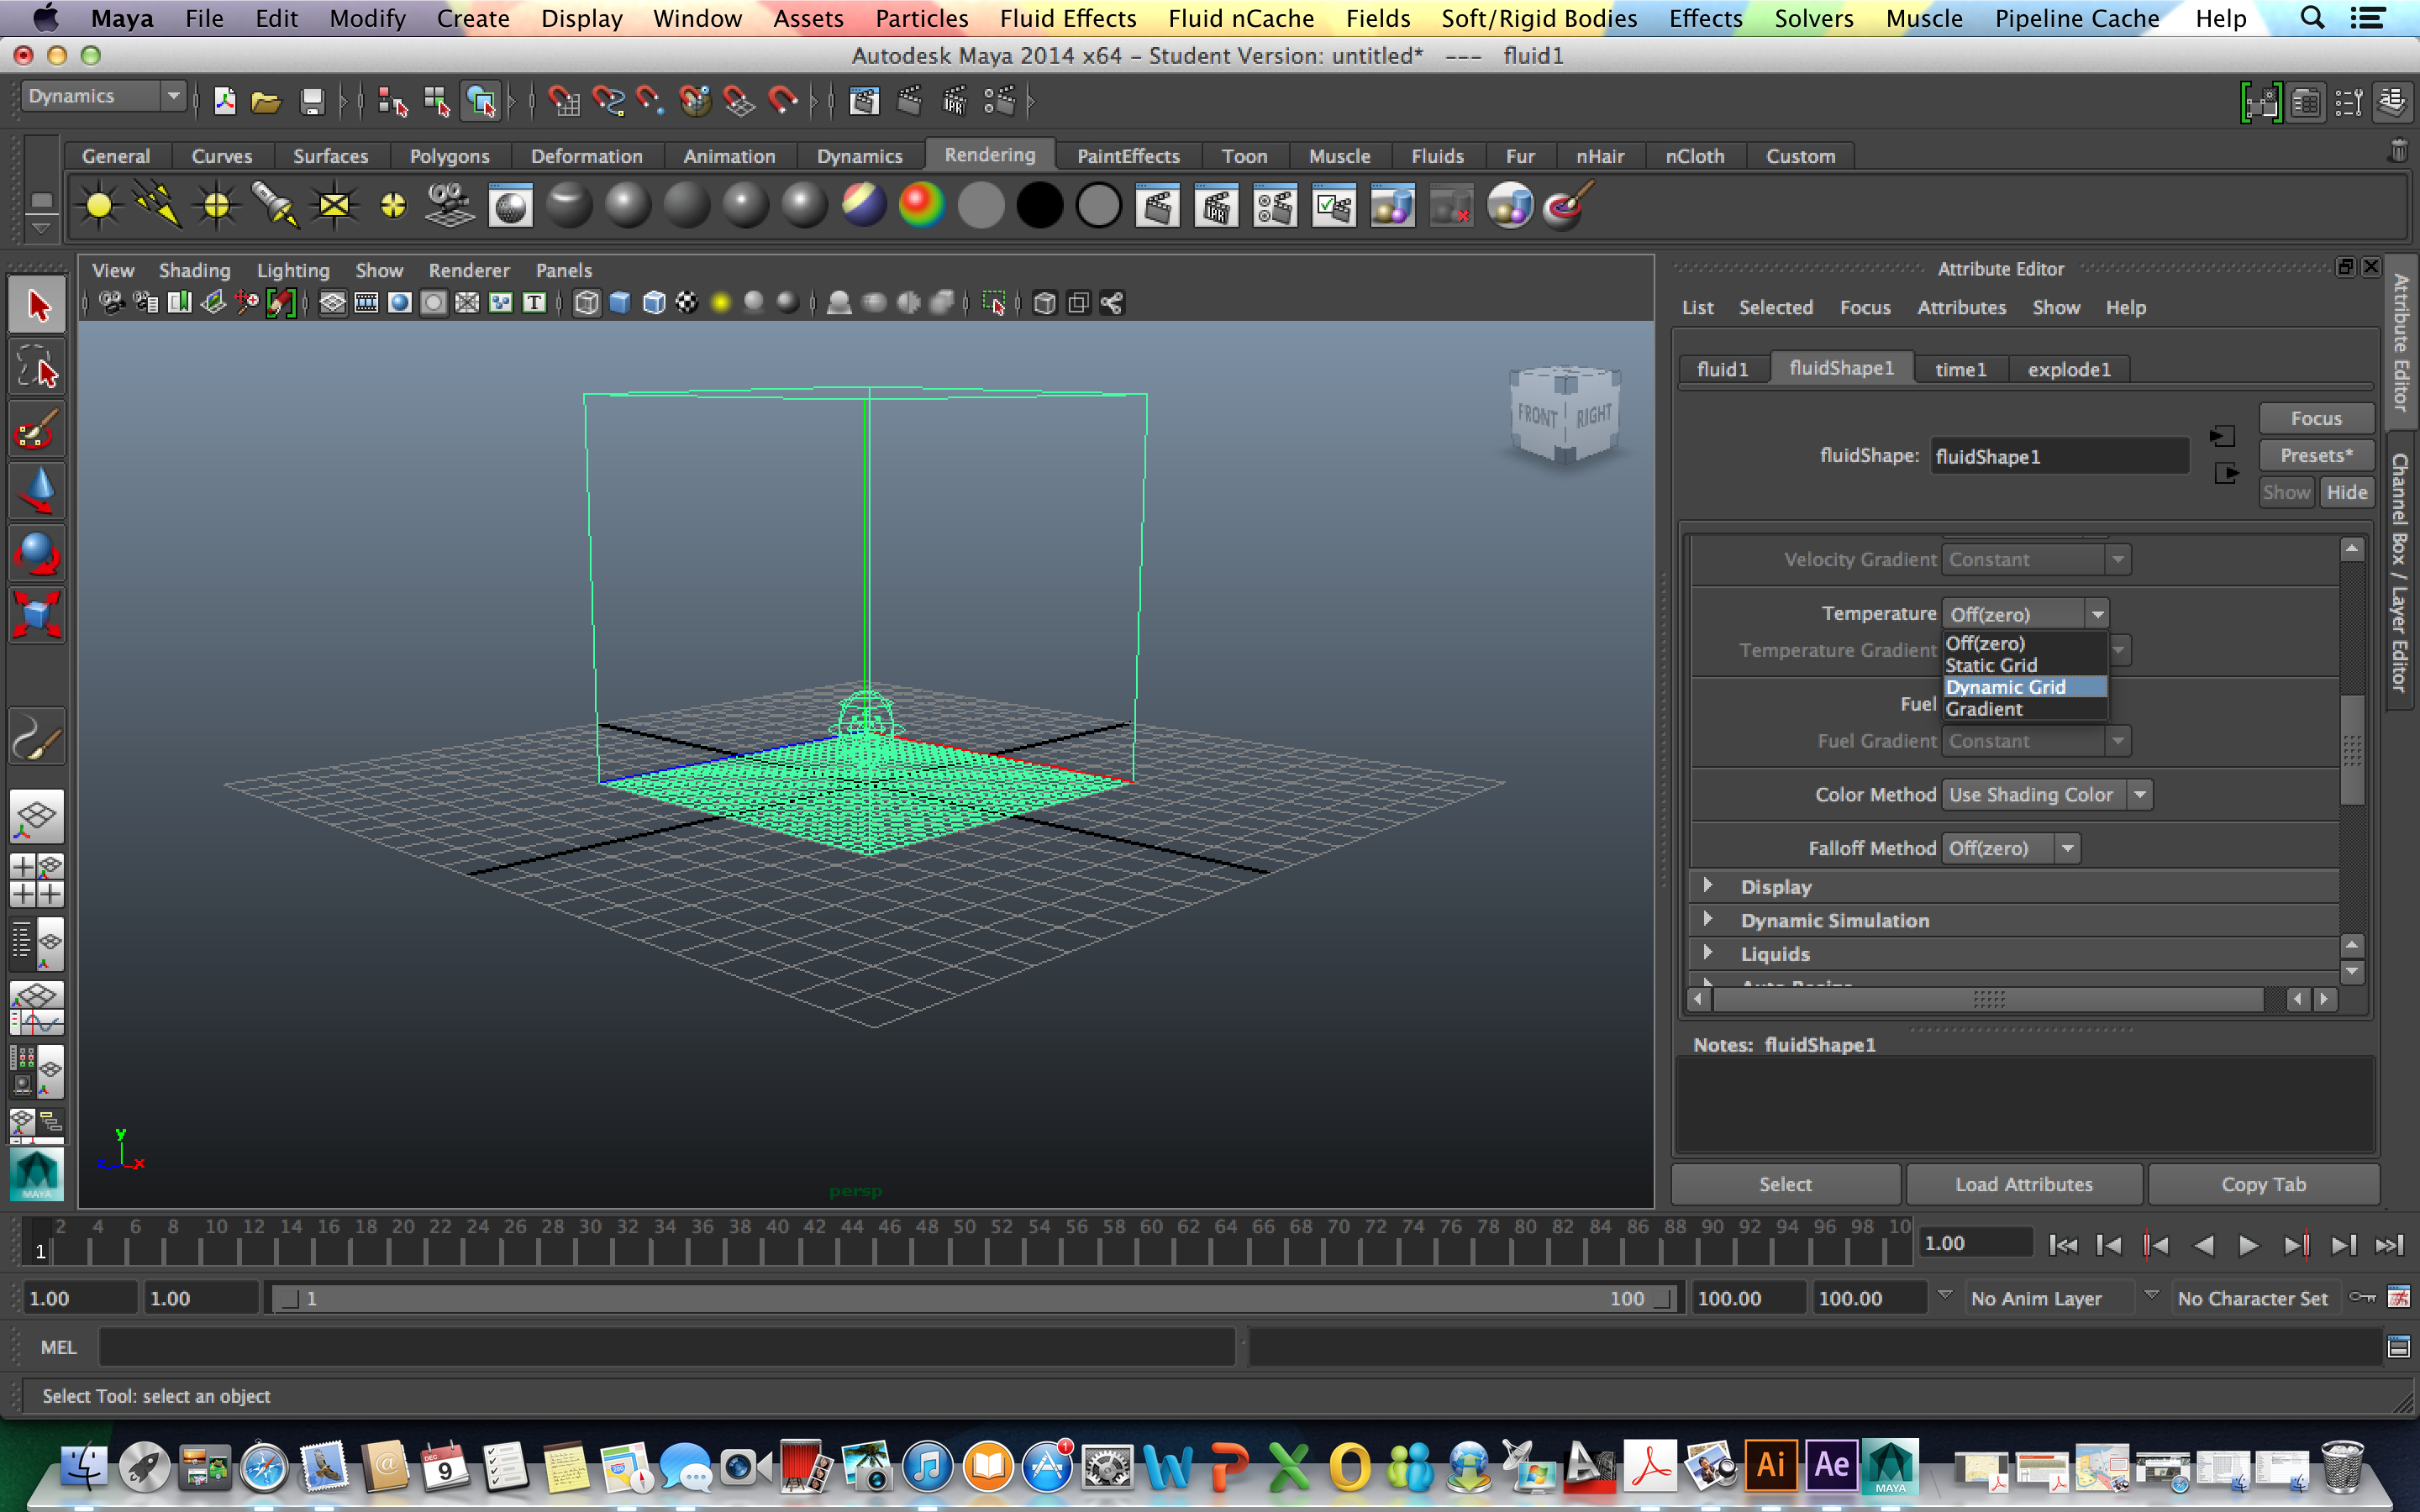
*Select the box and set the Temperature to Dynamic Grid
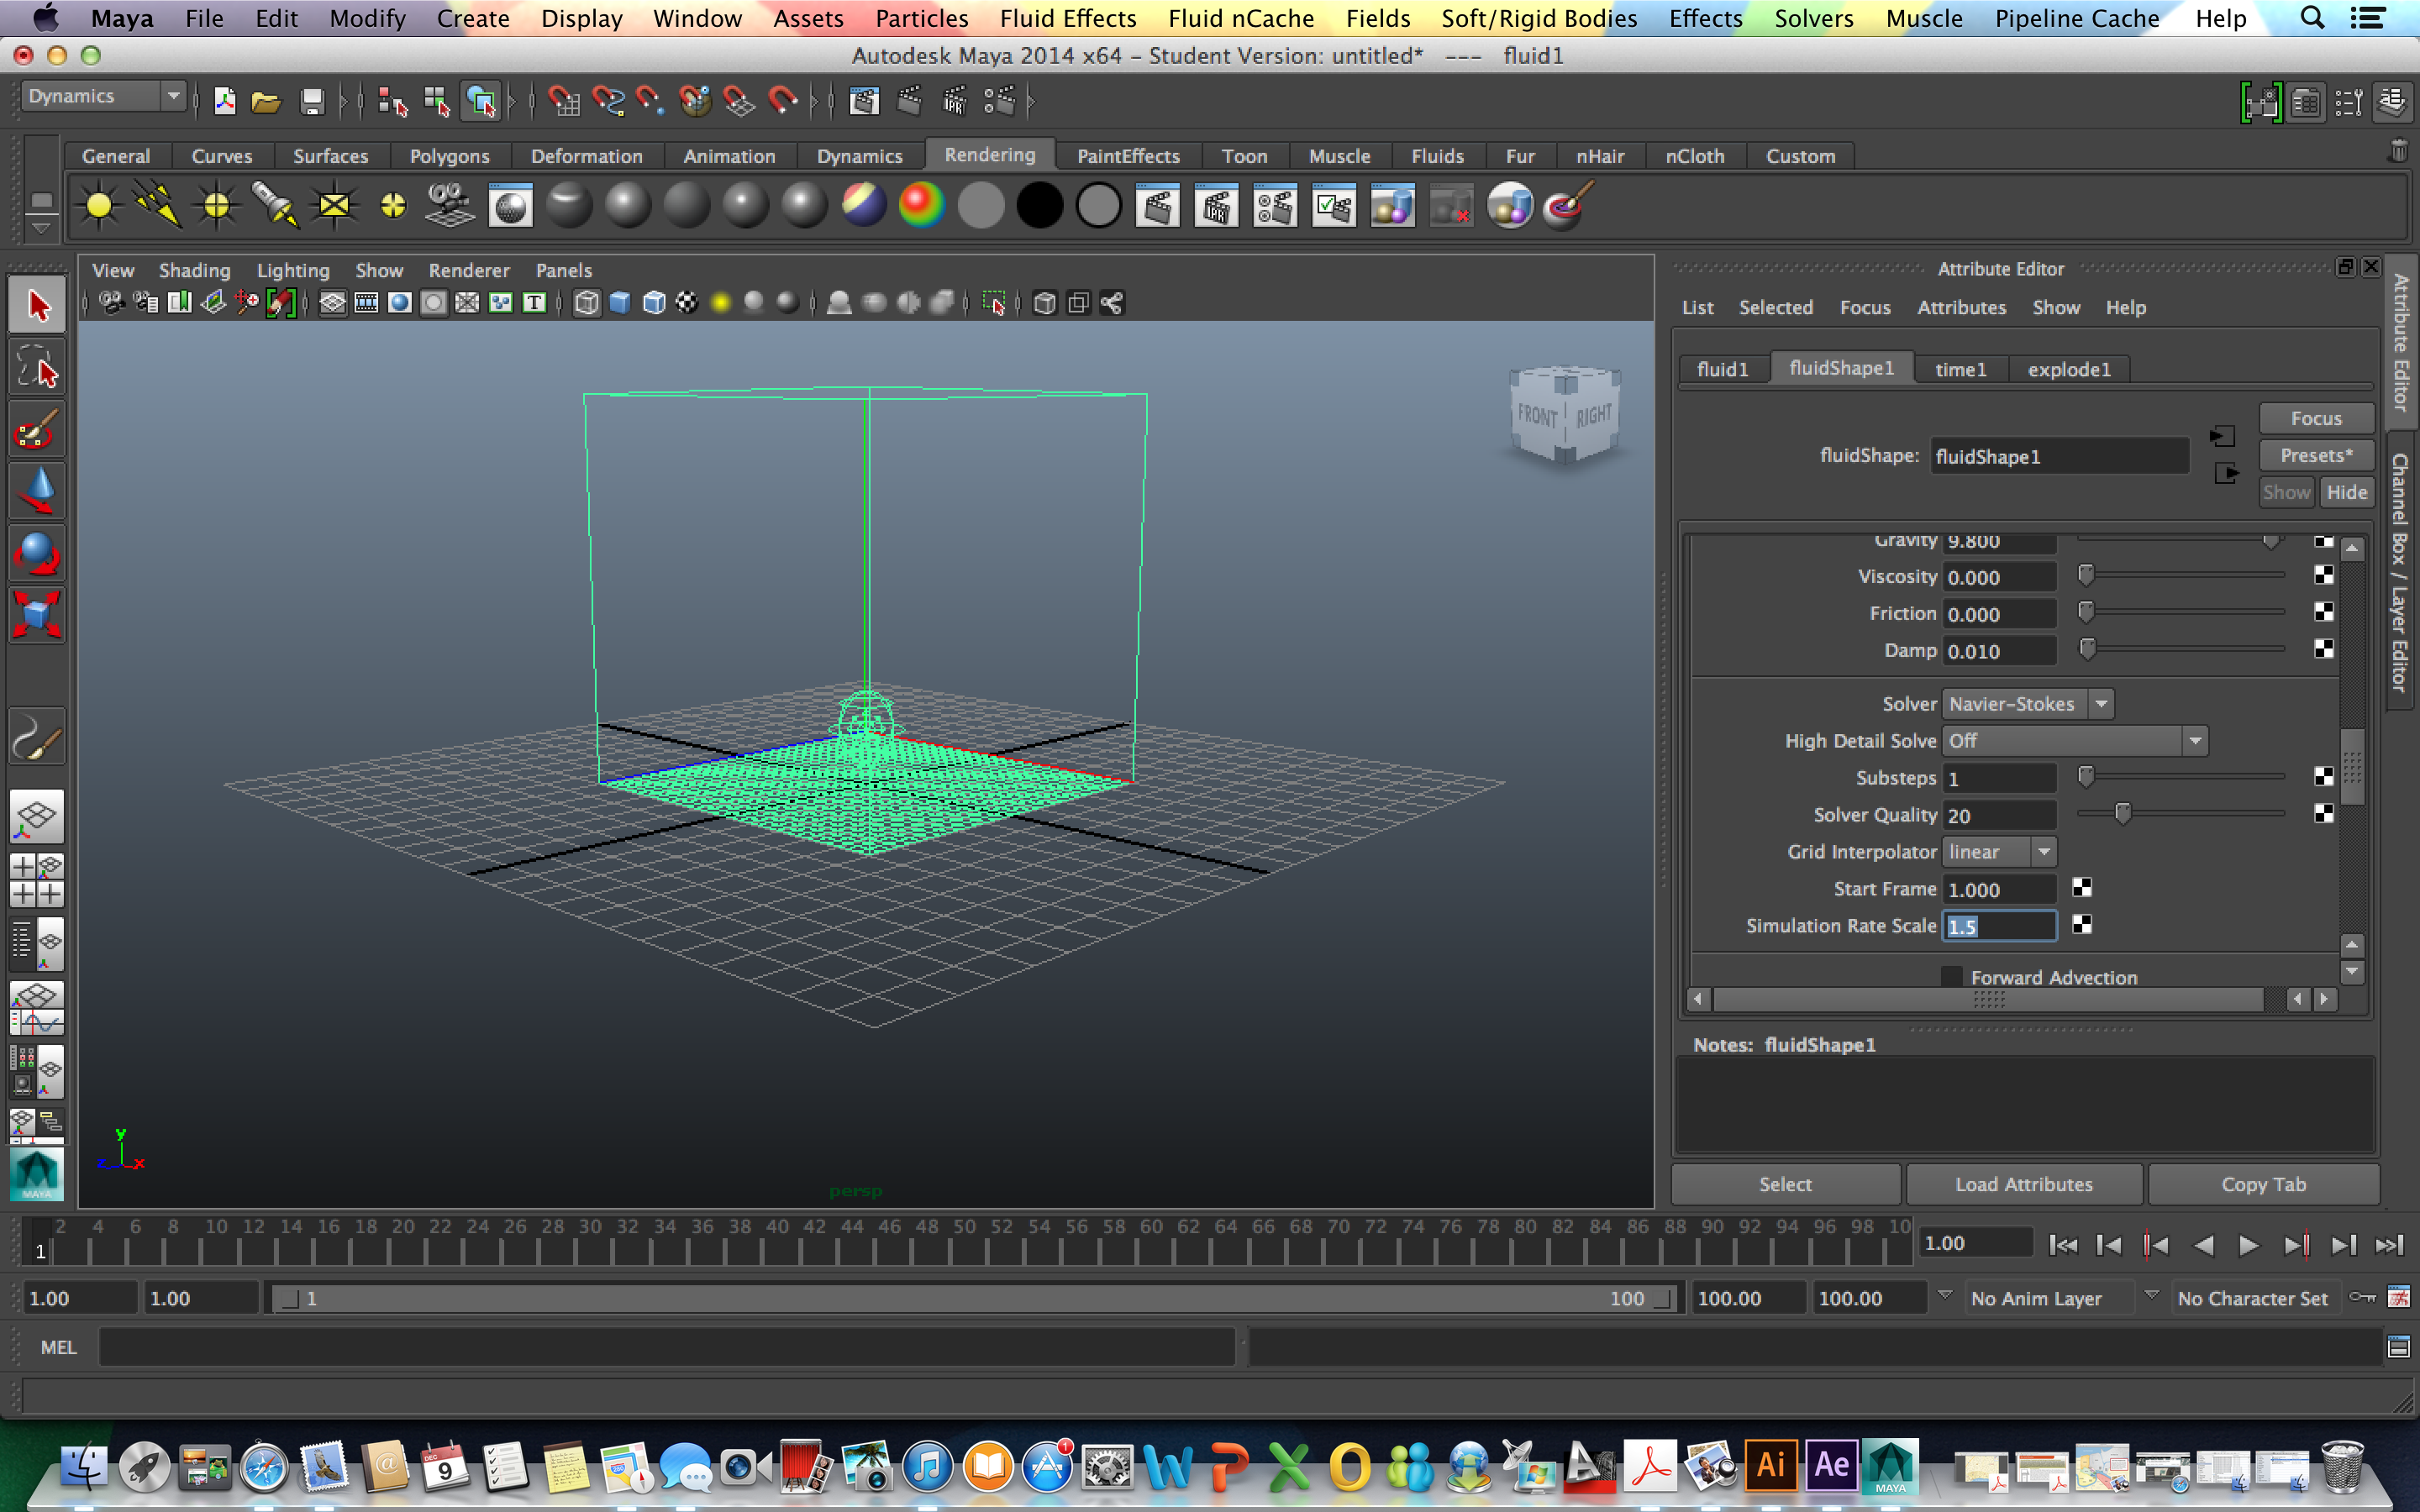
*Under Dynamic Simulation change Damp to .01 and Solver Quality to All Grids

*Increase Simulation Rate Scale to 1.5
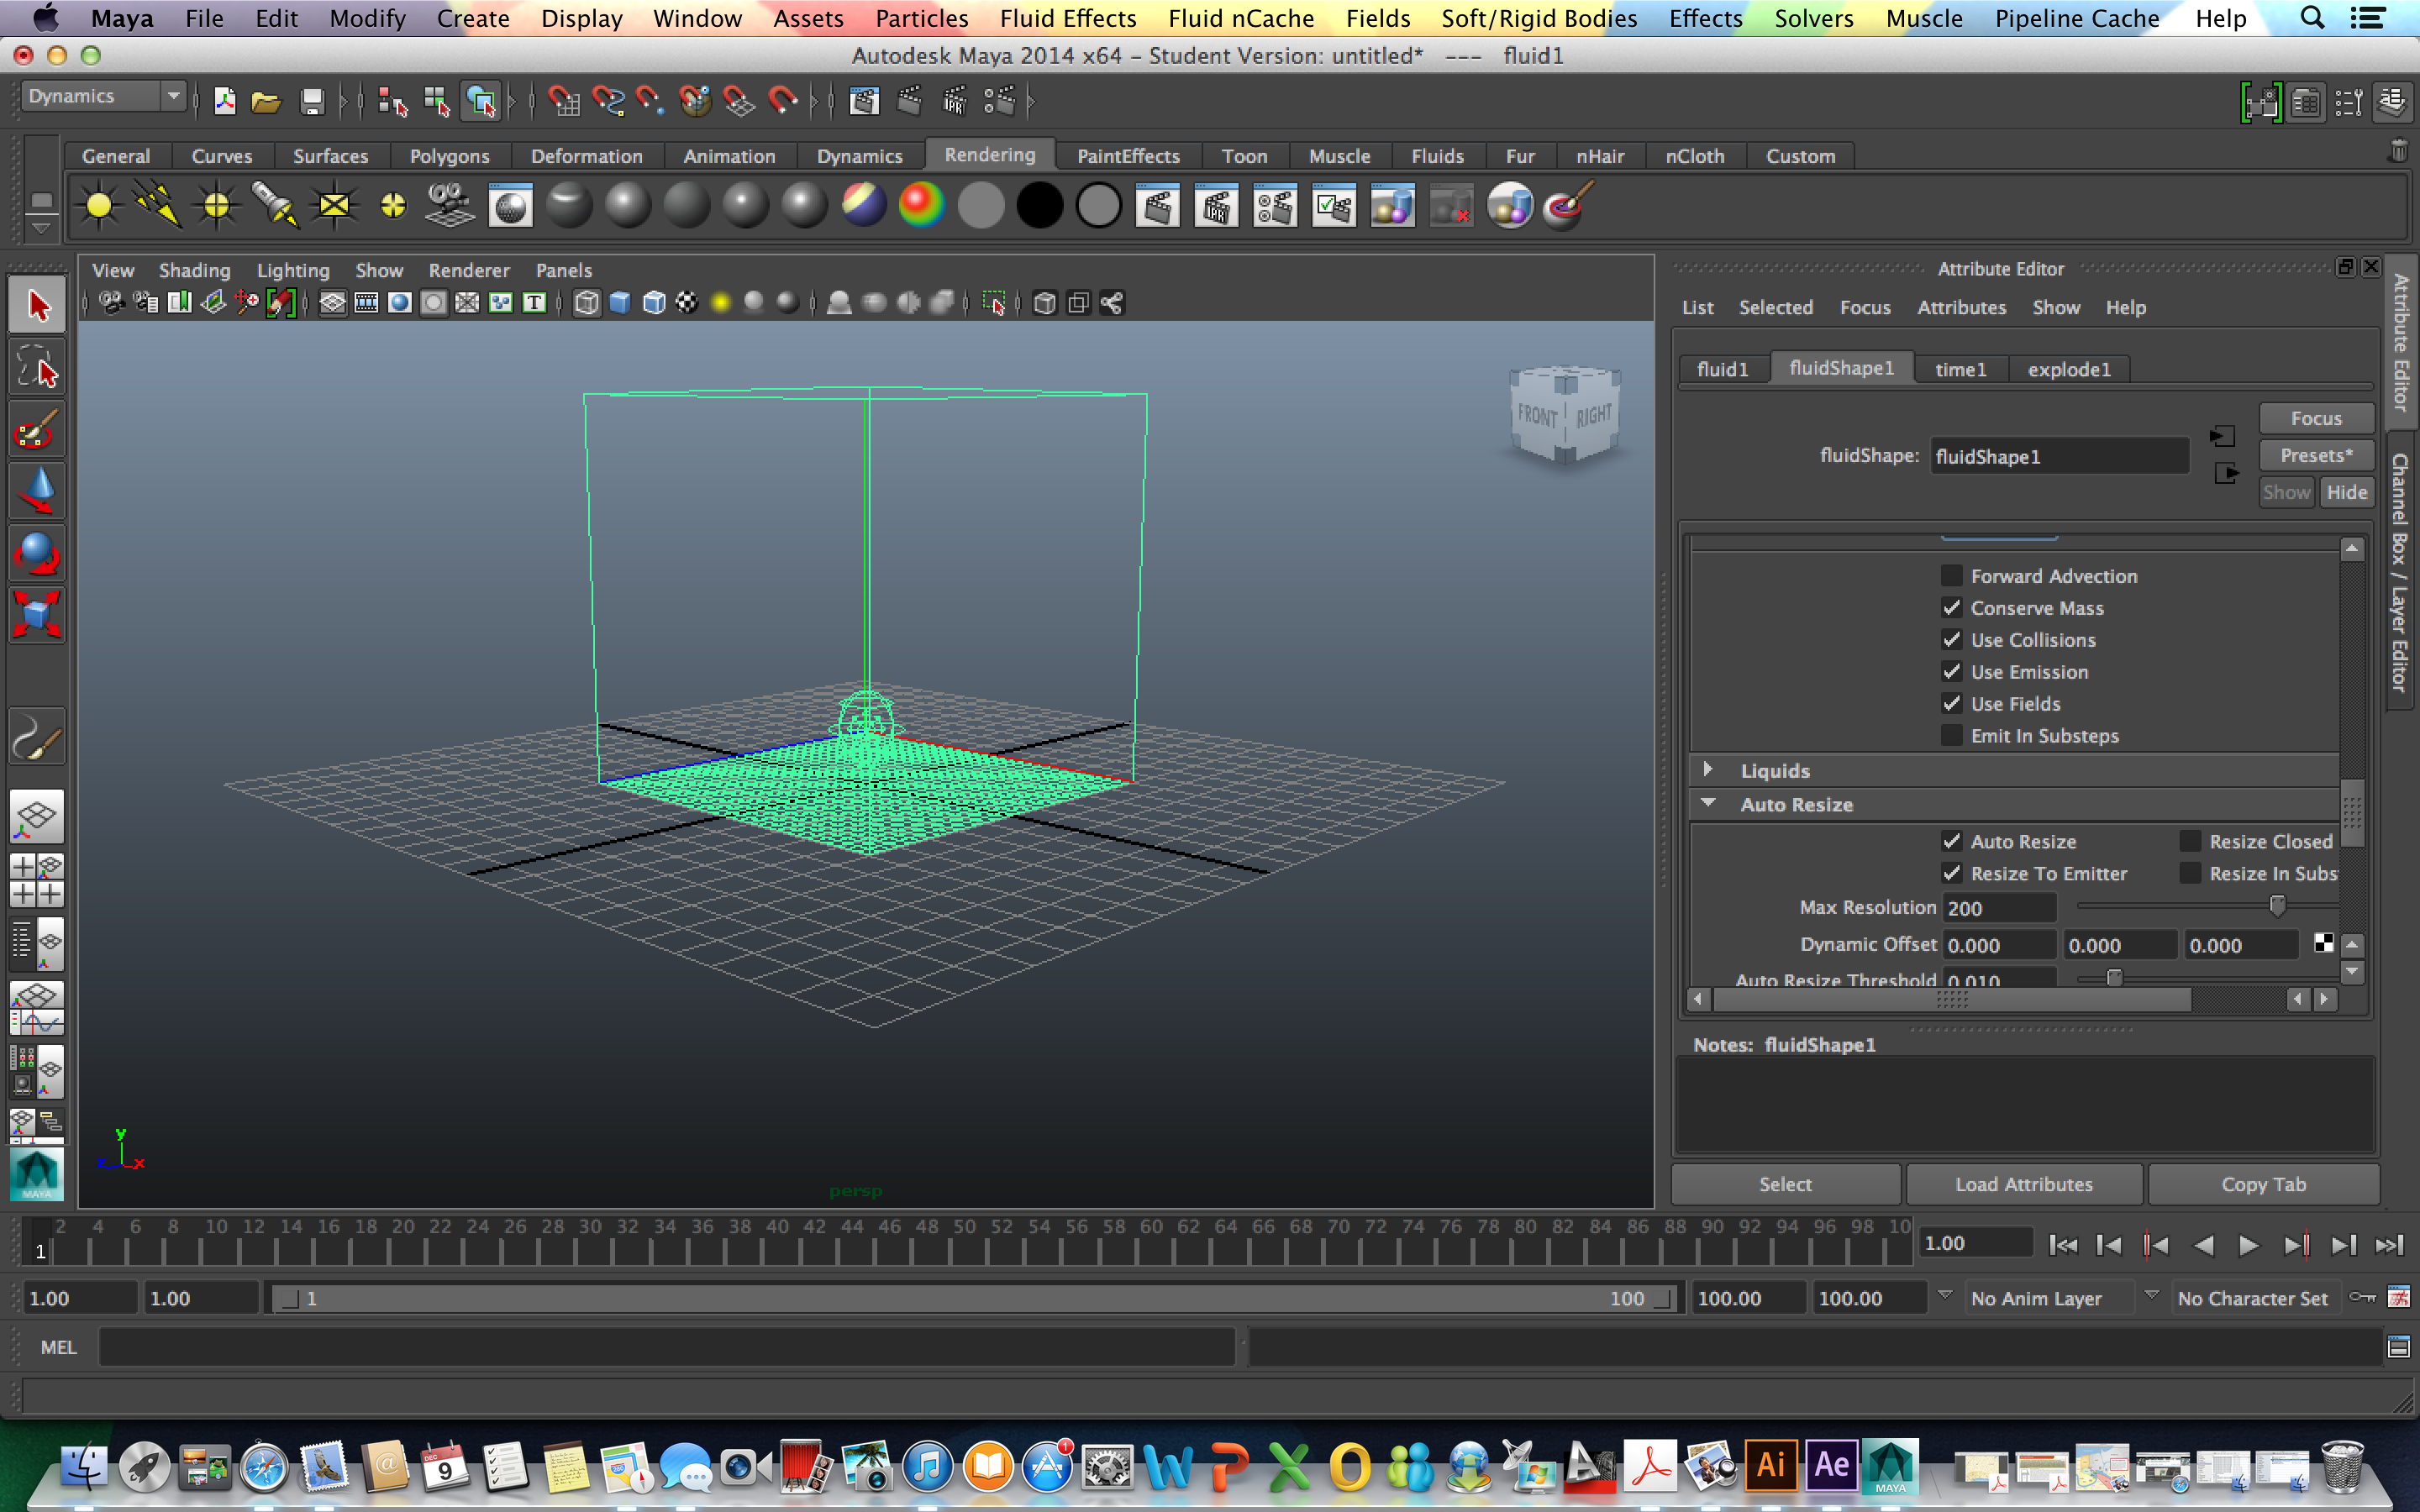
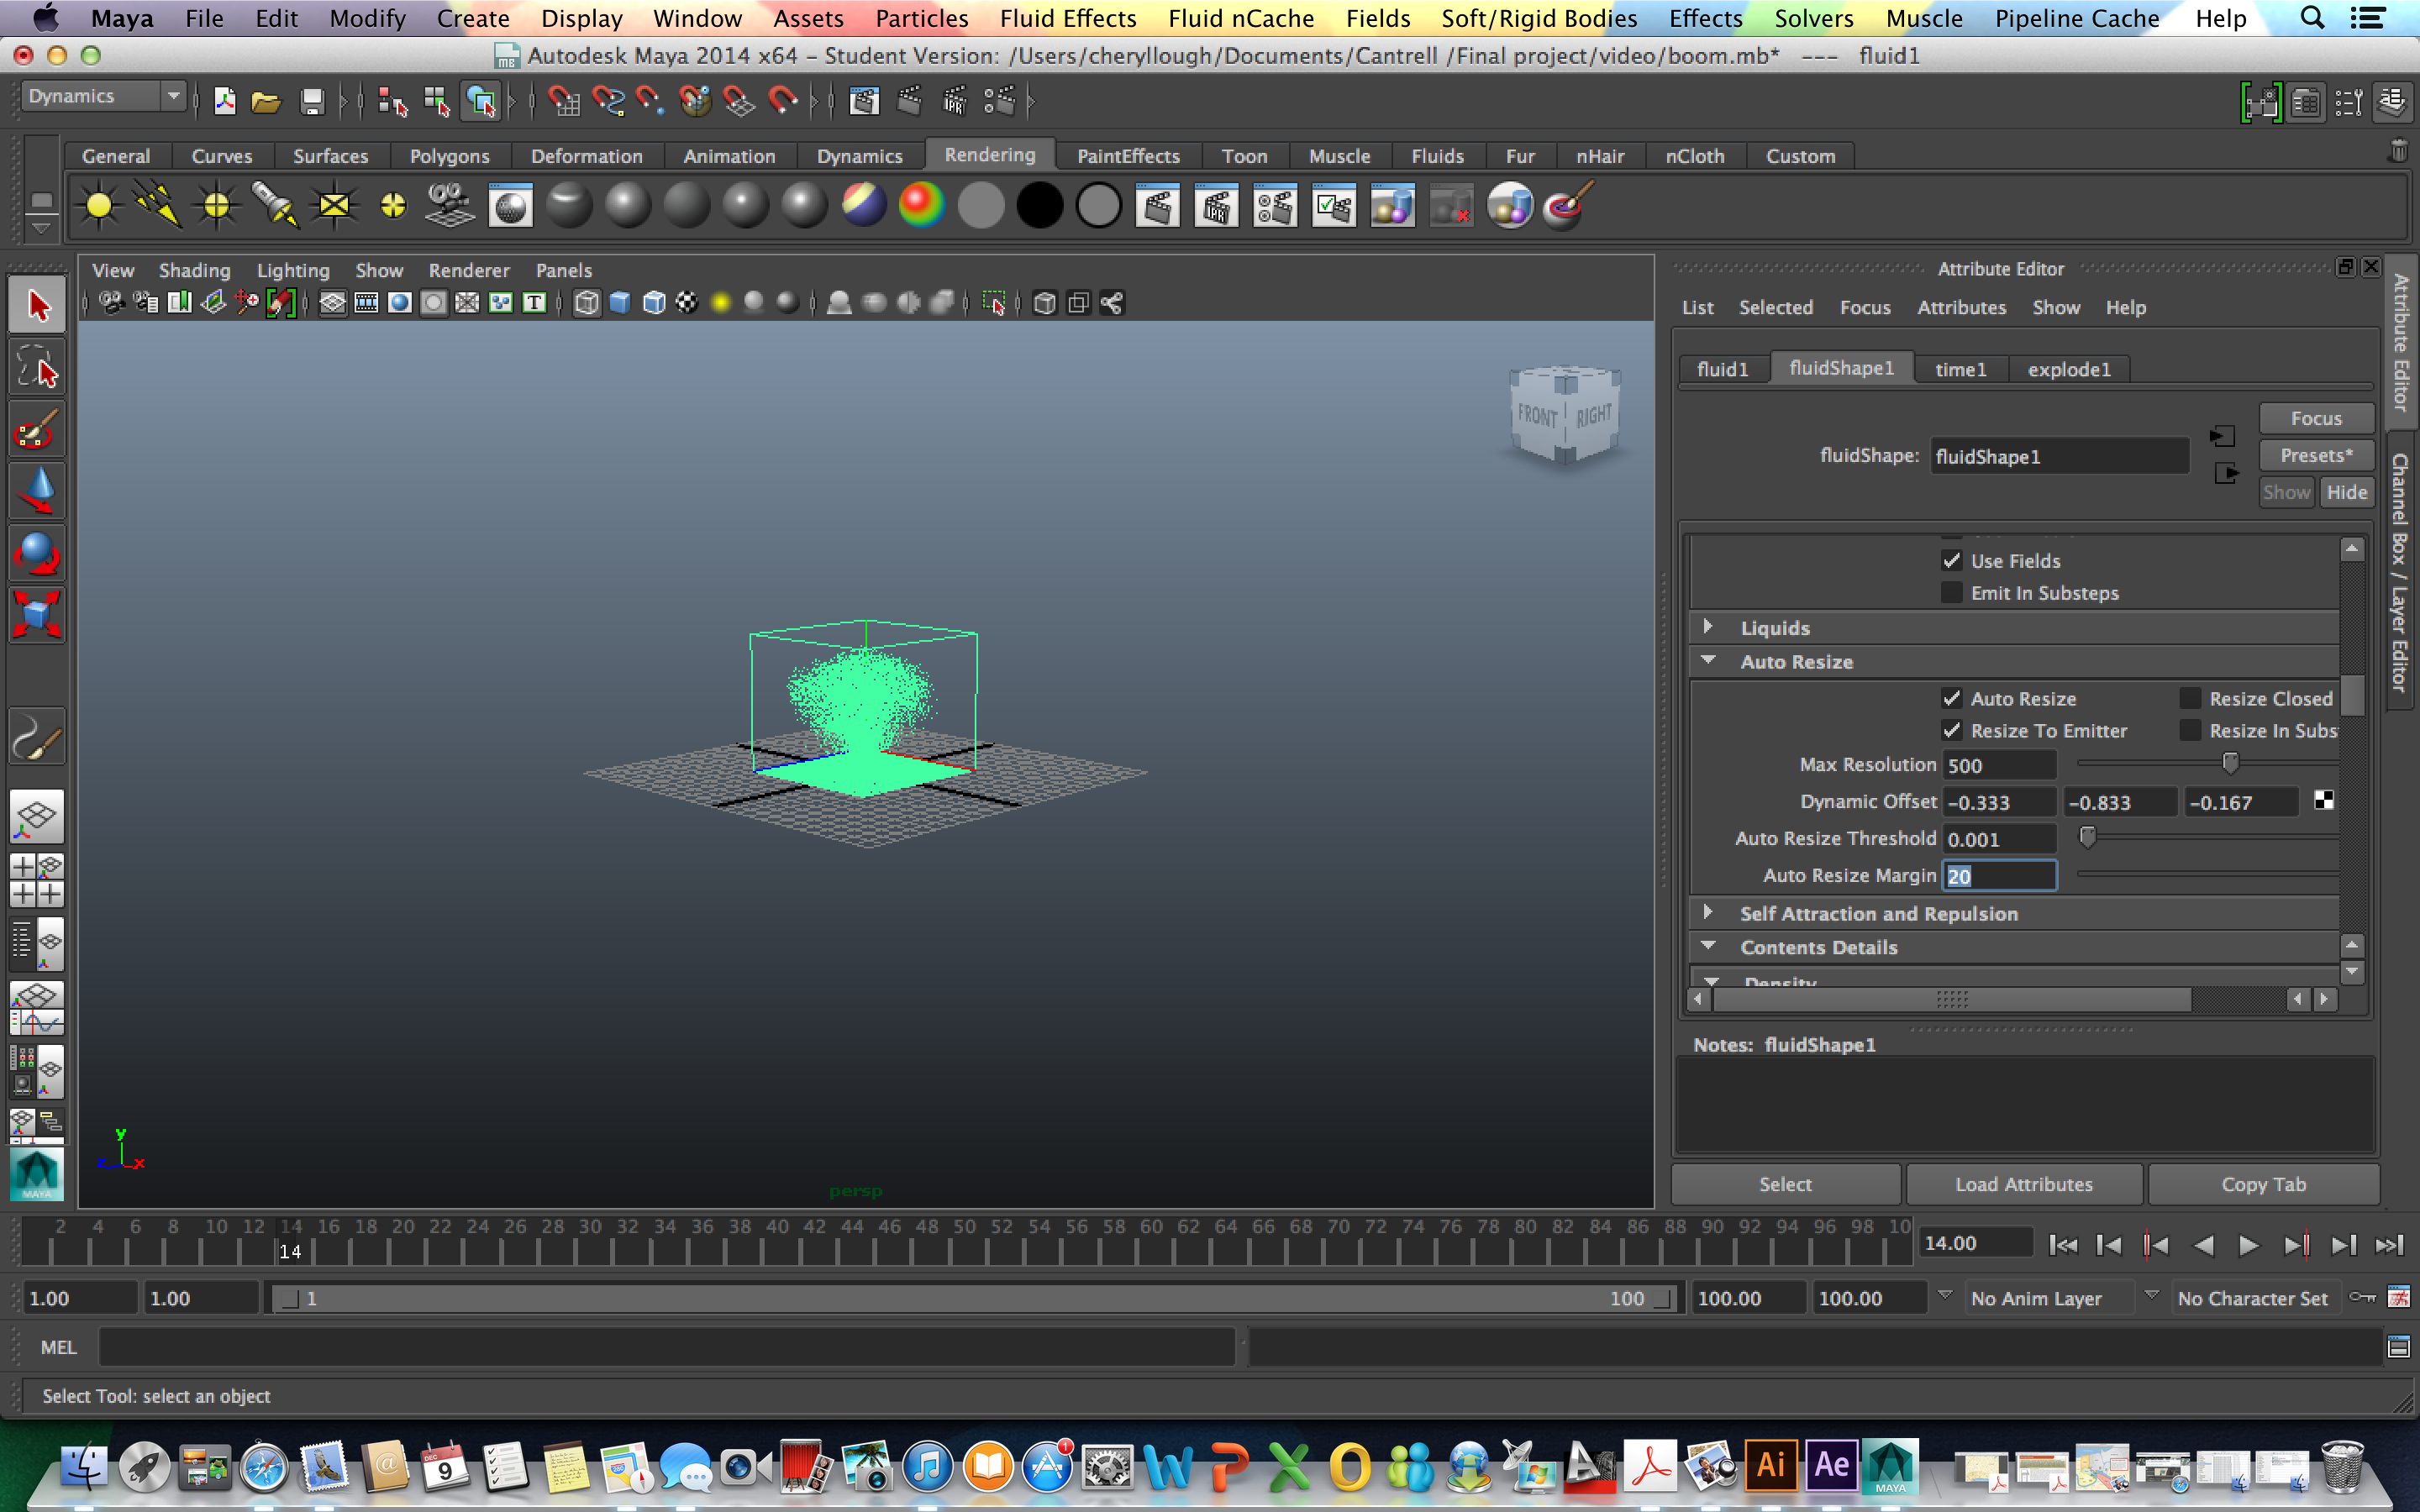
*Turn on Auto Resize and turn off Resize Closed and Resize Subs
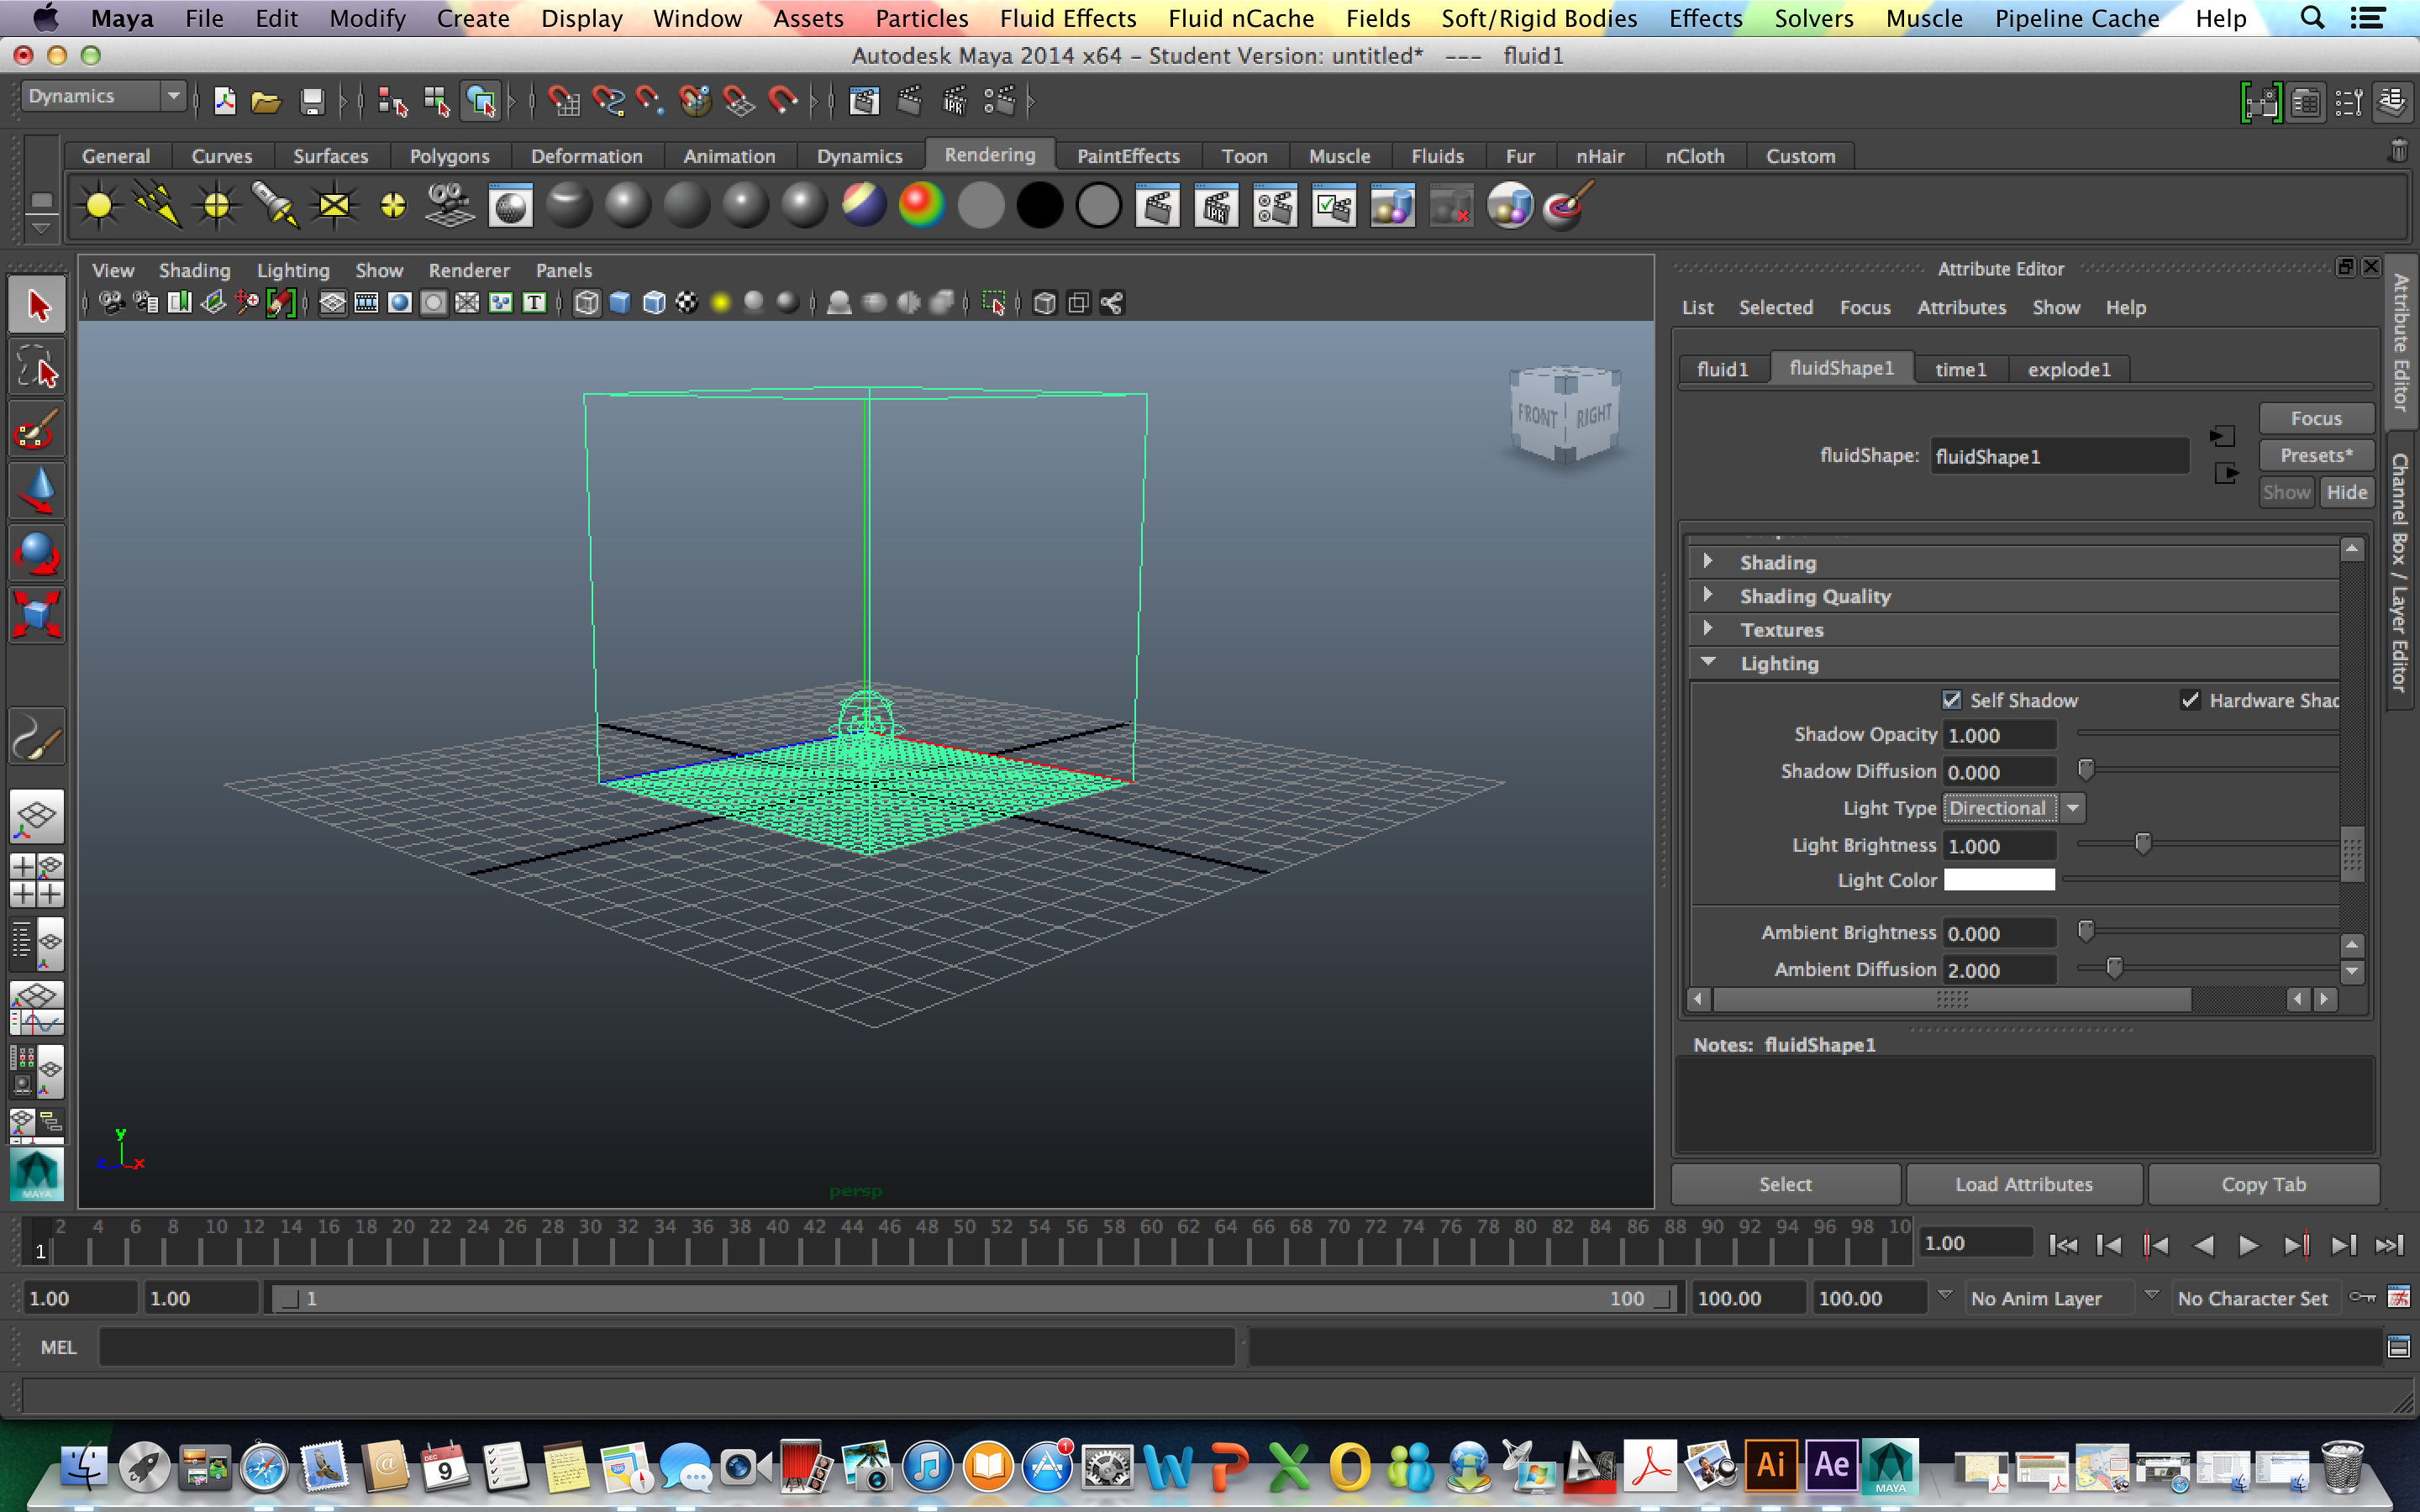
*Under Lighting, check Self Shadow and increase Shadow Opacity to 1
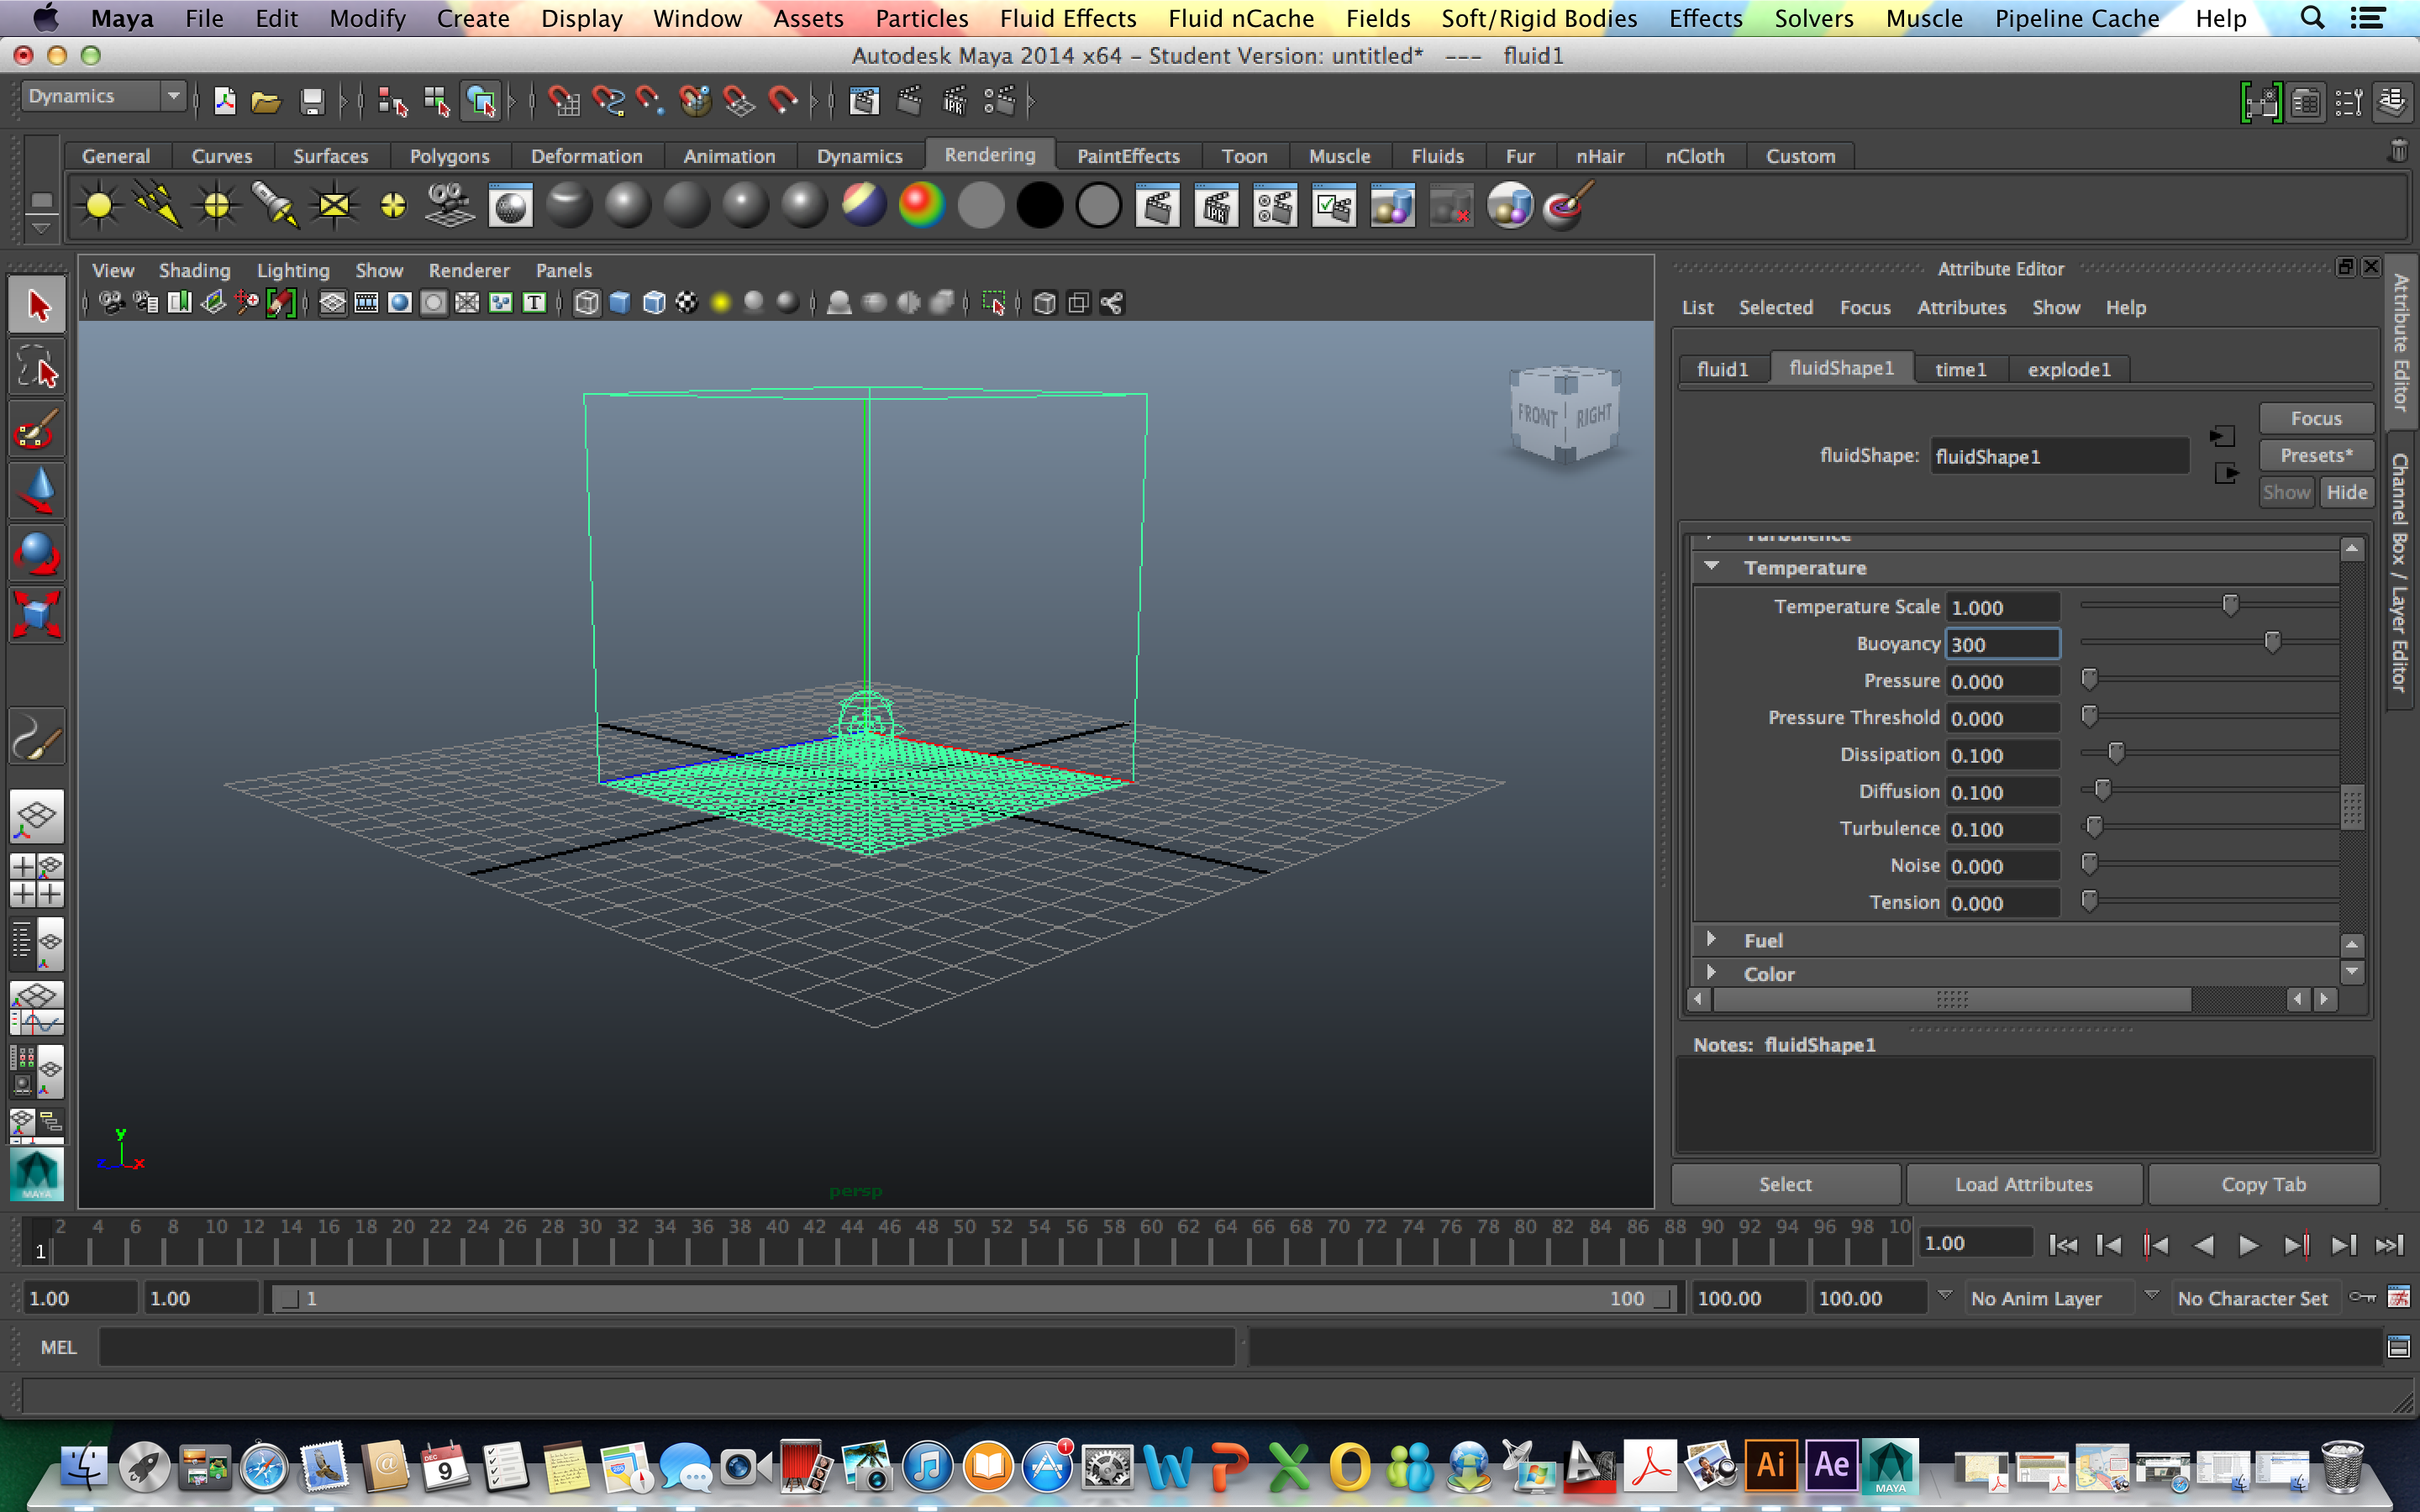
*Under Content Details, Temperature, increase Buoyancy to 300
*Increase Dissipation to 1.2 and increase Turbulance to 120

*Under Velocity, increase Swirl to 5.0
*Under Density, decrease Buoyancy to 0.5 and Dissipation to .2
*Under Shading, adjust Transparency
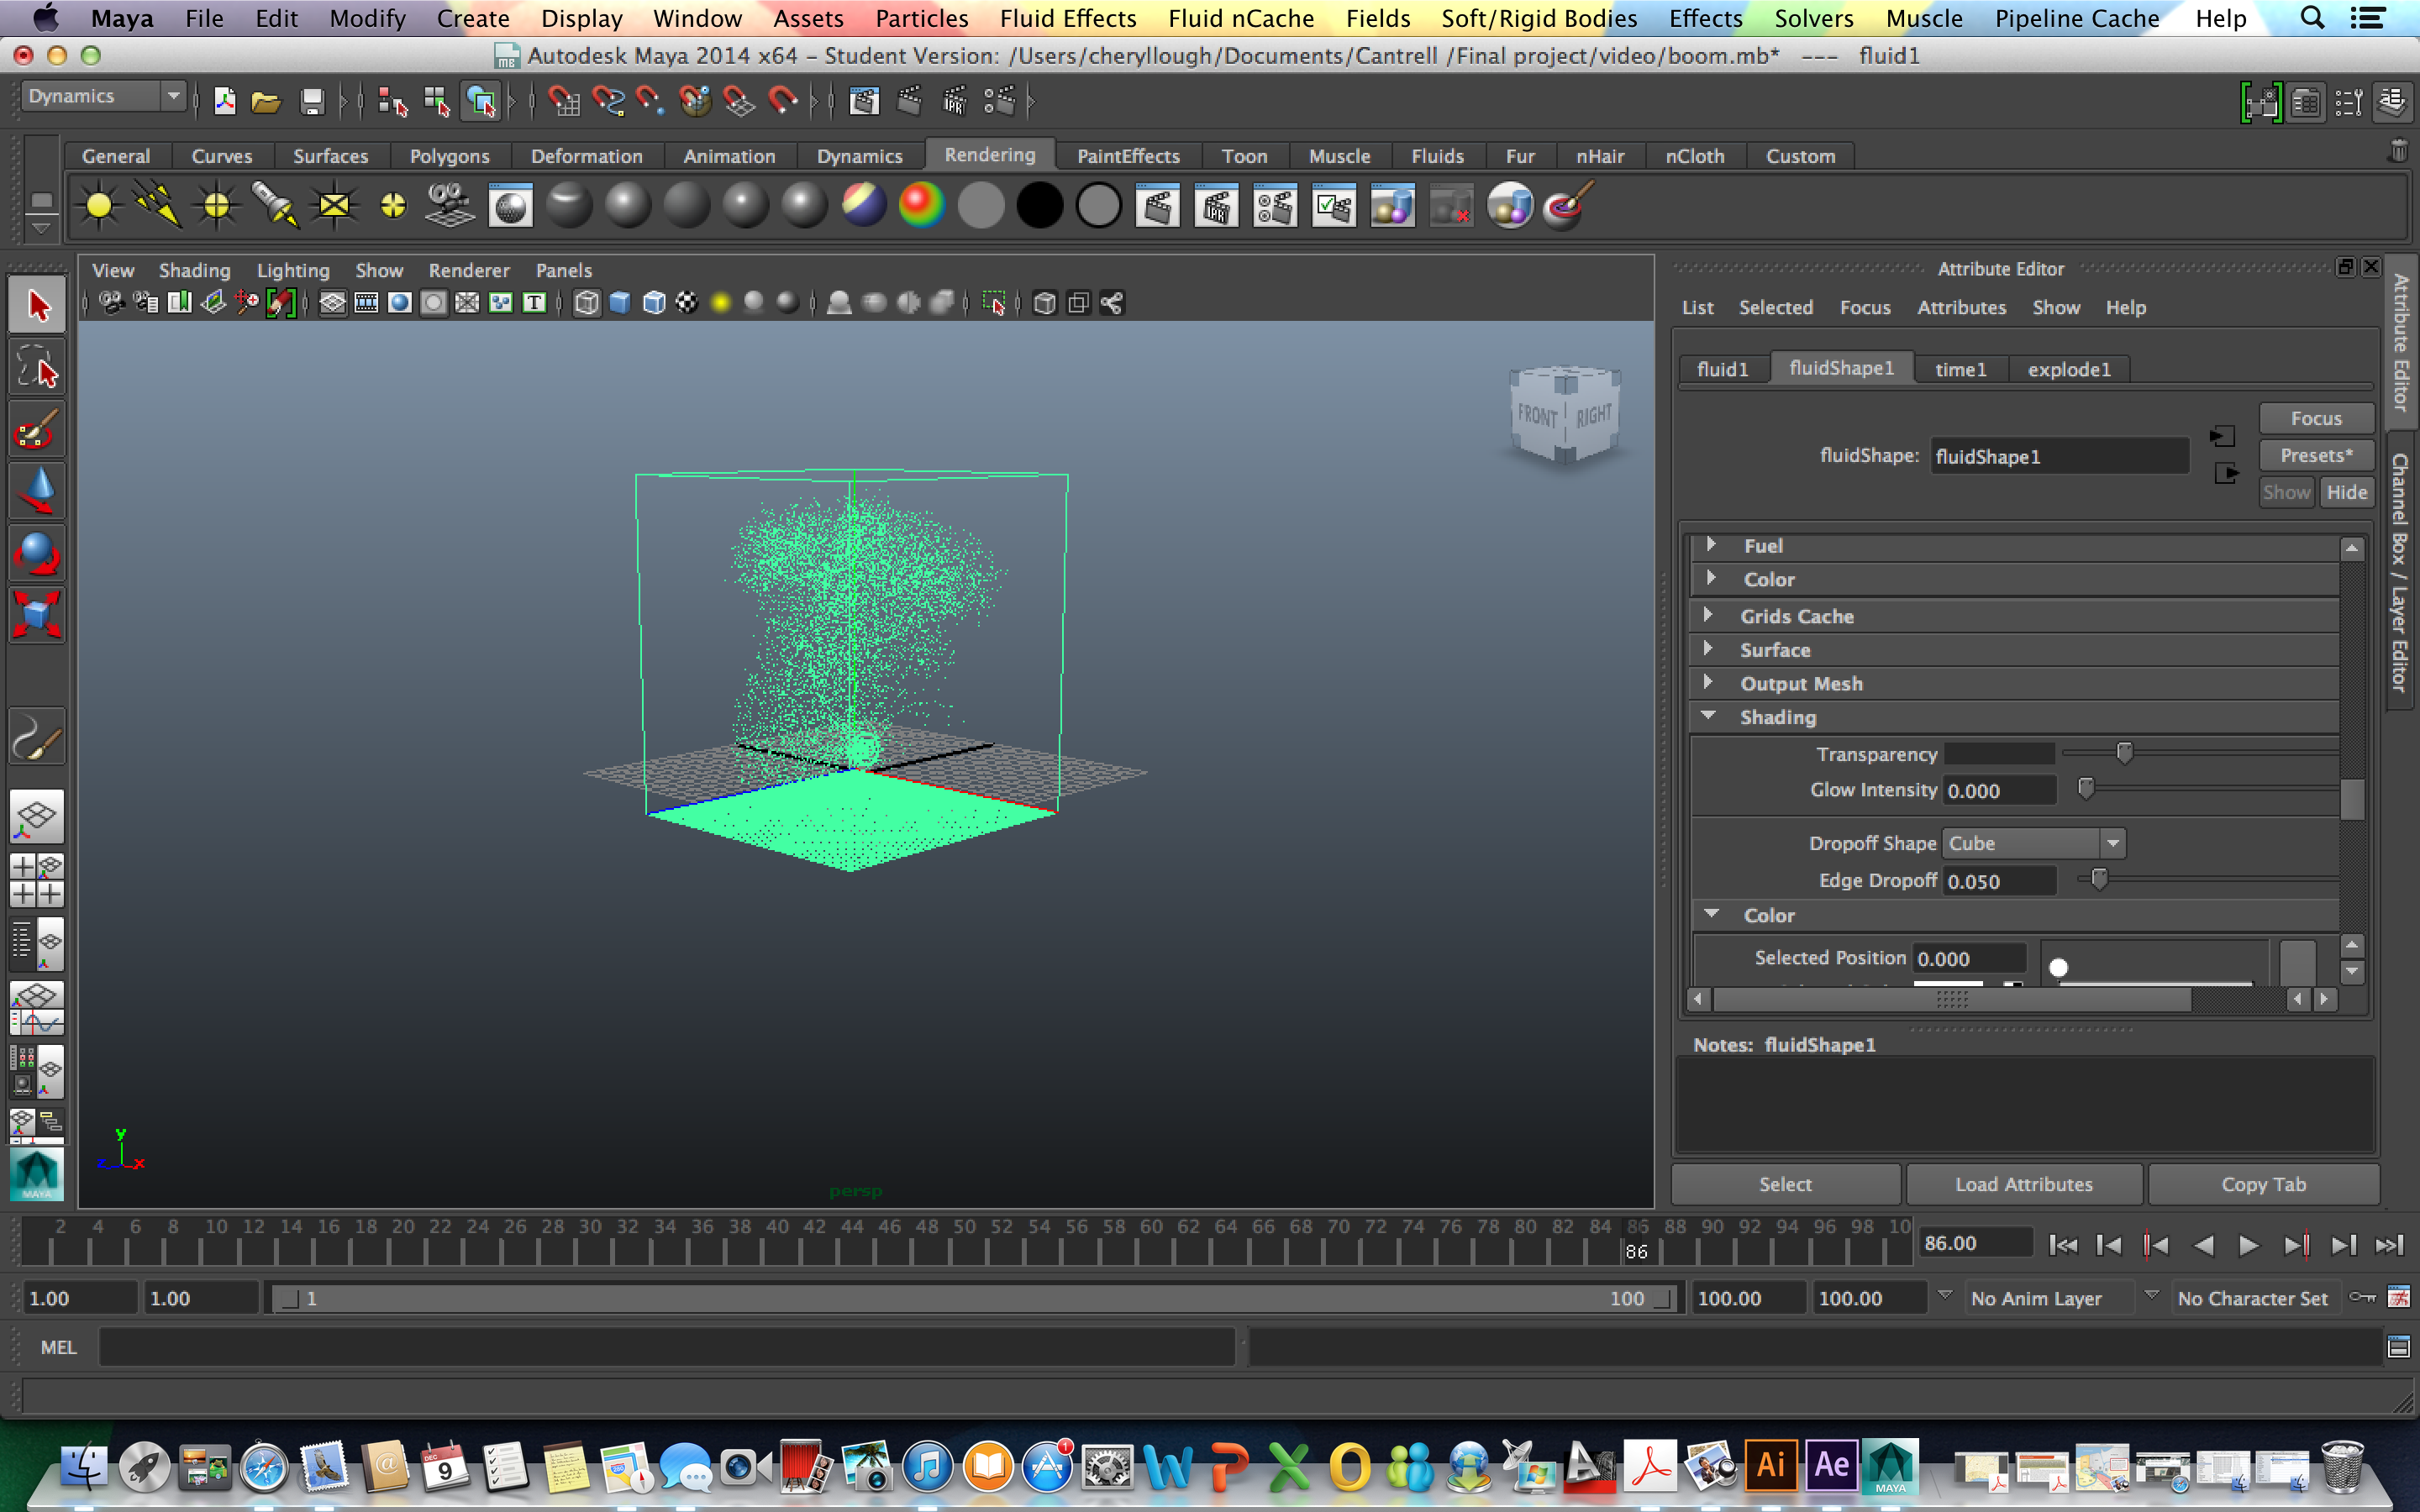
*Under Color, Adjust Color Input to Temperature and change selected colors to black and grey


*Under Auto Resize, change Max Resolution to 500, Auto Resize Margin to 6 and Auto Resize Threshold to 0.001
*Under Incandescence, increase the V value under the yellow dot to 3

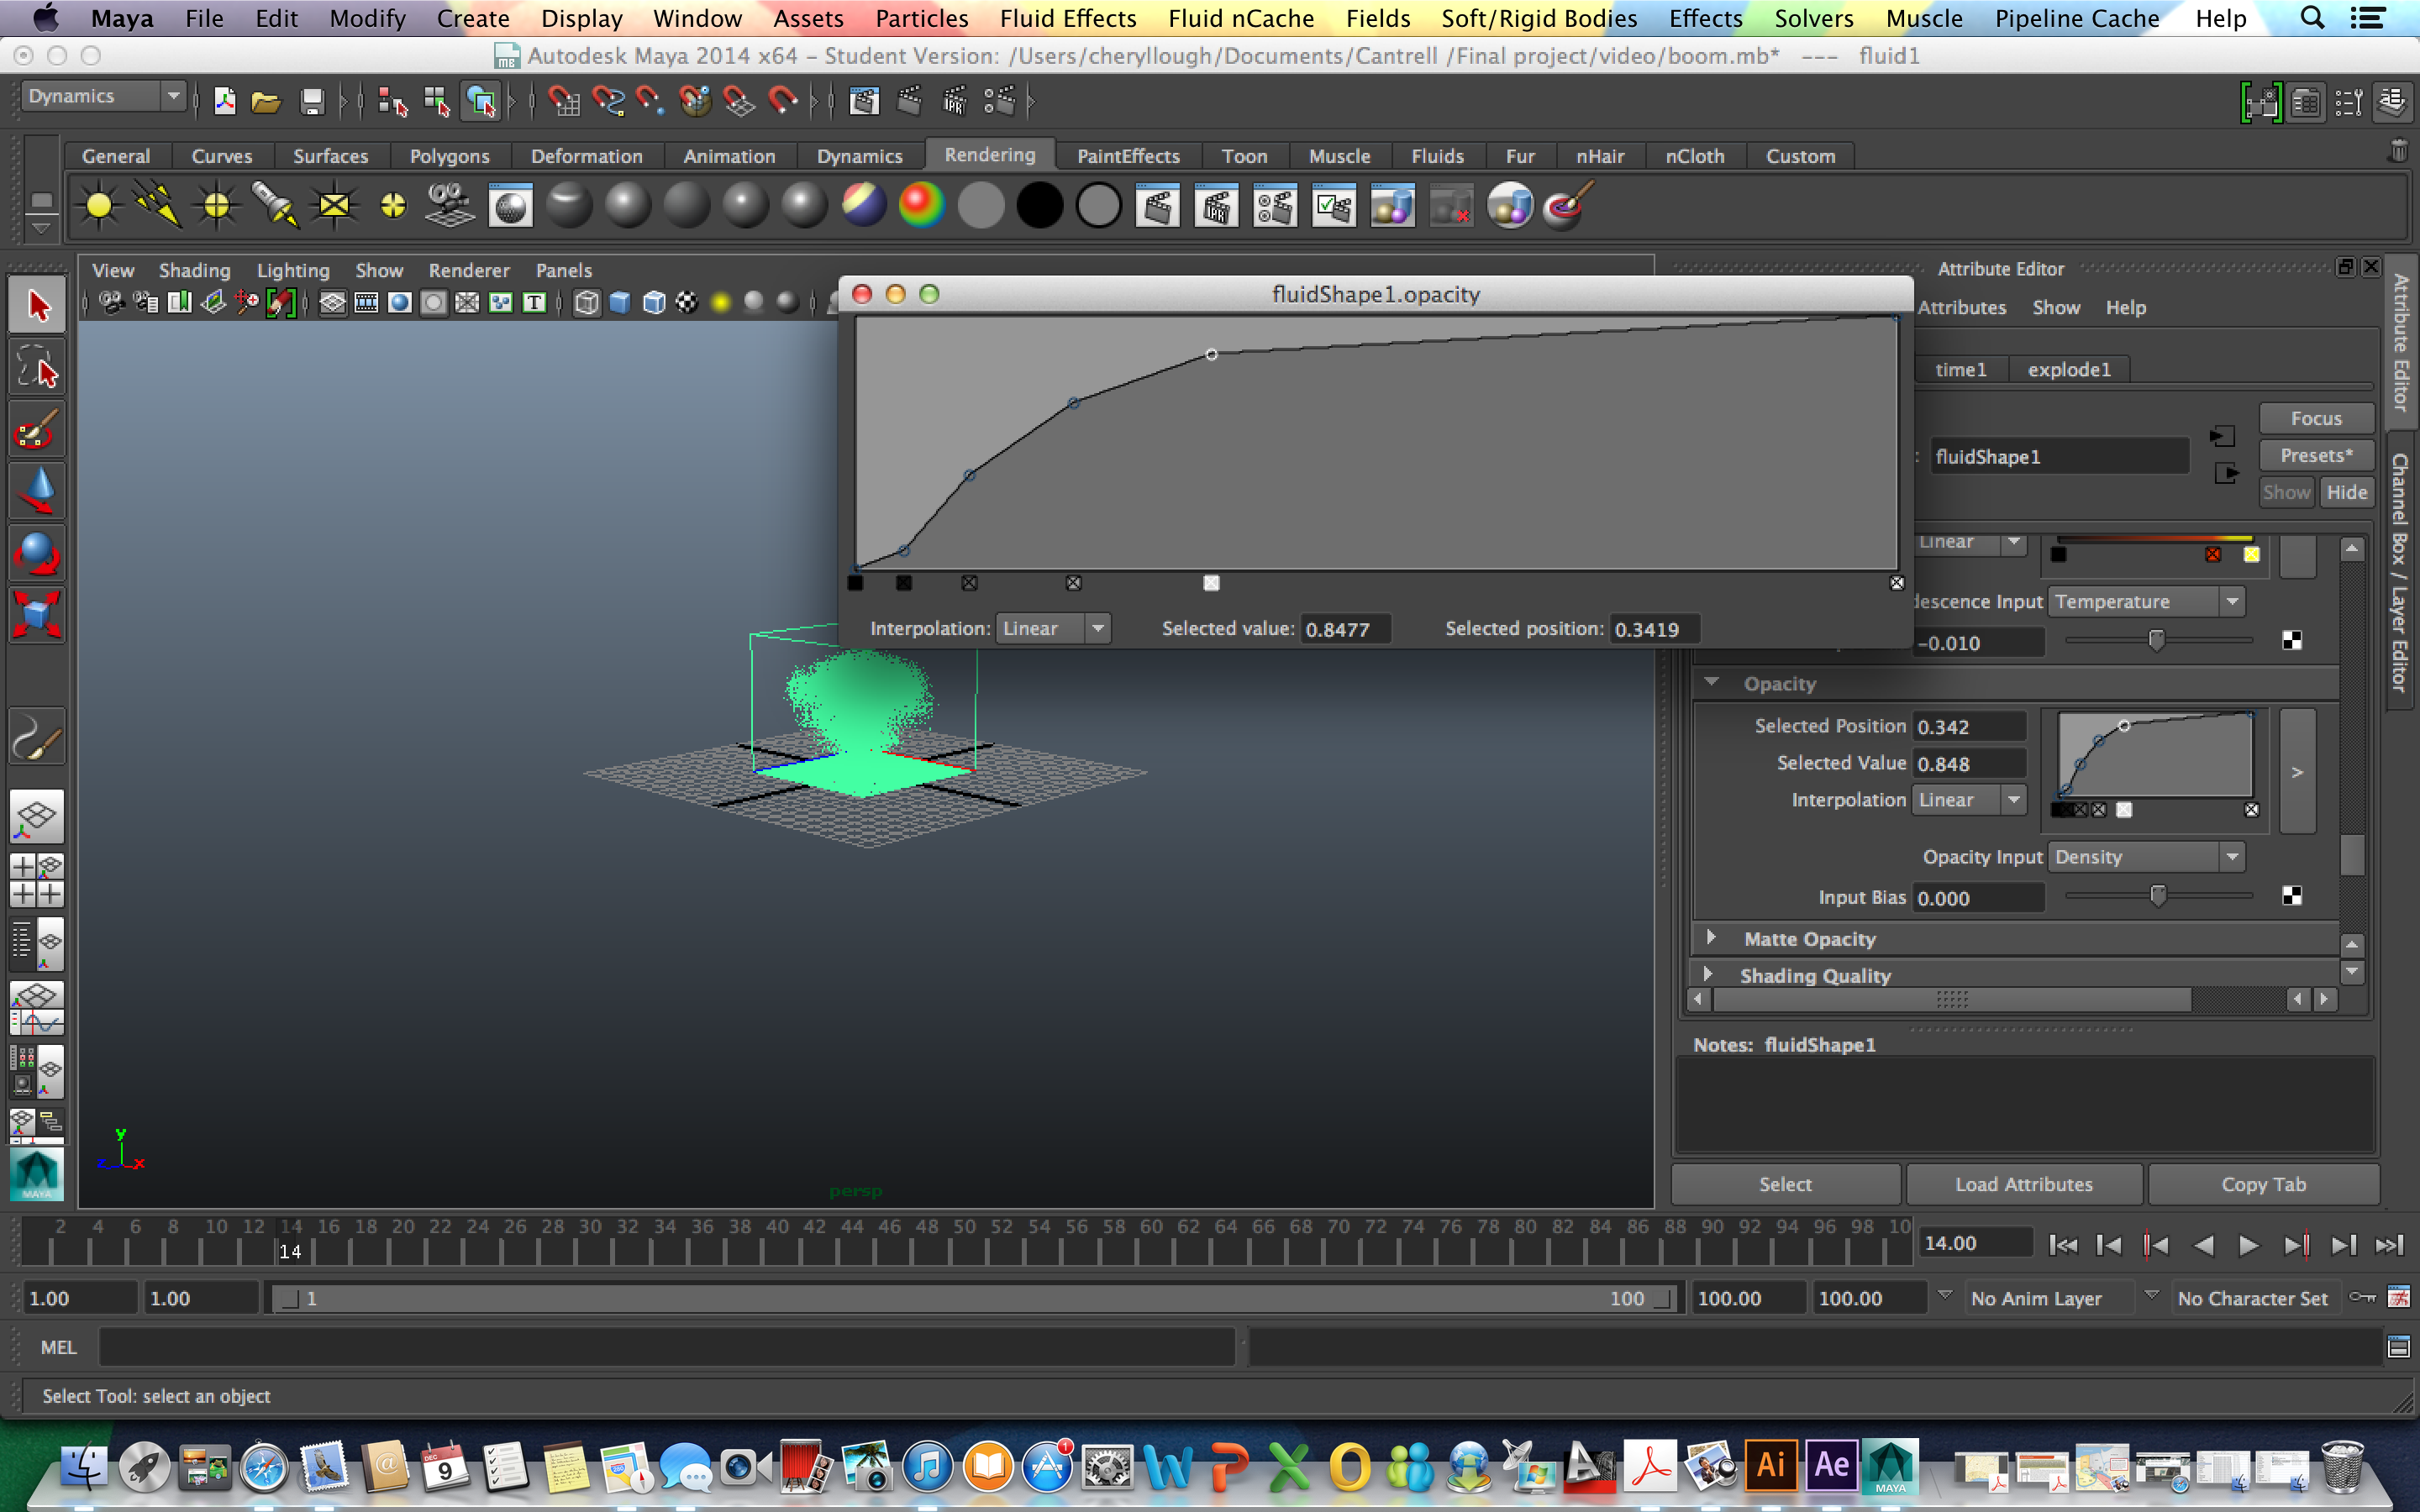
*Under Opacity, adjust the curve
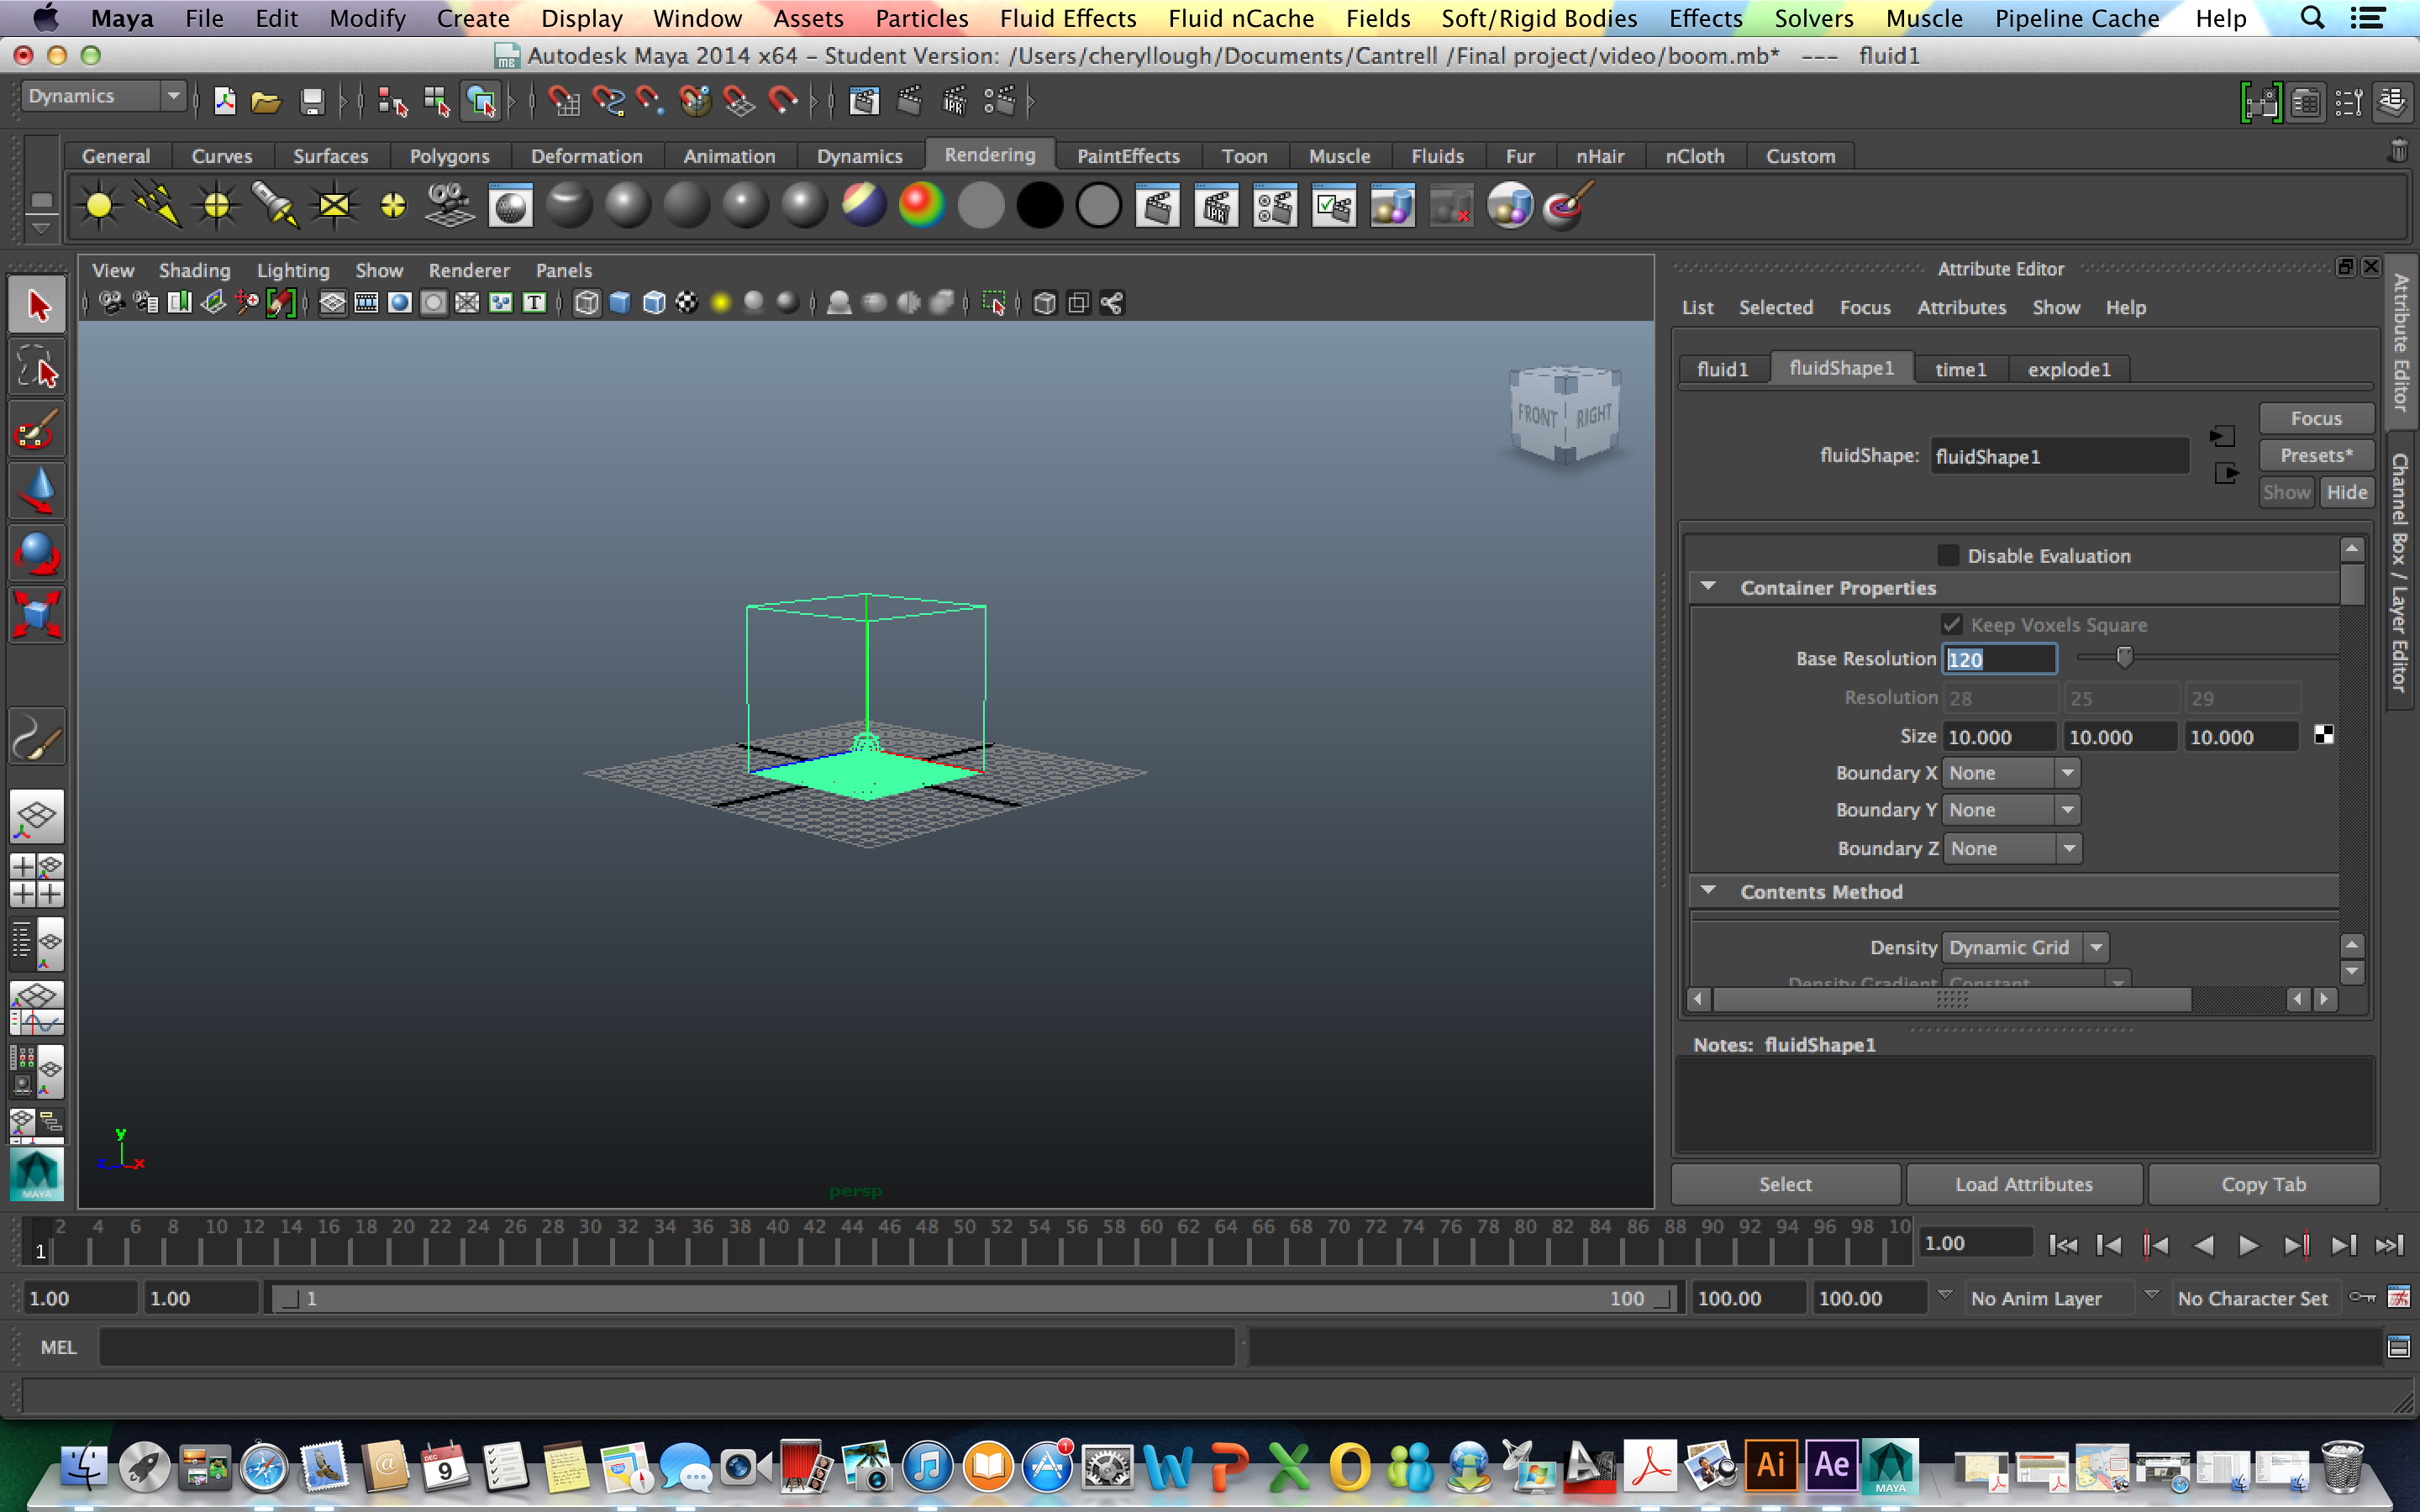
*Under Container Properties, change the Base Resolution to 120
*Batch Render