Adding Time Lapse Sequence to After Effects
Time-lapse photography is a technique whereby the frequency at which frames are captured is much lower than that used to view the sequence. When played at normal speed, time appears to be moving faster. For example, an image of a scene may be captured once every second, then played back at 30 frames per second. The result is an apparent 30-times speed increase. Time-lapse photography can be considered the opposite of high speed photography or slow motion. (Wikipedia)
The first use of time lapse photography was to settle a bet (supposedly). During the 1870’s horse aficionados debated whether all four hooves of a galloping horse left the ground at the same time, essentially making the horse airborne for a split second. Because this couldn’t be seen with the naked eye, an Englishman named Eadweard Muybridge was hired to find proof. After five years of experiments, Muybridge finally developed a linear series of cameras that were connected to trip wires that were activated by a horse running by. The cameras snapped a photo of the horse, each a half second later than the previous camera. When the individual frames were viewed together it made the first time lapse photography.

Muybridge went on to use this technique to study movement in many animals. Time lapse photography started to be used in movies (which is actually another method of time lapse taking 24 to 30 frames per second) and the microscopic study of organisms. During the 1930s, a banker named John Ott began capturing time lapse images of his plants blooming. After learning about ways to manipulate plant movement, Ott created a symphony that synced plant movement and music in the time lapse video Dancing Flowers.
Today time lapse photography is easier than ever to take and put together. It’s a way to view time sped up to see movement of people, plants, weather, clouds, water…whatever!
Time lapse was a technique I used that turned out to be the foundation of my animation. The first portion of my video, the view along the edge of the river, are images that I took with my cell phone over a period of time.
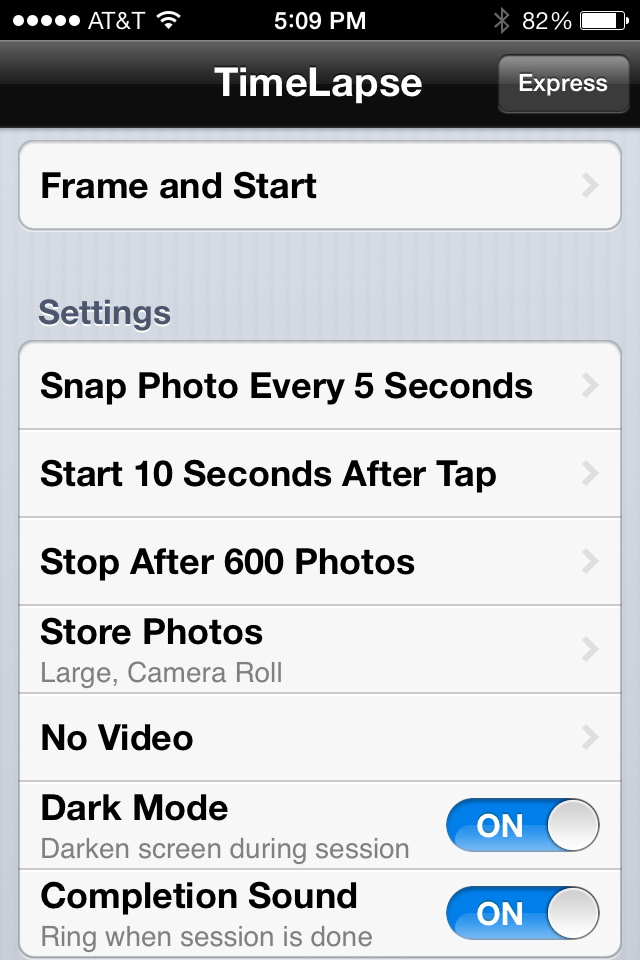
I purchased and downloaded the cell phone application TimeLapse. This app takes pictures automatically (without me pressing the shutter), and saves them to my camera roll. I can also adjust how often I want a picture taken and after how many pictures I want the snaps to stop.
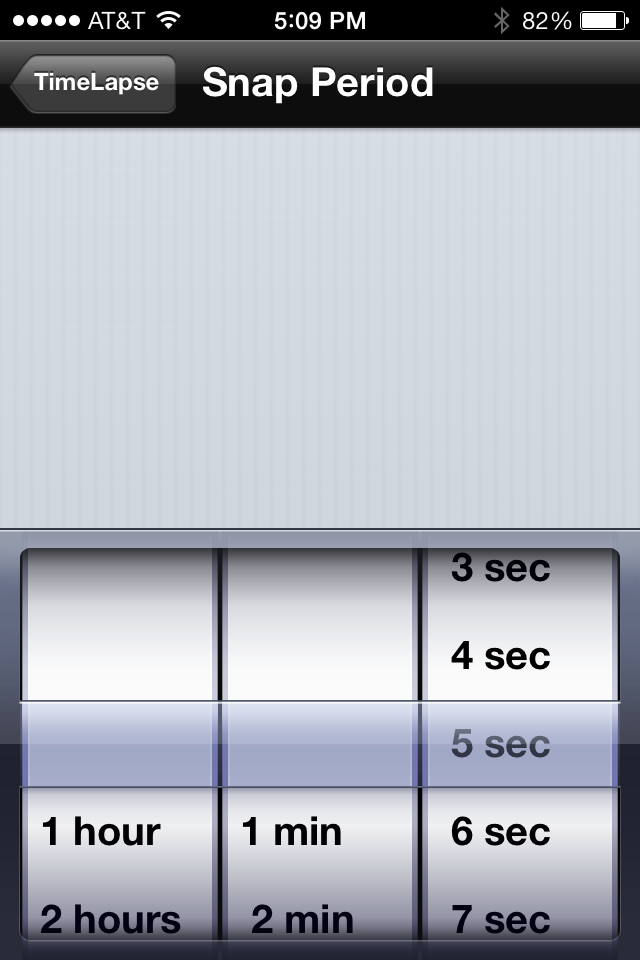
To capture this time lapse video, I attached my cell phone to a tripod and set it along the river, making sure my frame captured the water, bank, and sky. The app snapped a photo every 10 seconds for 45 minutes. When I finished taking pictures on-site, I transferred those images to my computer (they were jpegs).
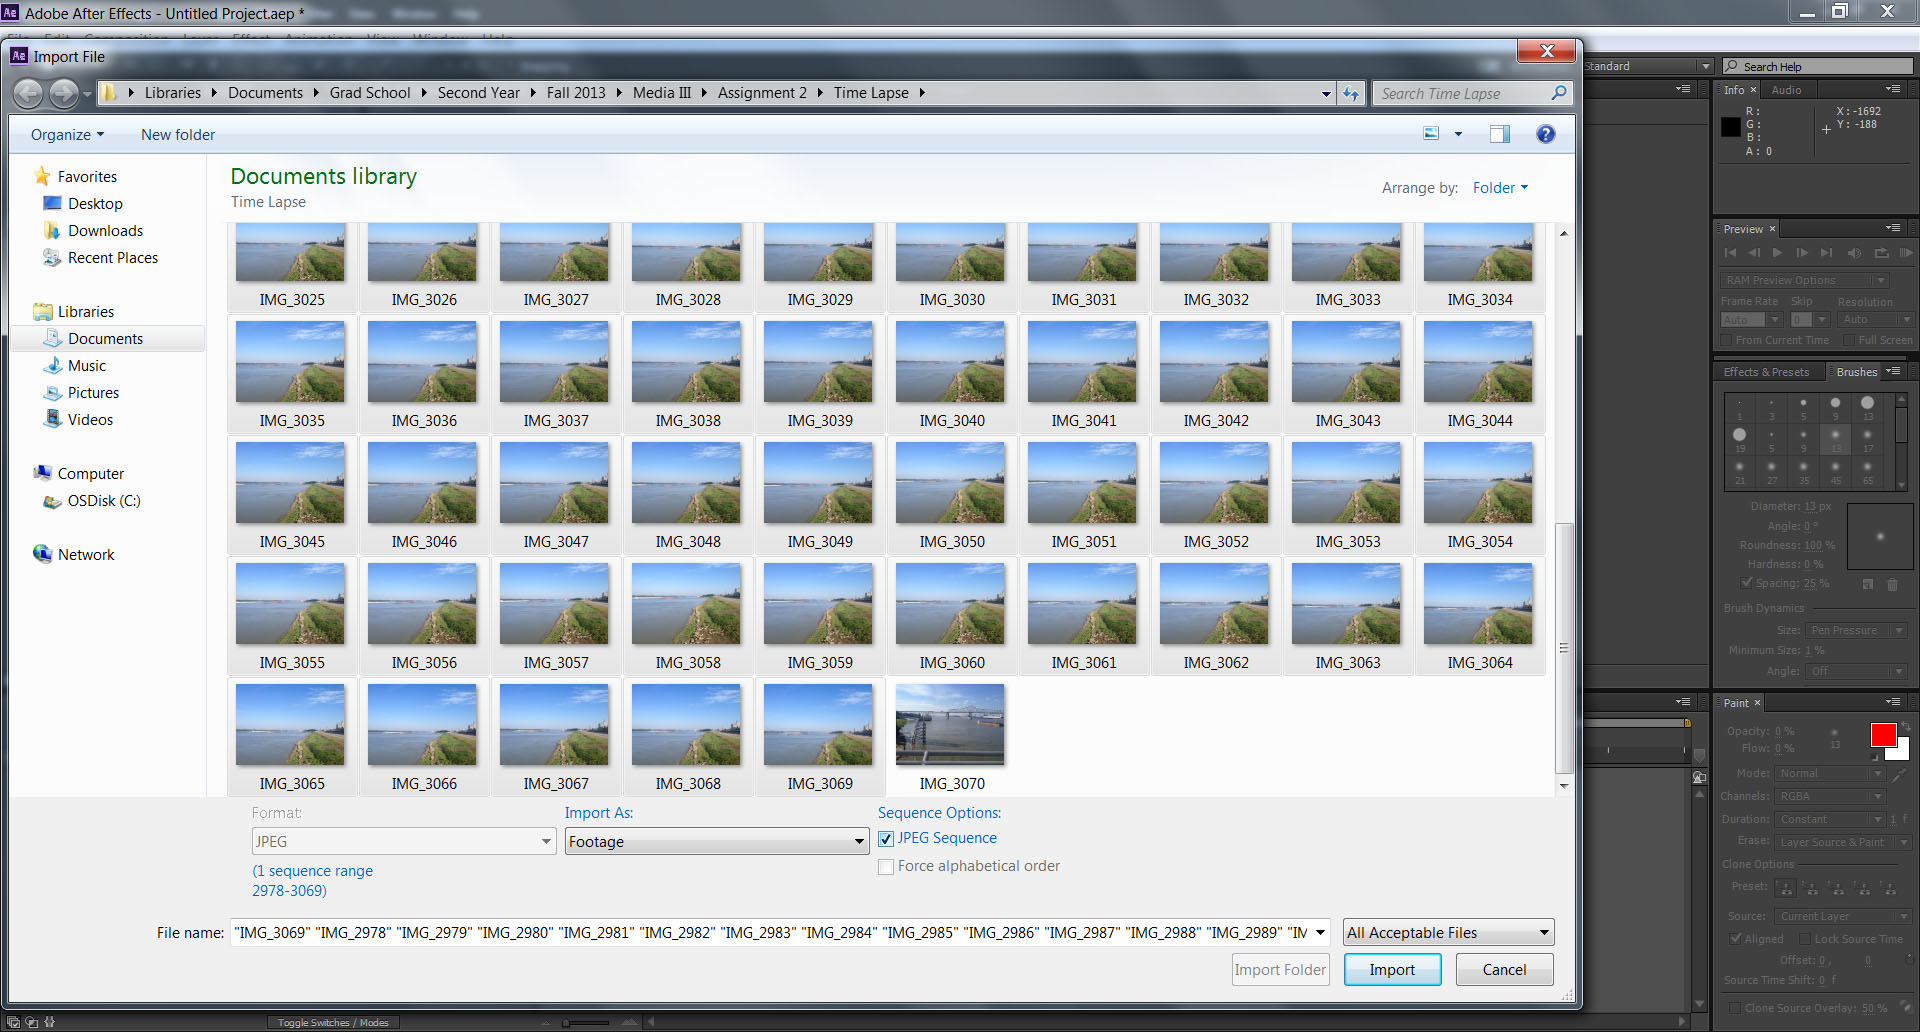
The great thing about After Effects is that it can read the time lapse jpeg sequence as one event – it essentially makes a “movie” from your individual image files. To bring these images into AE as one series, choose File > Import > File and select all of your images.
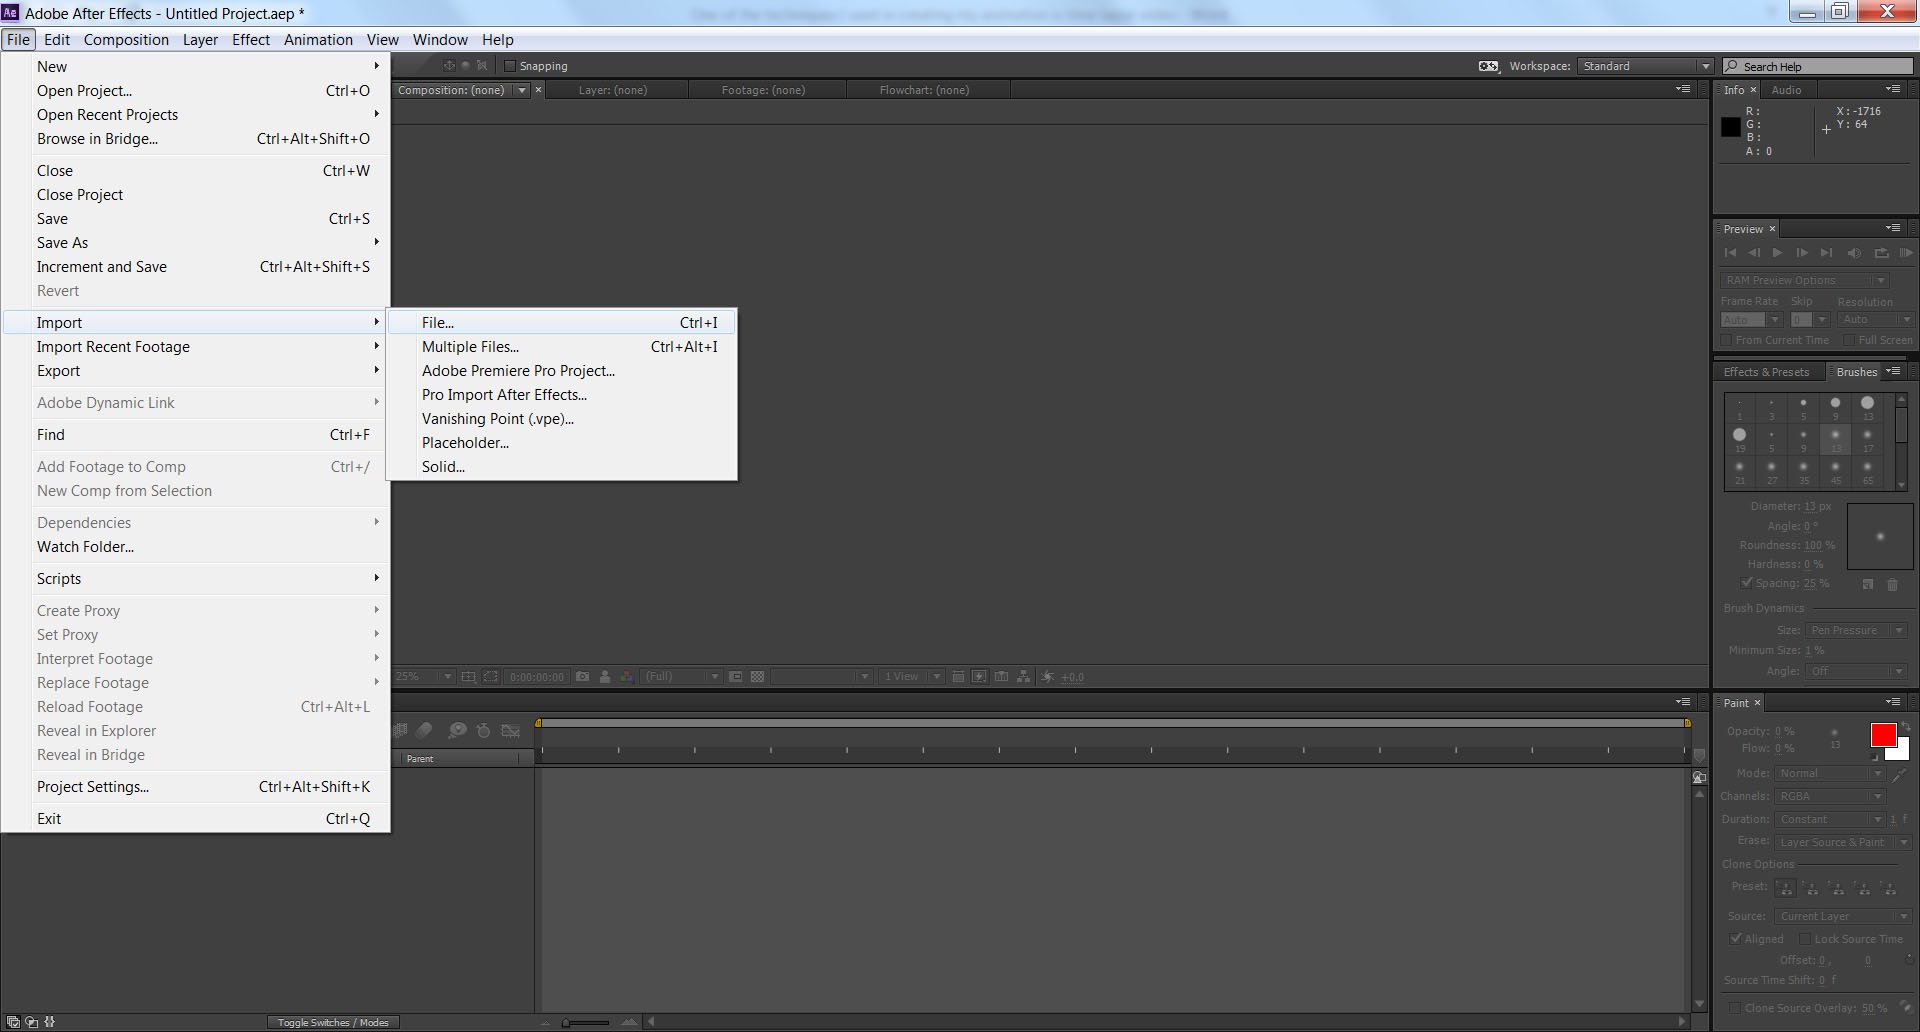
After all your time lapse images are selected, check the “JPEG Sequence” box (important!) and then click Import.
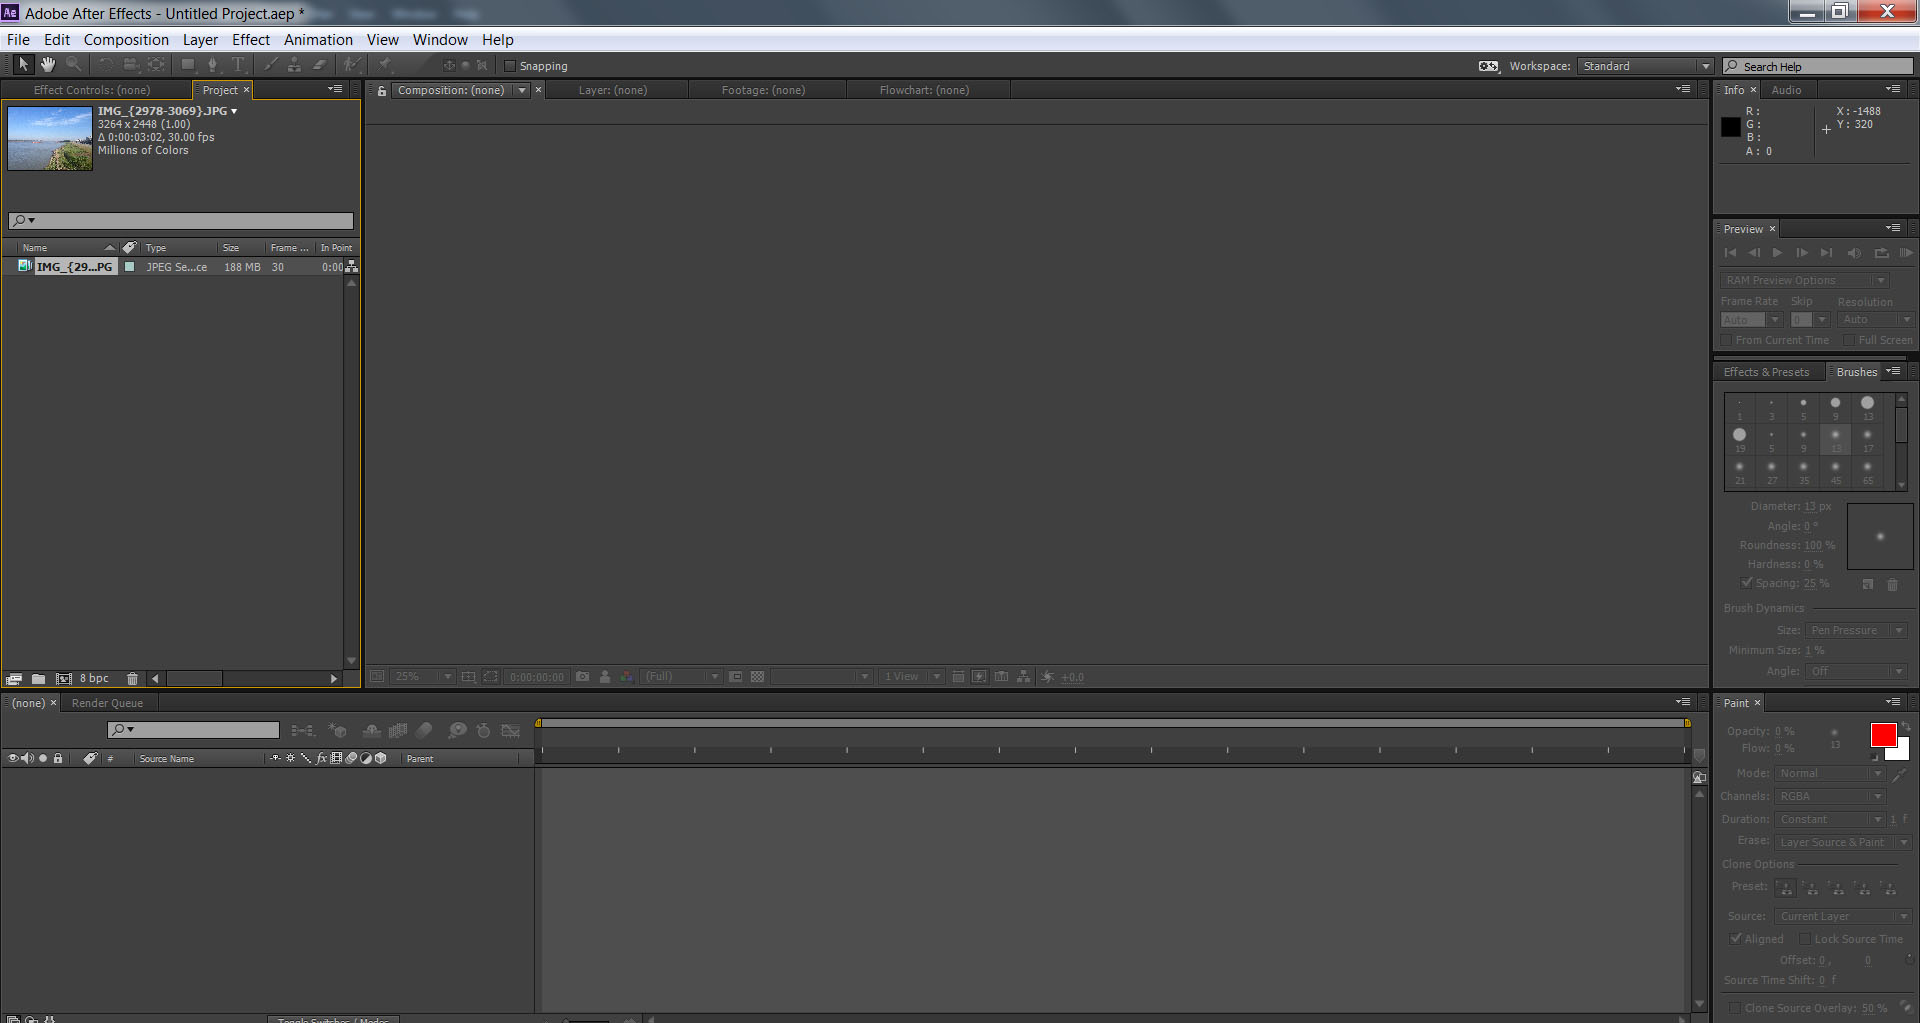
The time lapse image sequence will show up as one item in the Project panel.
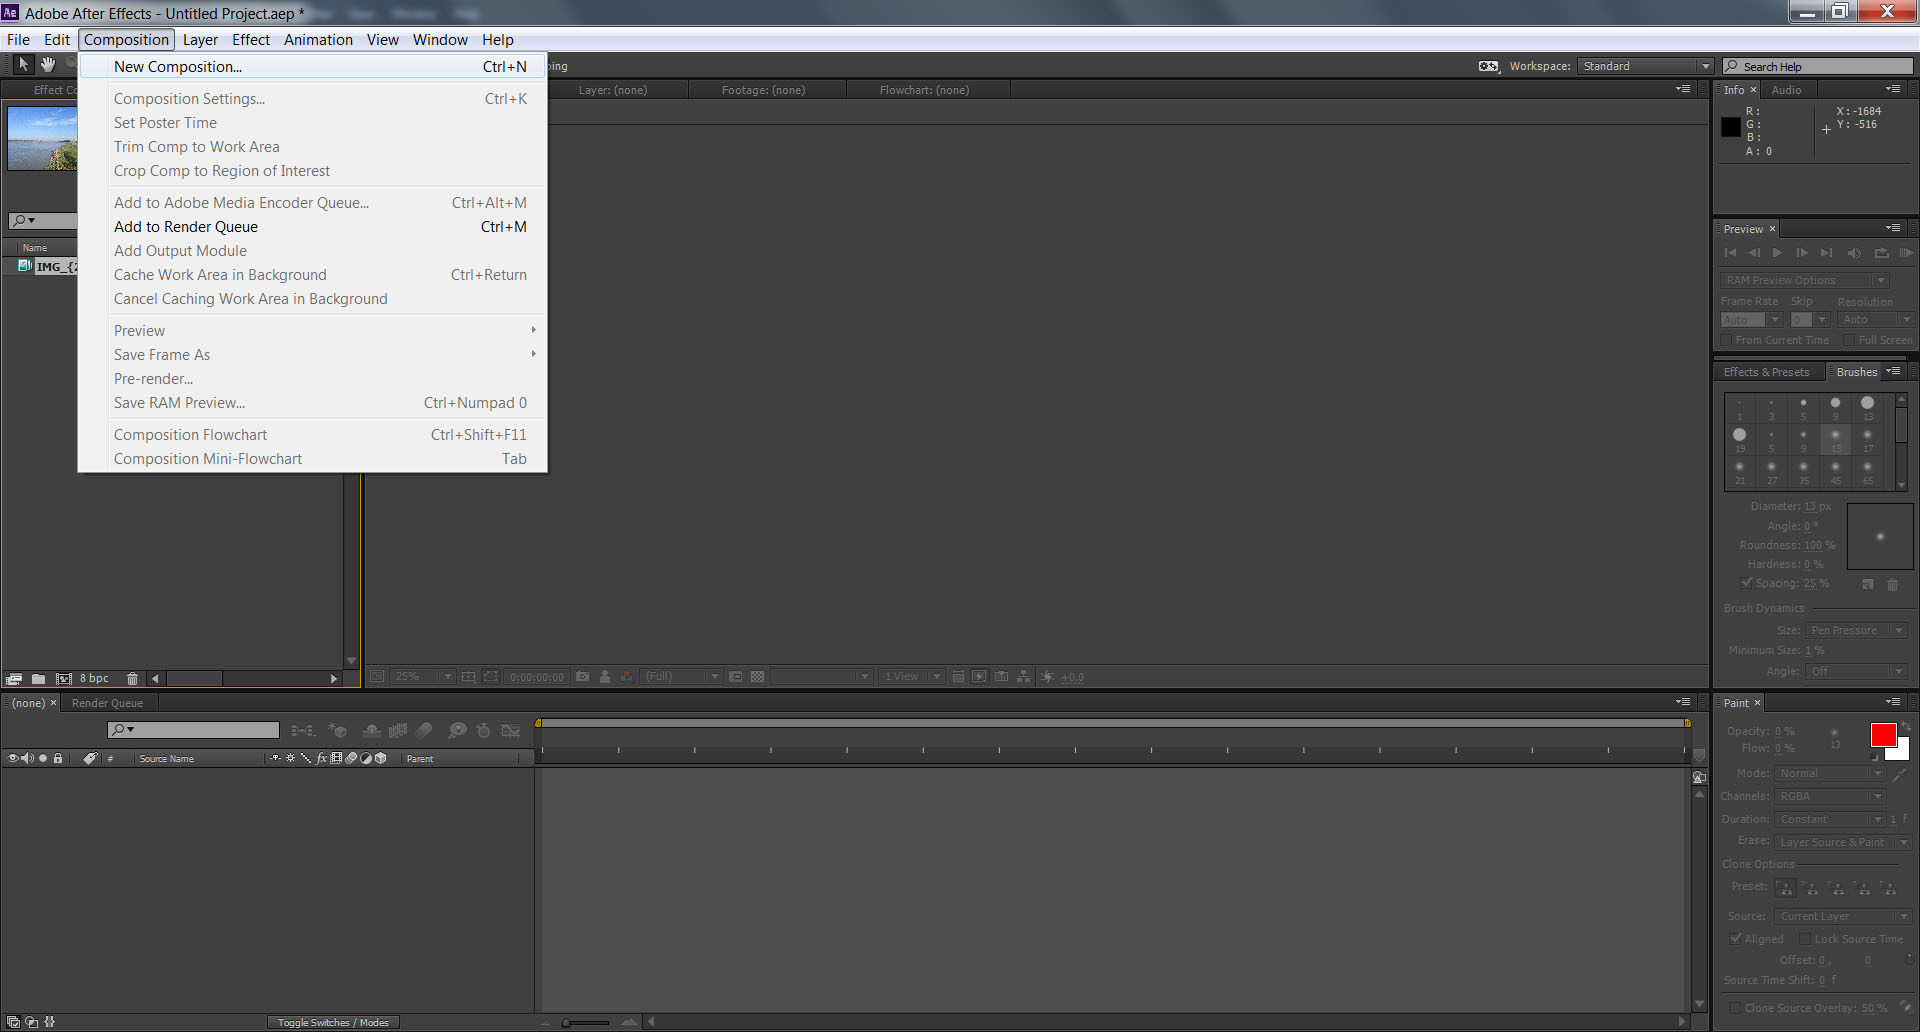
Because the time lapse sequence was my first video information, the next step was to create a composition in which to place it. In the toolbar click Composition > New Composition. This prompts the Composition Settings box where I named my composition and adjusted the settings as needed.
To bring the time lapse sequence into the composition, simply drag it from the Project panel into the Composition panel.

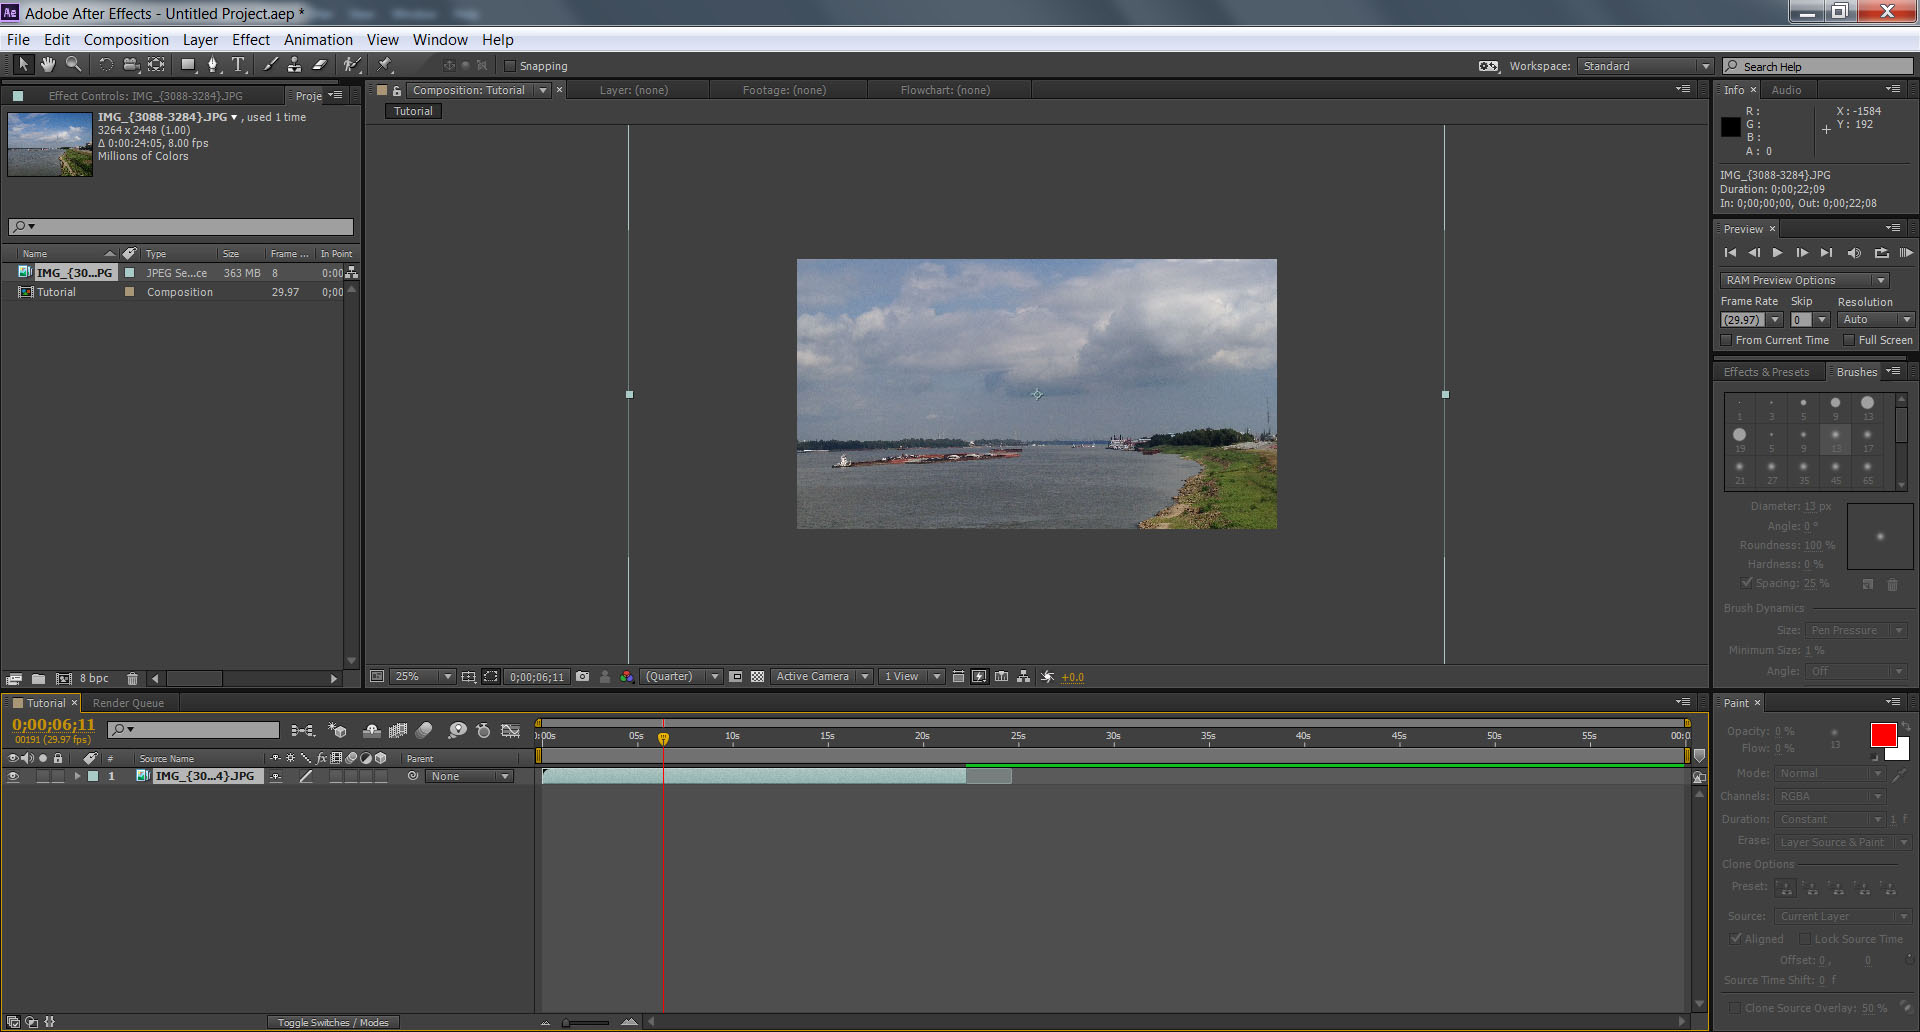
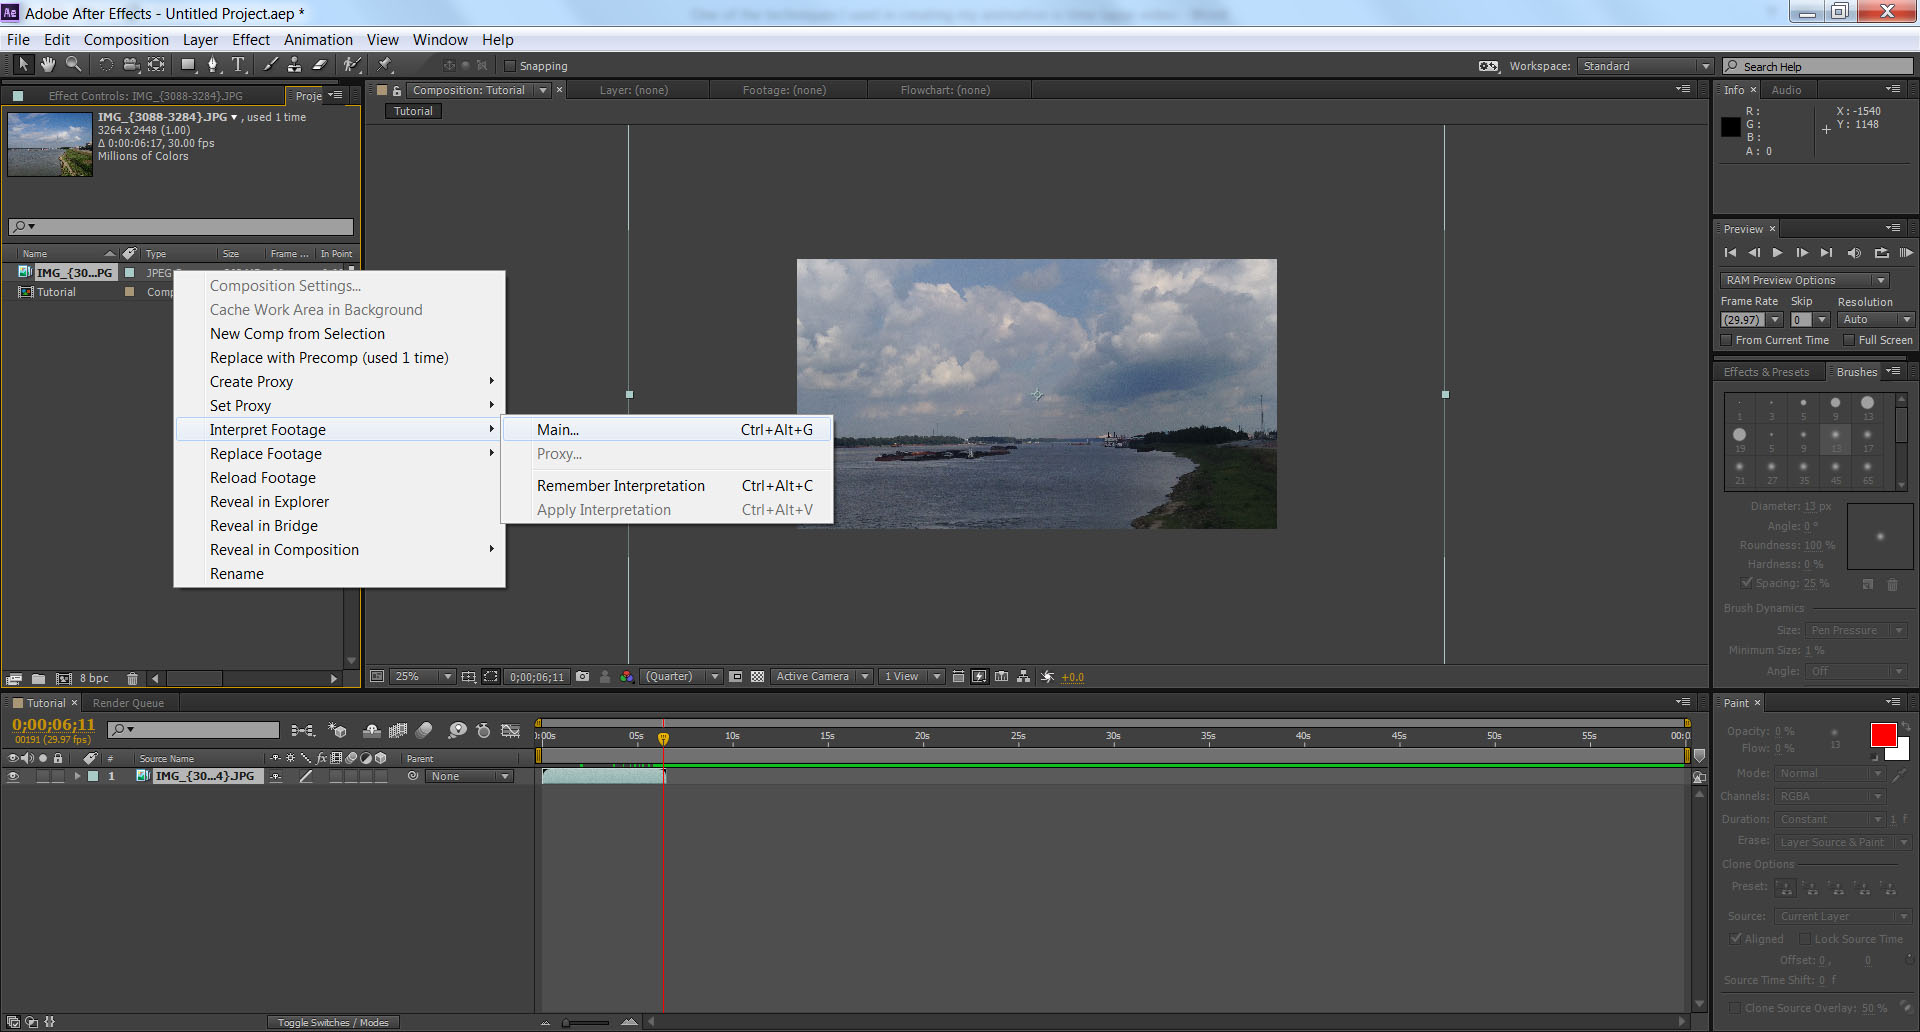
The blue bar shows me that my time lapse sequence is about 7 seconds long. I want it to be around 25 seconds so I need to adjust how many frames per second it plays. Right click on the time lapse sequence in the Project panel. Select Interpret Footage > Main. The frame rate is automatically set at 30 frames per second (Frame Rate > Assume this frame rate).
I changed the rate to 8 frames per second. In the composition panel, the blue bar shows the “ghost” time of the video at 8 frames per second. Pull the solid blue line to the right to fill the “ghost” space to lengthen the time lapse sequence.