
Creating a Terrain with the Displace Modifier
First you will need to get a Digital Elevation Model (DEM) of a specific location. In this case we are using a DEM of the NW Laurel Hill (Louisiana) USGS quadrant. You will need to convert the DEM file into an image file (such as jpg) using GIS. Black represents low areas, white represent high areas.

Check the file size (in pixels) of the DEM image file, as you will need this information shortly.
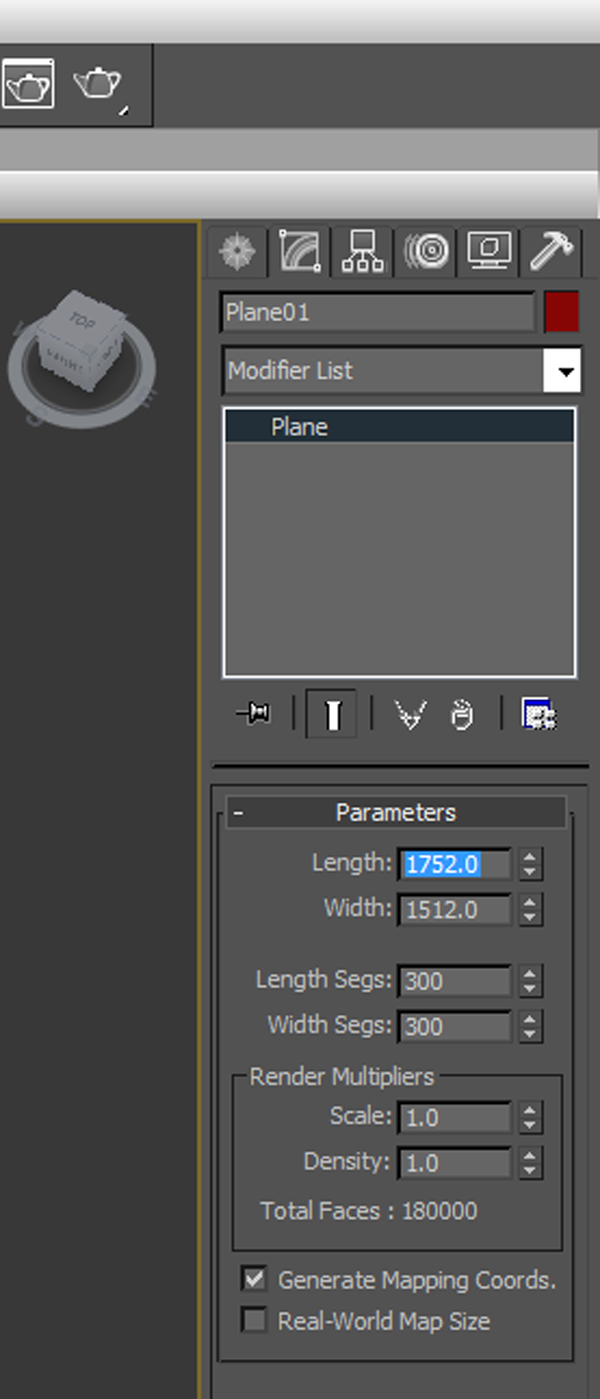
1. In 3ds Max create a plane, and in the dimension panel type in the pixel width and height of the plane to be the same of your DEM image file, or a proportional ratio of that dimension. In this case it is 1752×1512.
2. Also increase the plane’s length and width segments, the more segments the greater detail and the longer the render time. In this example we are using 300 length and 300 width segments.


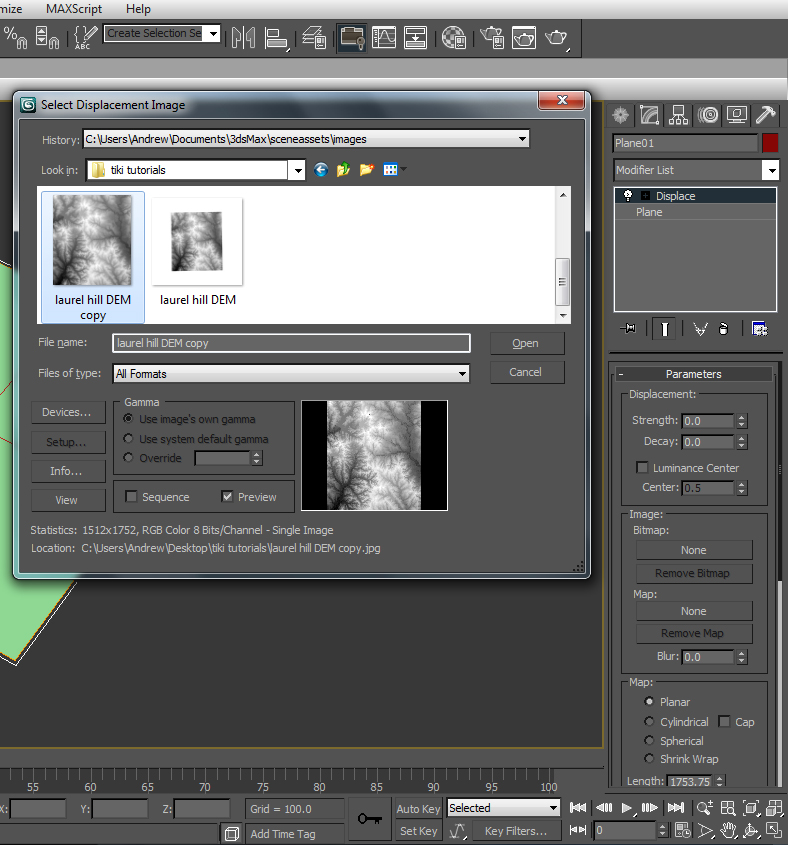
3. With the plane selected, choose Displace from the modifier list

4. Under the parameters rollout, select the None button under Bitmap. Navigate to your Dem image file and select open. Your DEM image had been added to the plane as a displacement modifier.

5. However you will have to adjust the strength to make the terrain pop-out to a relatively realistic level (this is not an exact science). In this case 40 is used for the strength. Other options are also available to adjust as necessary.

Your digital terrain is created!
At this point you can add an aerial bitmap as a material to the plane to help bring it to life.
6. Press M to open the material editor, click on the diffuse color block, and select bitmap, browse to the aerial image and select ok. Drag the material to the plane, and click the view in window button to see a preview of the aerial in the window.
[…] using different 3D modelling software on this topic so it is worth checking them out too here and here and one for Blender […]