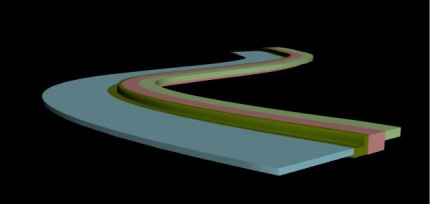
Creating a Street Using Loft
3ds Max Loft Tutorial
The “Loft” tool provides a simple and highly versatile method to create 3d objects from 2d splines. This tutorial shows you an implementation of “Loft” in Landscape Architecture, by showing you how to create a road.
First you have to create a series of splines which will serve as the shape for the Loft.
In this case we will create:
- A rectangle that will be the shape for the street.
- A Spline that will serve as the shape for the curb and gutter.
- Two other rectangles that serves as the shape for the planting strip and the sidewalk.
- Finally you have to create a spline that functions as the path on which you will loft the shapes you just created.
Tips:
If you are modeling with a real world application it often makes sense to adjust the home grid.
Do this by right-clicking on the ‘snaps toggle’ button at the top of your screen.
In the pop-up menu click on the ‘home grid’ panel and set the grid spacing to your desired value. Typically you will find a unit that will be a module you are constructing with, for example if your smallest dimensions are typically 3” then you could make the grid size 3” with major grid lines every 4 (to show feet).
In order to use the grid for your purposes, make sure that in the snaps panel the snaps are set to grid points.
Close the snaps and grid settings.
Creating the 2d objects
Street
Go to the ‘create panel’ and select ‘shapes’. Make sure that ‘splines’ is selected in the rollout menu.
Click on rectangle and create a rectangle in the front viewport. Use keyboard entry to create the spline in exact measurements.
Curb and Gutter
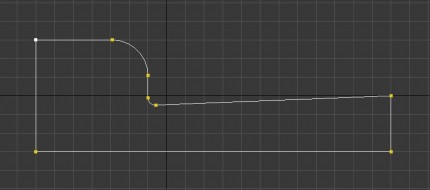
To create the shape for the curb and gutter use the line tool. Once you have the rough shape, go to the modify panel.
Use the ‘Fillet’ function under the geometry panel to round the edges as needed. For the ‘Fillet’ you will have to select a vertex and type in the desired amount of the fillet.
The spline should now look something like this. Please note how the edges became smoothly by using the fillet function.
Planting Strip and Sidewalk
Use the rectangle tool to create two simple splines that serve as shapes for the planting strip and the sidewalk.
Path
Create a path using one of the spline tools. Which one you use depends on the site you are modeling. The path represents the centerline of the roadway in this example.
In this case we will use a Bezier spline. Bezier splines are created by clicking and dragging while each vertex is generated. We will create this spline in the top viewport, because we want the street to be horizontally.
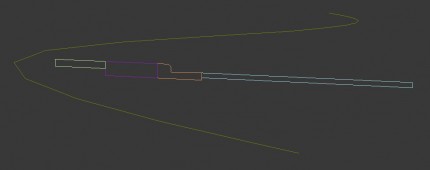
Make sure that all your created splines are aligned with each other. The path on which the road will be lofted could be anywhere an must not be adjacent to the other shapes.
Once you are done, your scene should look approximately like this.
Setting the Pivot Point Correctly
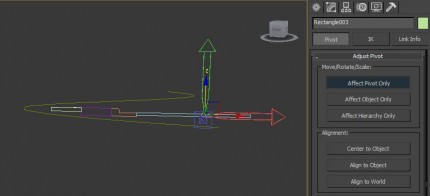
Because we want to loft those splines neatly side by side, we will have to change the pivot point of each object. Otherwise they would be all lofted on their center, which is the default pivot point of objects in 3ds max.
To achieve this, set the snaps to pivot point, by right clicking on the ‘Grid and Snaps Settings’ and checking the appropriate box.
Then select the curb and gutter with the move tool (w), go to the ‘Hierarchy’ panel and click on ‘Affect Pivot Only’.
Now align the pivot point of each object to the one of the street shape, using the move tool. Since you set the snaps settings to pivot, the cursor should snap/jump to the pivot point of the street.
Repeat this for every shape that you created.
Loft
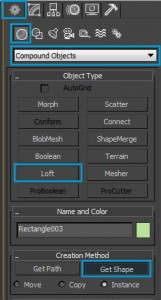
Now select the path that you created. Go to the create panel and select ‘compound objects’ in the rollout.
Click ‘Loft’. Under the ‘creation method’ menu click on ‘get shape’ and select you first shape.
Repeat this for every shape you created. Note that you have to deselect the path and repeat the whole loft operation for each shape. Once you are finished your scene should look like this.
If you want the shape to loft on the other side of the path, simply hold down ‘ctrl’ while selecting the shape. Using this, you can easily fabricate the other side of the road.

