Particle Playground
Particle Playground [after effects]
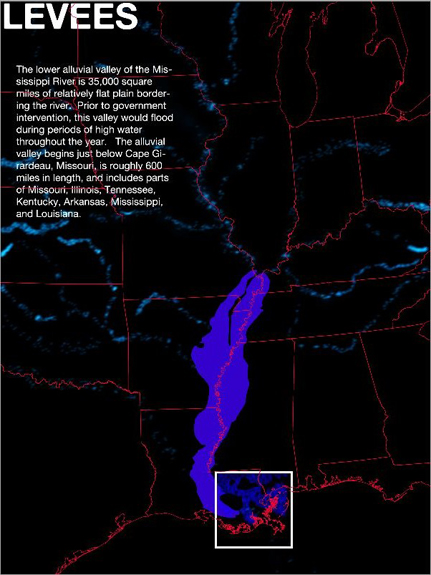
Our project utilized the particle playground effect to simulate sedimentation of the Mississippi River Basin. We started by importing existing topographical line-work for the Mississippi River and its tributaries into the projects folder. Multiple particle generators (set on cannon control) were added to the composition. We used the river line-work to serve as walls (or boundaries) to contain the particles. The final product was a system that carried particles down a river channel and deposited them into a delta formation.
To Use Particle Playground
1. Begin by opening a new composition. Composition>new composition
2. Import the file that will be used in the animation. File>import>file
3. Drag your project from the projects panel into the layers panel.
4. Click on the layer to which you want to add the particle playground.
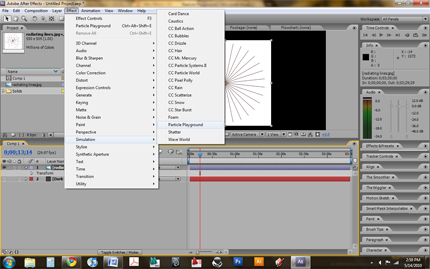
5. Go to the menu at top and click effect>simulation>particle playground.
This will set up a particle generator on the current layer. You can move the generator anywhere on this layer. The particle generator is set up with cannon as the default particle control. The cannon creates streams of particles from a specific point.
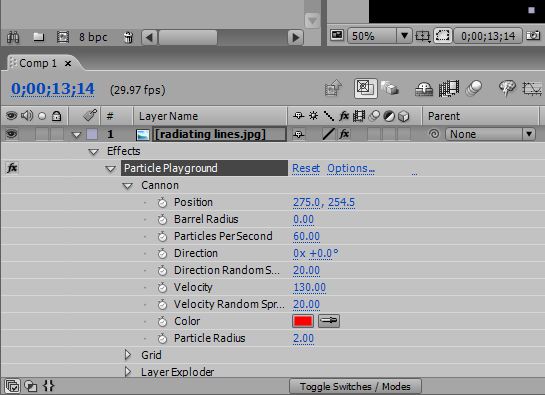
Once you have the particles on the layer you can change their properties, such as size, and color, and particles per second. To do this, go onto the layers panel, click the layer with the particles and then effects>particle playground>cannon. There is a range of options that let you control the particles. Just know that the more particles you add to the system, the more time it will take to render.
To control where your particles are allowed on the layer you can add boundaries by using wall controls
1. Begin by creating a new solid layer. Layer>new>solid
2. Click on the pen tool in the top menu.
3. Draw or trace the boundary in which you want your particles contained. This will be used as your wall mask.
4. While on the solid layer, add the particle playground effect. Effect>simulation>particle playground
5. Under the particle playground effect in the layers, click on wall; then click on the drop down box next to boundary. This will allow you to select the mask.

6. Once the mask has been selected, click on particle playground in layers panel; this will allow you to move your particle generator into the mask.
The particles will stream out of the generator but be contained by the walls of the designate mask. The particles can be manipulated the same as in the first process.


