Intro to ArcMap 9.3
GIS Files
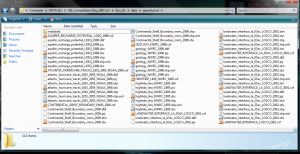
When you look at a folder containing GIS data in a normal window, notice that there are multiple files with similar names, in sets of around 5-9. The similar names signify that all of these files are associated with a layer you can use in GIS software. The file types signify different types of data that are necessary to make the spatial relationships of the layers work. Some of the most common types seen are: *.csf = content secure format, *.dbf = shapefile attribute file, *.prj = projection definition file, *.sbn and *.sbx = spatial index, *.shp.xml = xml file for metadata, *.shx = shapefile that stores lookup index. When you move data from one location to another, you must be sure to move all the file types associated or your layers will not function. Because of this, it is highly recommended that you use ArcCatalog (or other similar software) to move files instead of windows.
Opening ArcMap
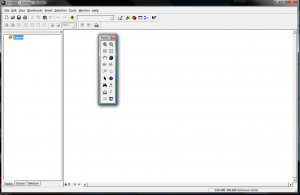
After you open ArcMap and have chosen whether to open a new map or existing map, you will see a variety of frames/windows. Top = Main Menu, left = table of contents window, right = main data/layout window, the Tools toolbar may be on the right or floating or docked elsewhere. You can anchor a toolbar by dragging it to the top or side of the map display window and release when you see a thin rectangle.
*If you don’t see the Tools Toolbar, you can access it and the other toolbars through View > Toolbars.
*If the Table of Contents Window isn’t visible or you accidentally close it, you can access it through Window > Table of Contents
Saving a map
When you save a map for the first time, you need to make sure that you check where the data is going to be stored. When you add a layer to the map, the data is not copied but referenced. ArcMap locates the data using the stored path. If ArcMap can’t find the data, then the layer isn’t drawn and there will be a red exclamation point (!) next to the layer name in the TOC.
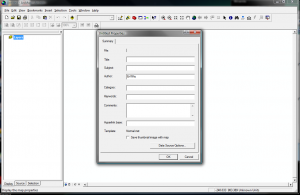
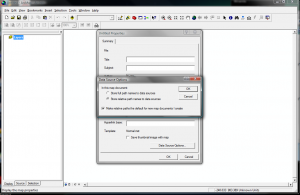
Data Source Options: File > Document Properties > Data Source Options > Store relative path names to data sources > Make relative paths the default > OK.
Basically, this is saying that when you save a layer, you want the data source to point to a path relative to where the map document is stored, regardless of computer, hard drive, jump drive. This will make it easier to share files and transfer between public computers and home. If you know that you will not be transferring your maps from one computer to another and your data will always be in the same place, you can use absolute or full path names, however it is recommended to use relative until you become more familiar with your GIS uses.
To save the map: File > Save As > browse to folder where you will keep your projects > give the file a name “somethingDescriptive.mxd” > Save as type: ArcMap Document (*.mxd) > Save. (This saves the map as a new map document, retaining the original incase you need it later.)
Next time you can just use Save instead of Save As, unless you would like to keep a working backup copy. It is recommended that any time you are going to make big changes, you should use the Save As function to create a new version before making the changes. Remember to save often!
File Names
ArcGIS file names are very particular. You must only use alphanumeric characters and underscores; NO weird characters, no spaces! Files must not contain more that 15 characters and the entire path name must not be longer than 150 characters. Keep this in mind when you set up a GIS folder system and try not bury your data too deep.
Layers
Layers are references to the data sources that can be displayed on the map. This includes point, line and polygon shapefiles, feature classes and raster images.
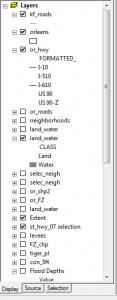
Turn layers on/off that are currently in the map document by clicking the box in the table of contents.
![]() Add a layer by clicking the add layer button > browse to your file > select file > OK.
Add a layer by clicking the add layer button > browse to your file > select file > OK.
To change the display order, click and hold the layer name and drag it to the position. ArcMap draws layers from the bottom up.
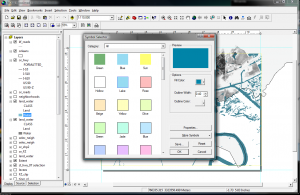
The colors generated when you first add a layer are random. To change the colors, click on the legend symbol which brings up the symbol selector window. You can change the fill, outline, symbology, size, angle in this panel. There are more advanced options which we will reference later.
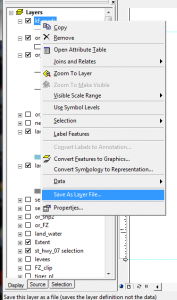
Save a layer as a layer file: Saving a layer as a layer file will not save the data, but rather will store your display properties such as colors and fields used to categorize. RtClick on layer > Save as Layer File > navigate to where you want to store the layer, give it a name if you don’t like the one already given > Save as type: Layer files > Save.
Maneuvering in ArcMap
Zoom and Pan: you can zoom by either using the mouse or using the buttons on the tools toolbar. The hand icon is the pan button. Full extent zooms to the display the full extent of all layers whether they are turned on or off. Go back returns to the previous extent. Next extent steps through the sequence of zooms you have viewed.
Window > Magnifier
Window > Overview shows the full extent of all layers on the map. The red box shows the area you are currently zoomed in to.
Creating Spatial Bookmarks
Spatial bookmarks save the extent of the map display or location so that you don’t have to use pan or zoom.
Zoom to area > Bookmarks > create > give it a name > OK.
Measure distance
![]() Tools toolbar > measure button
Tools toolbar > measure button
In the drop down, select the units then select what you want to measure.
Identify
You can select which layer you want to identify information from and you can keep clicking without closing the window. To retain the information selected, hold the shift key. Right click on the entry to flash the marker.
Select Features, Attribute Tables, Sorting
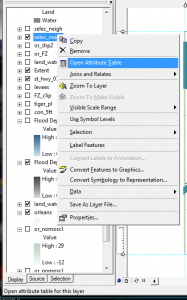
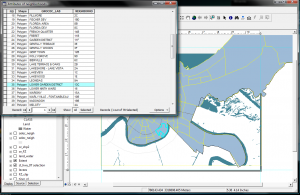
A layer that has tabular data associated with the map features will have an attribute table. RtClick on the layer > open attribute table. The tables contain one record for each feature.
You have to select a feature before you can do anything to it. When selected, it will be highlighted on both the map and in the attribute table. There are a variety of ways you can select features (individual, multiple, by category or field or attribute).
![]() Selecting on the map using the select button.
Selecting on the map using the select button.
Tool toolbar > select features button. To change the selection method: Selection > Interactive Selection Method or Selection > Options. To change the way a particular layer’s selection looks RtClick on layer > properties > selection tab.
To clear the selection, use the clear selection button or selection > clear selected features.
(Hot keys = shift+alt+underlined letter > underlined letter and/or arrow keys. To back out use esc.)
To set selectable layers: Selection > Set Selectable Layers
Use Tools toolbar > Find Features Button to select, flash, zoom, bookmark, id or unselect features. You can find features by their attributes. Click to flash, RtClick to zoom, pan, etc.
Selecting features through the attribute table:
RtClick on layer > Open Attribute Table. Click on the box to the left of the record you want to select. To select more than one record, hold the ctrl key while clicking. View > Zoom Data > Zoom to Selected Features.
Options: Select by attributes, Switch selection… and more.
Options > Clear selected to clear. (you can also click the upper left blank square to clear the selection.)
Sorting the table by a field: RtClick on the field name and choose how you want to sort. Move the field: Click the title, drag and release.
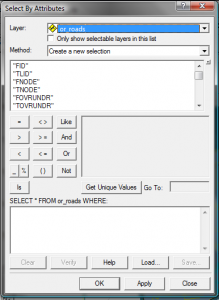 Select by attributes can be accessed 2 ways. This is called using a data query and is an important part of why GIS is so powerful. With attribute table open, click Options > Select by Attributes or through the main menu, Selection > Select by Attributes (you will notice in the selection menu, you can also select by location).
Choose the method, double click the field, click = (or one of the other operators, see Select By Attributes pdf for more details), click Get Unique Values, double-click selection, click Apply. You can add to the selection or remove selected records the same way, just change the method.
Labeling features
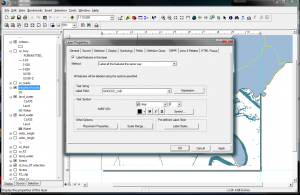
Can label items on the map based on values derived from one or more attributes.
To set label properties: RtClick on layer in TOC > Properties > Labels tab > Label Field drop-down > select field name > OK
To turn on/off labeling: RtClick layer in TOC > Label Features.
Getting Statistics
Zoom to full extent > click Selection Tab at bottom of TOC window > click box next to layer to make its features selectable > click Display tab > select features > RtClick layer > Open Attribute Table > RtClick gray column heading > Statistics.
Layout and Save / Print (Quick and Dirty)
At the bottom of the map window there are 2 buttons, one is Display View the other is Layout View. We’ve been working in Display View, but to layout your map for printing, you need to click into Layout View.
You will see the default is an 8.5×11 layout with the map in the center. Click on the outline around the map. Click the full extents button to fit the entire map with maximum visibility on the page.
Save layout as a printable document (JPG, PDF, AI, etc)
File > Export Map > browse to the folder where you will store your file > name file “somethingDescriptive.jpg” > save as type JPEG (*.jpg) > resolution = 150 dpi (your choice) > Save.

